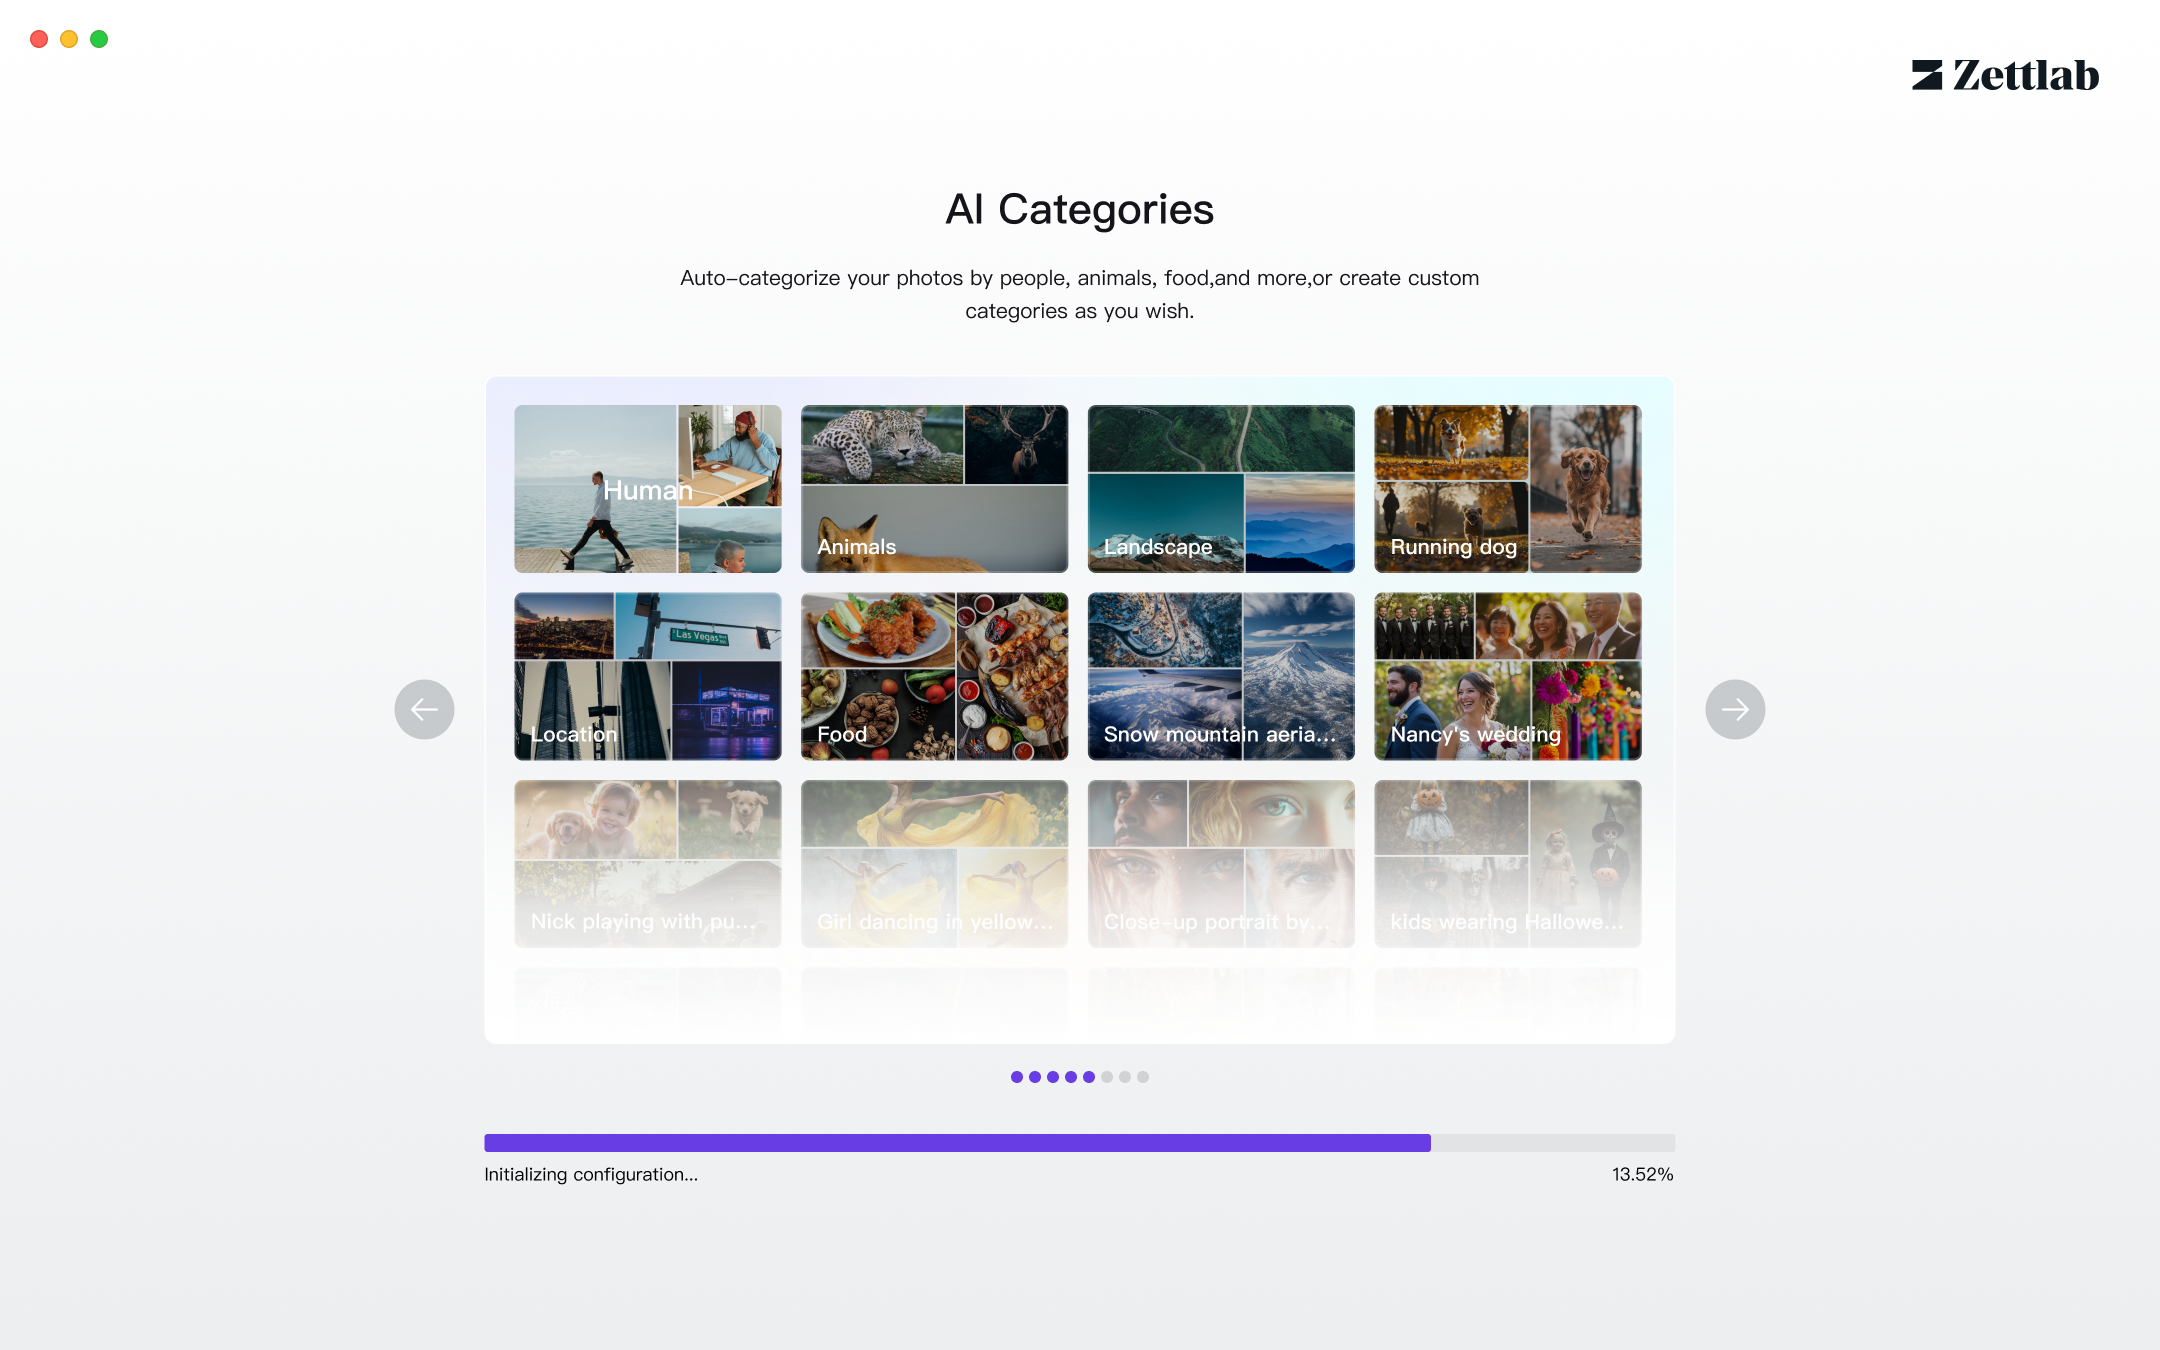
Products and Packaging
The following takes Zettlab D6 as an example.
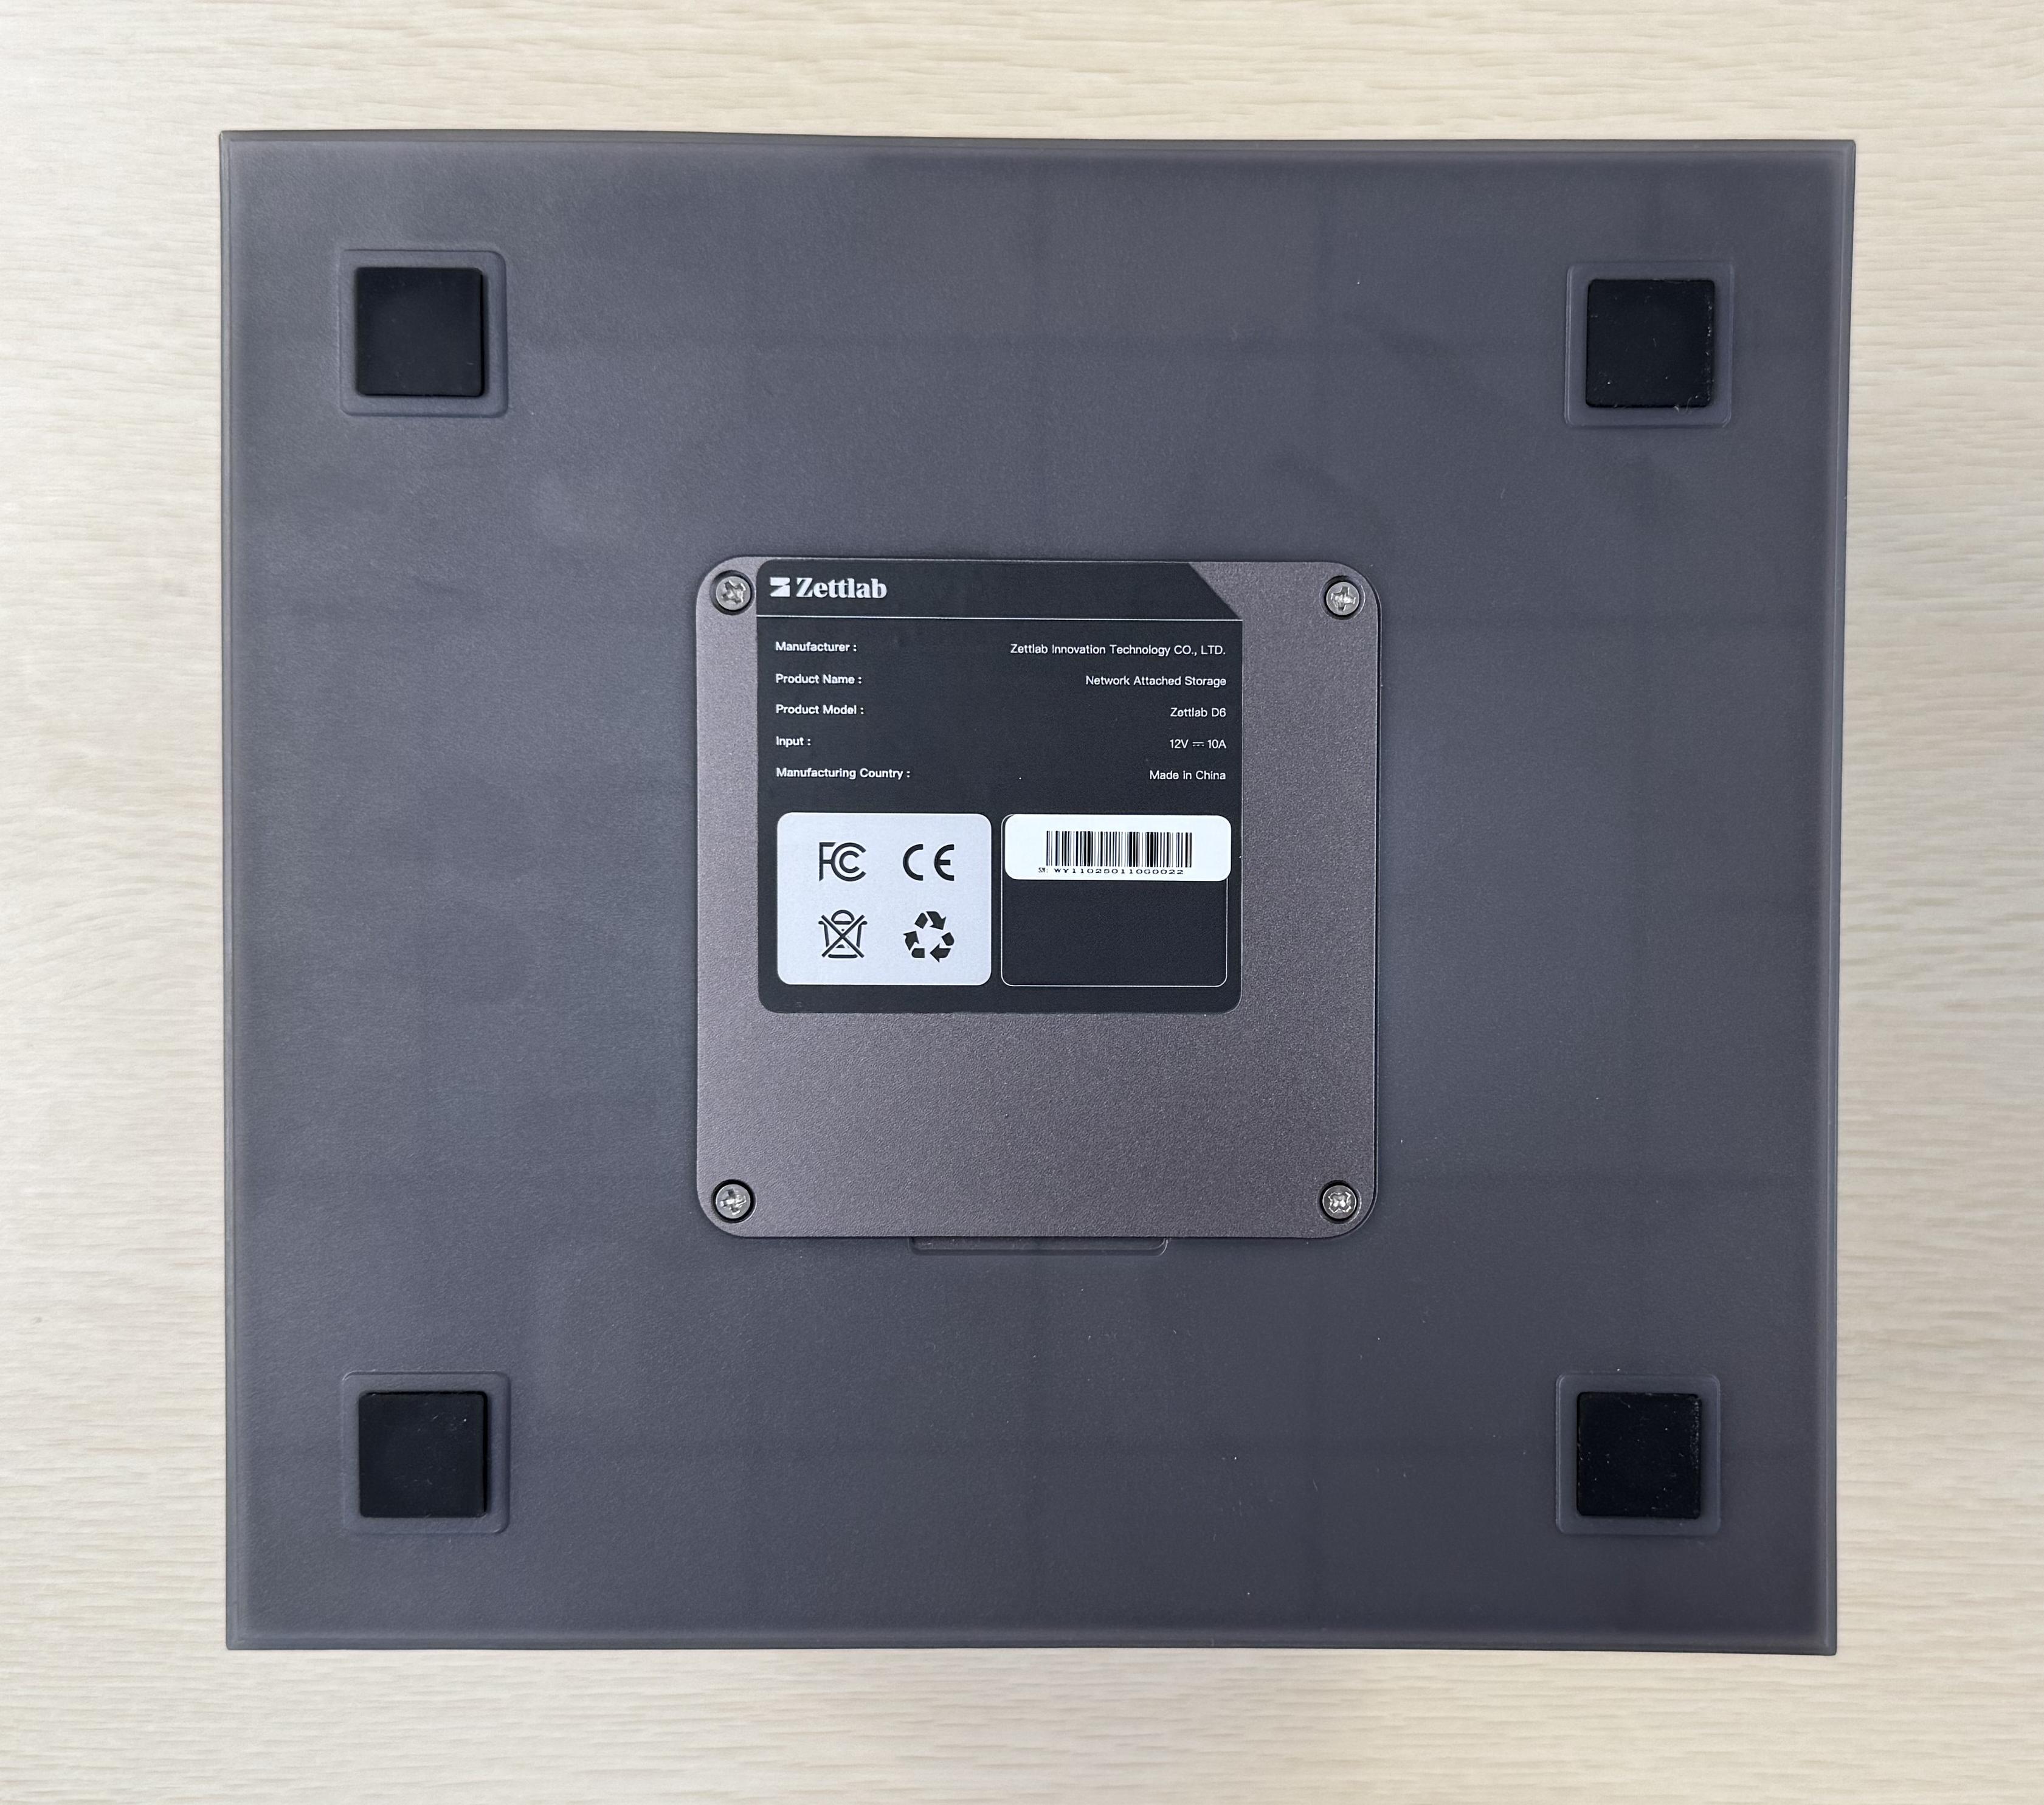
Product
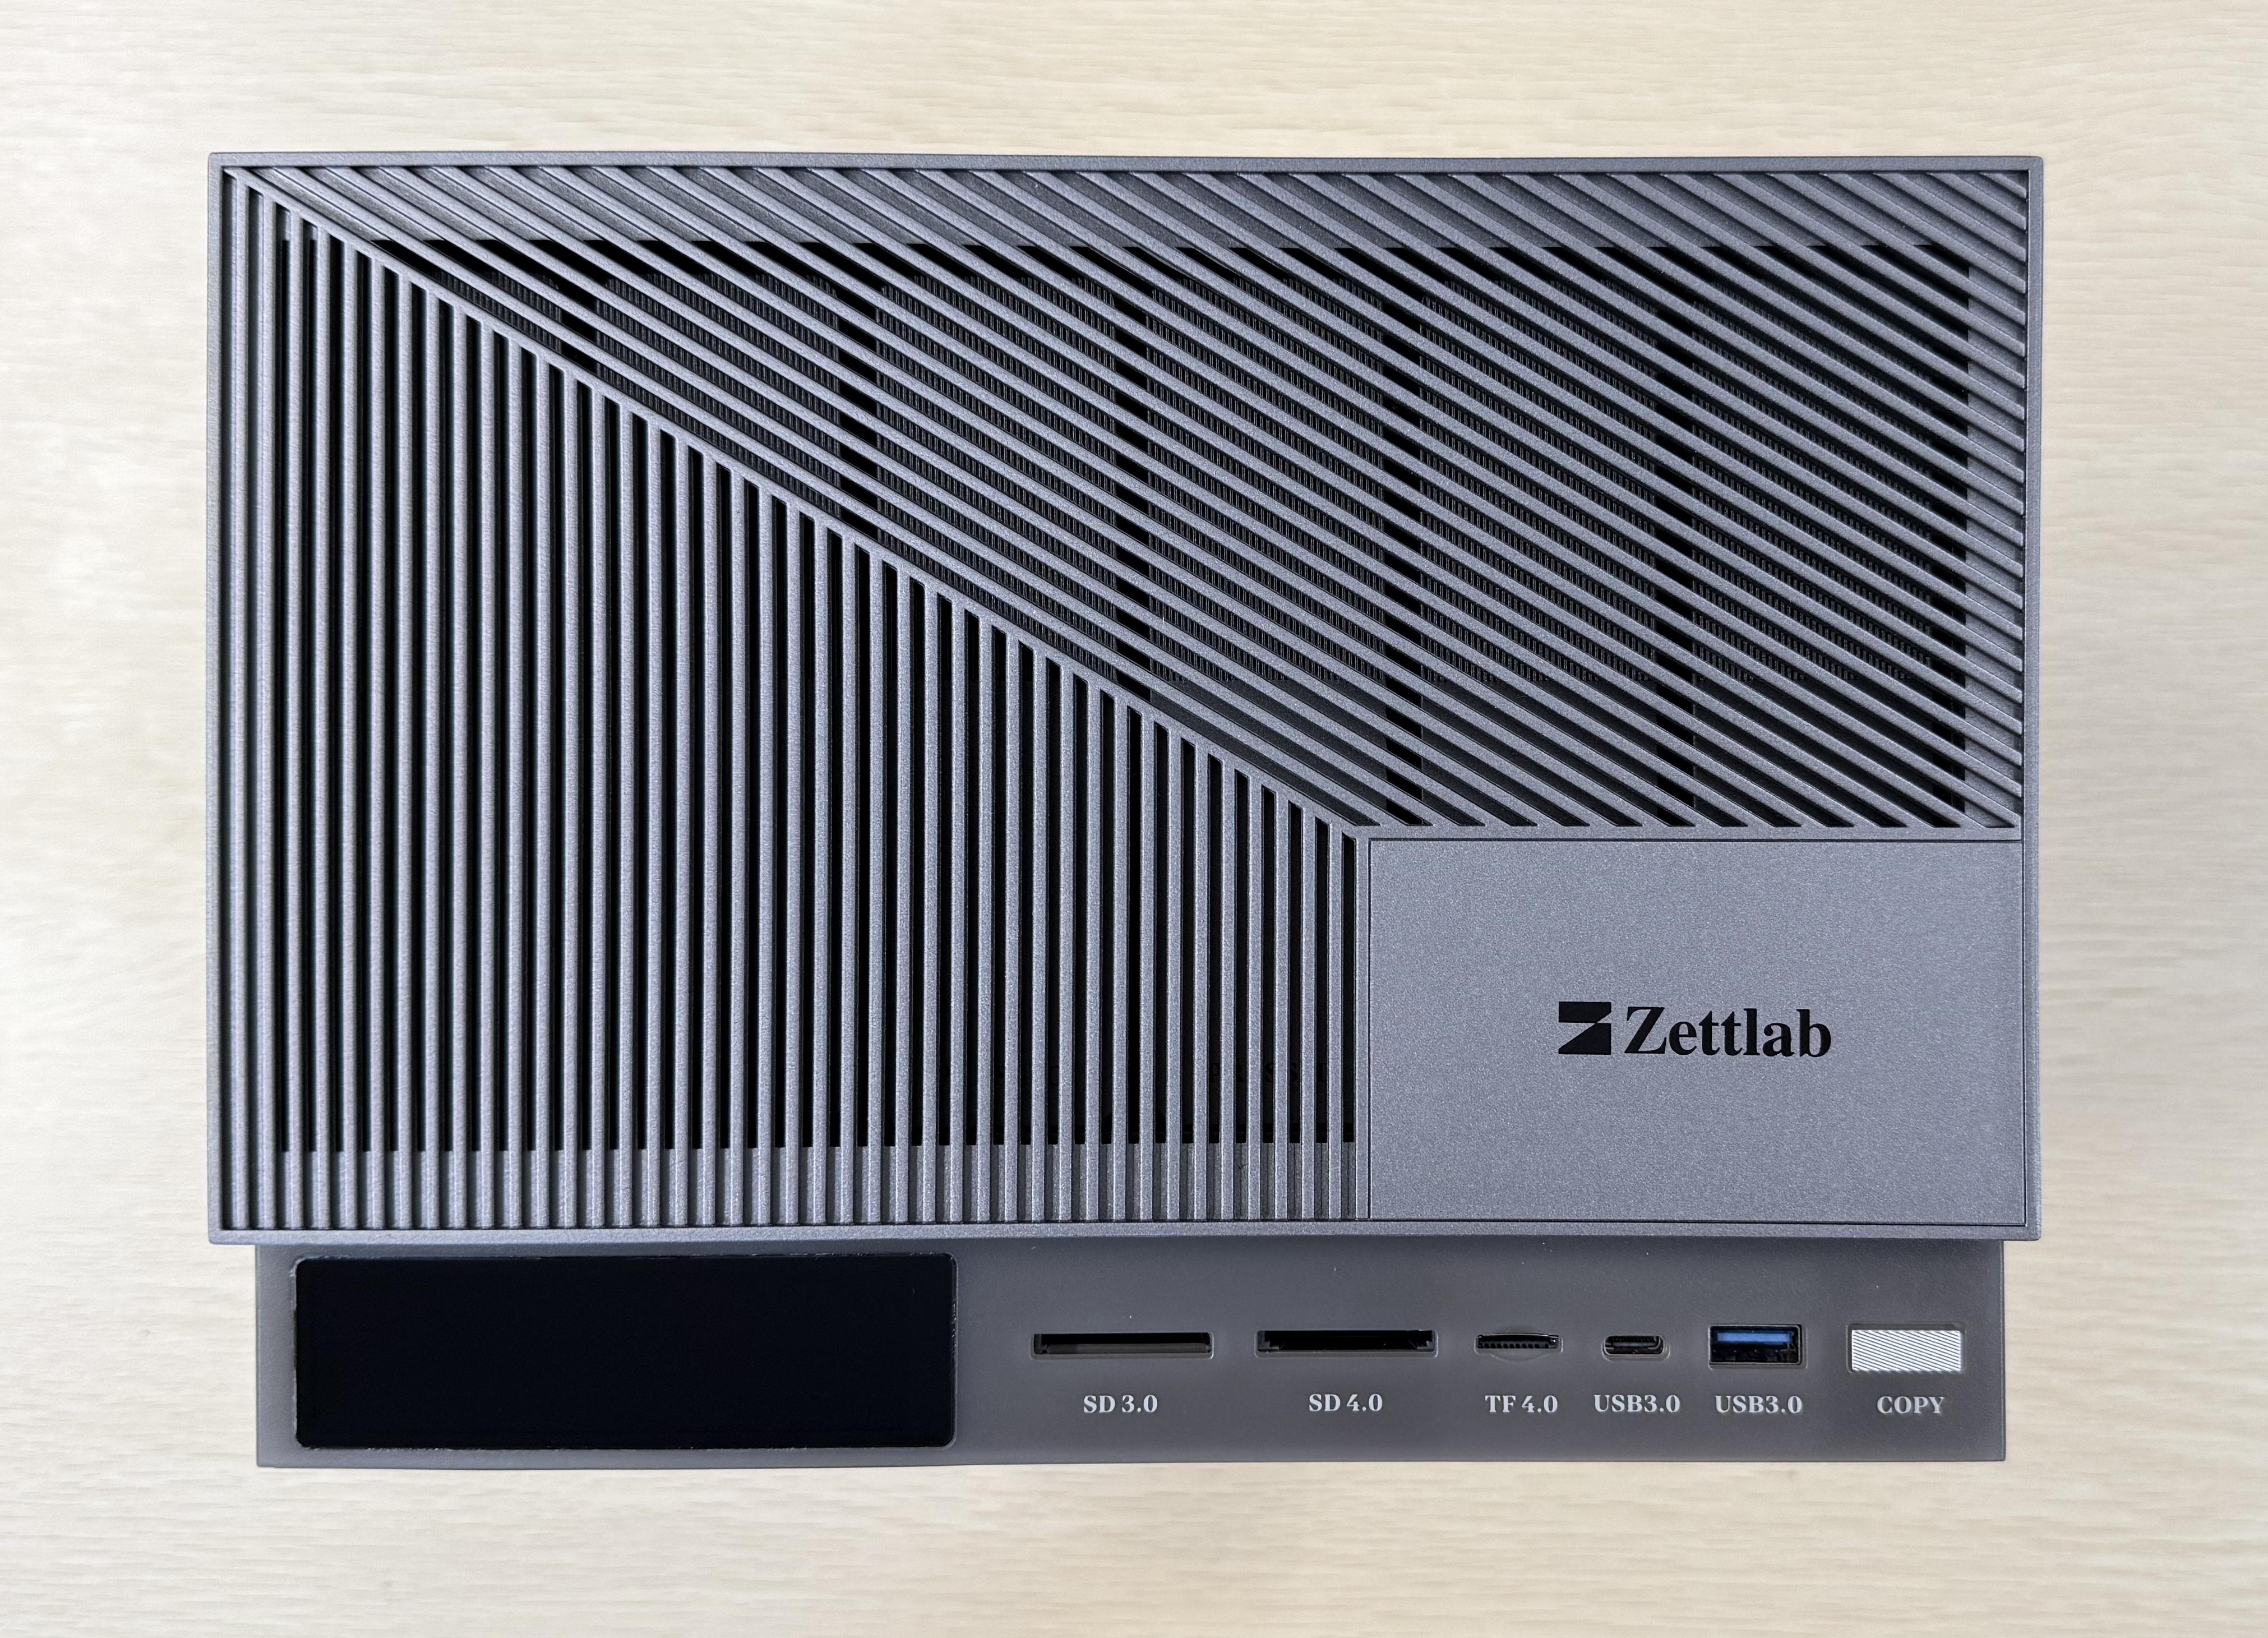
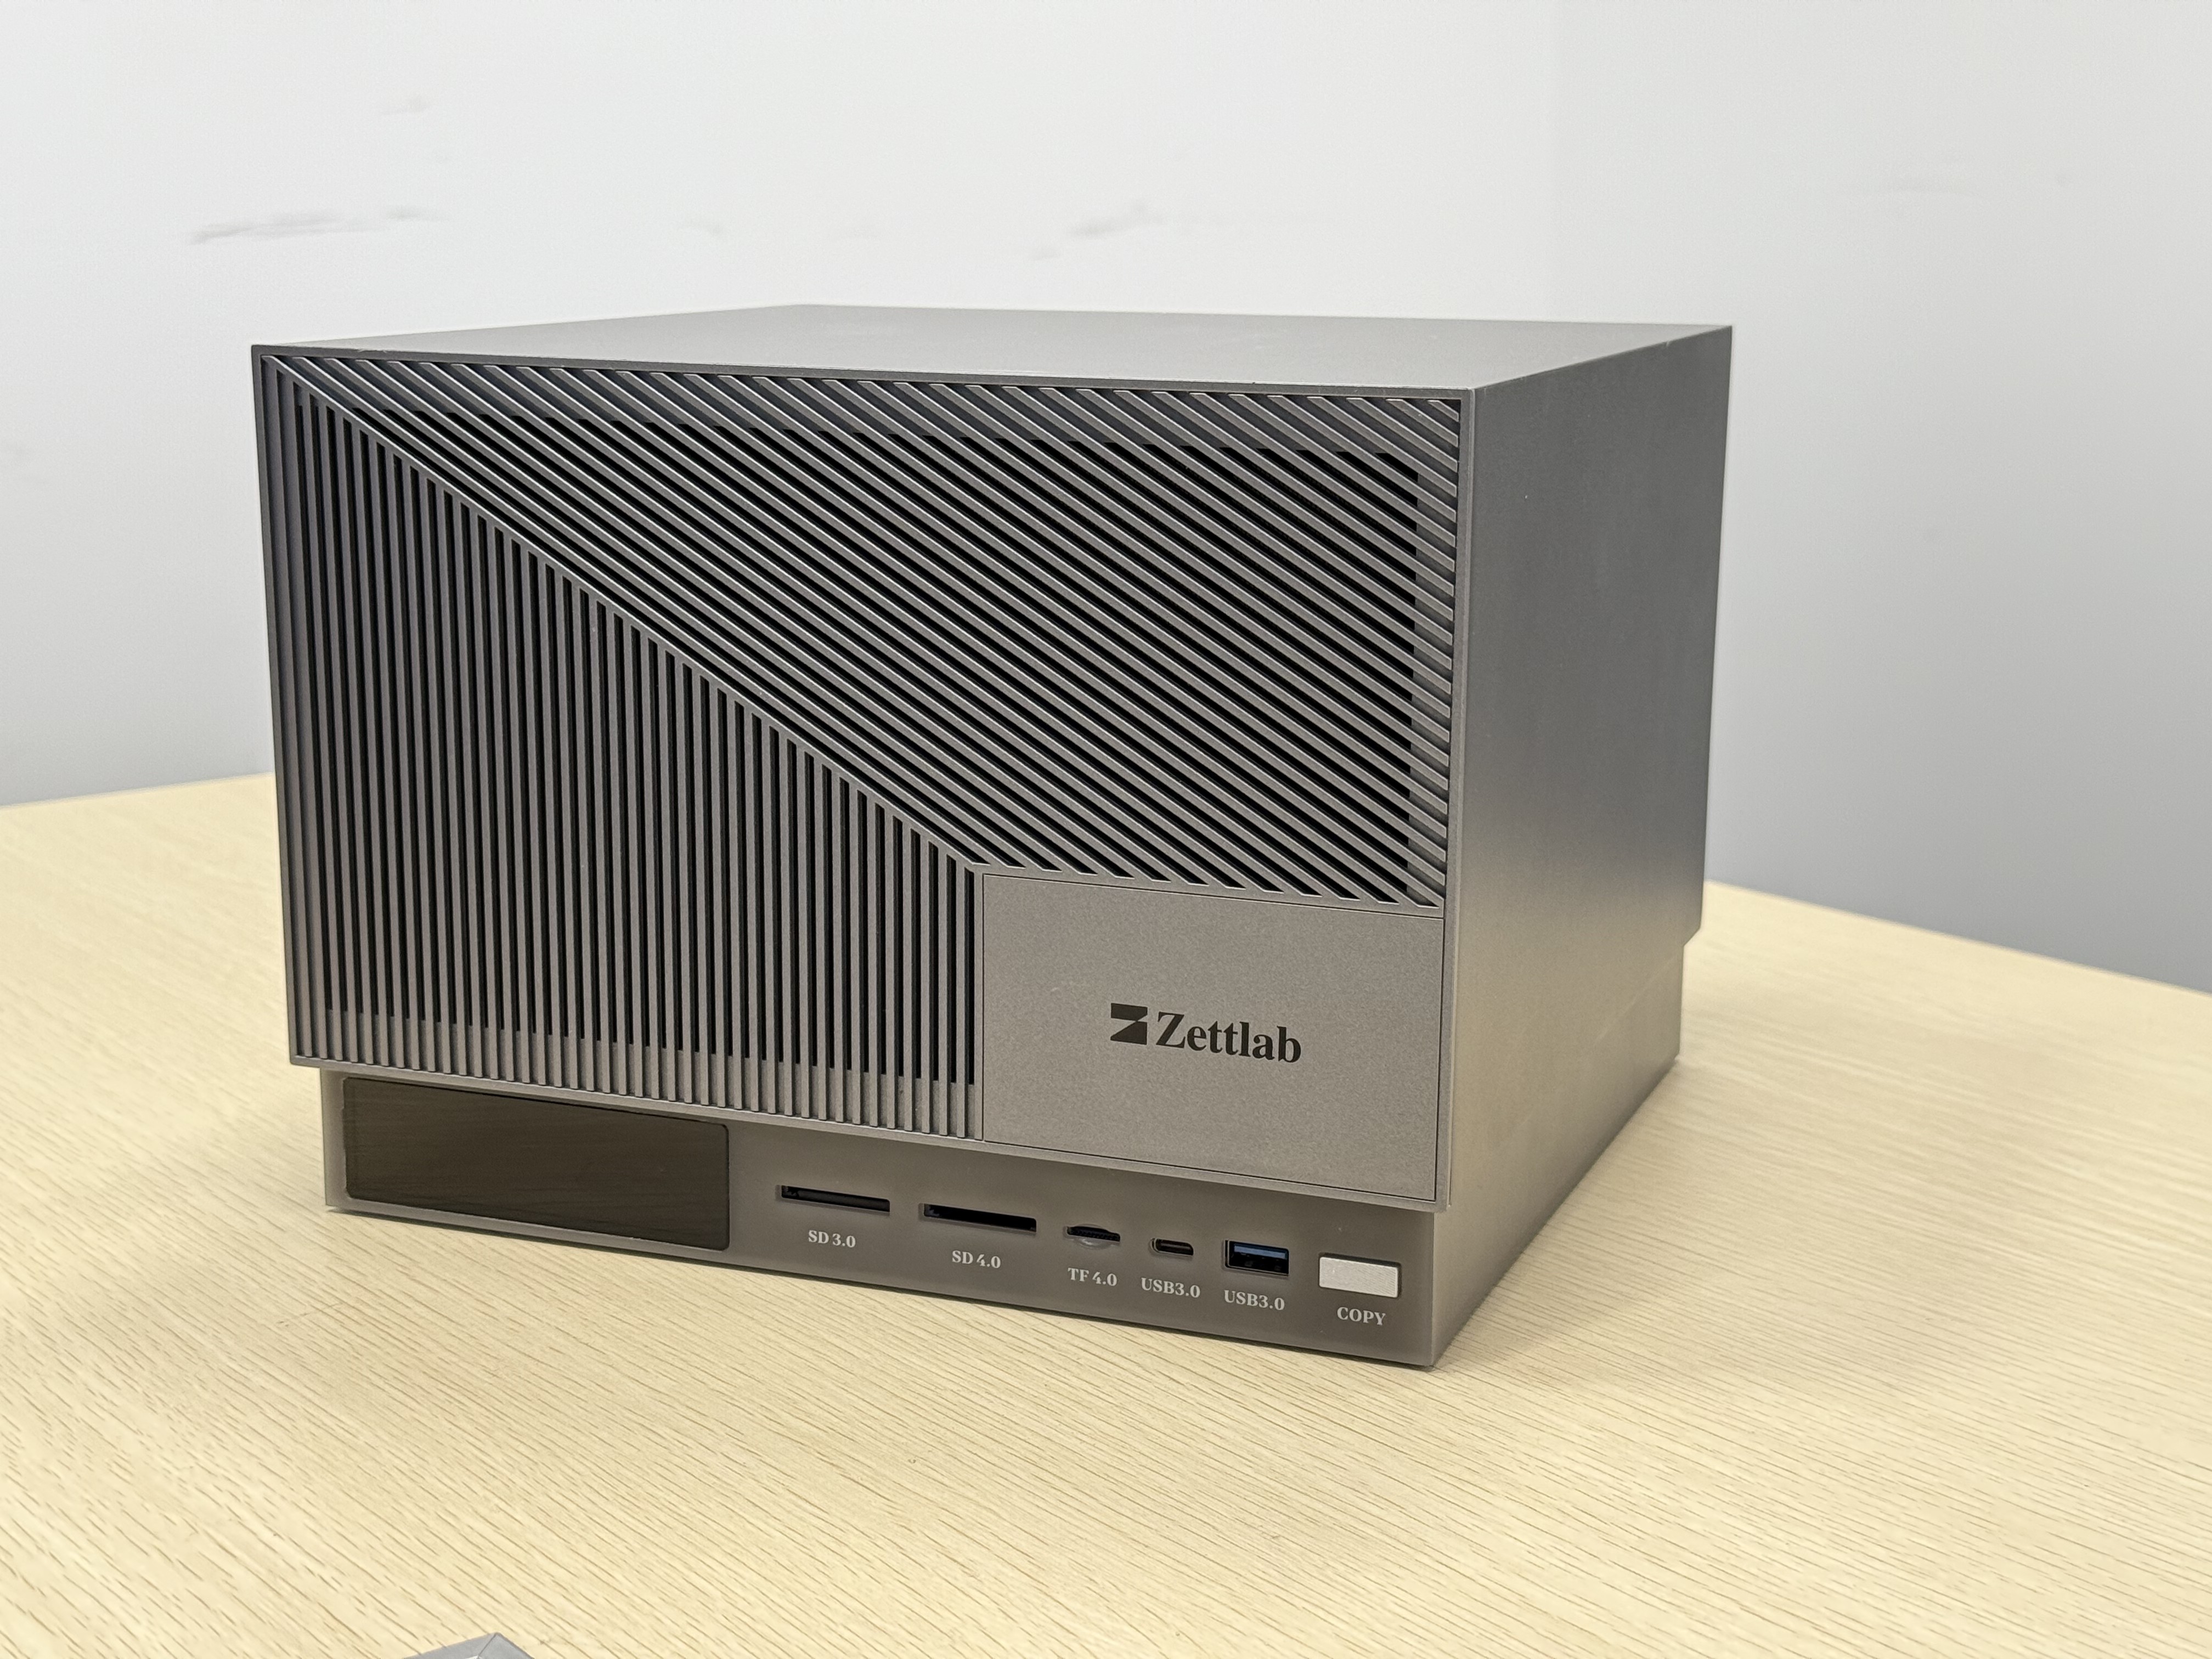
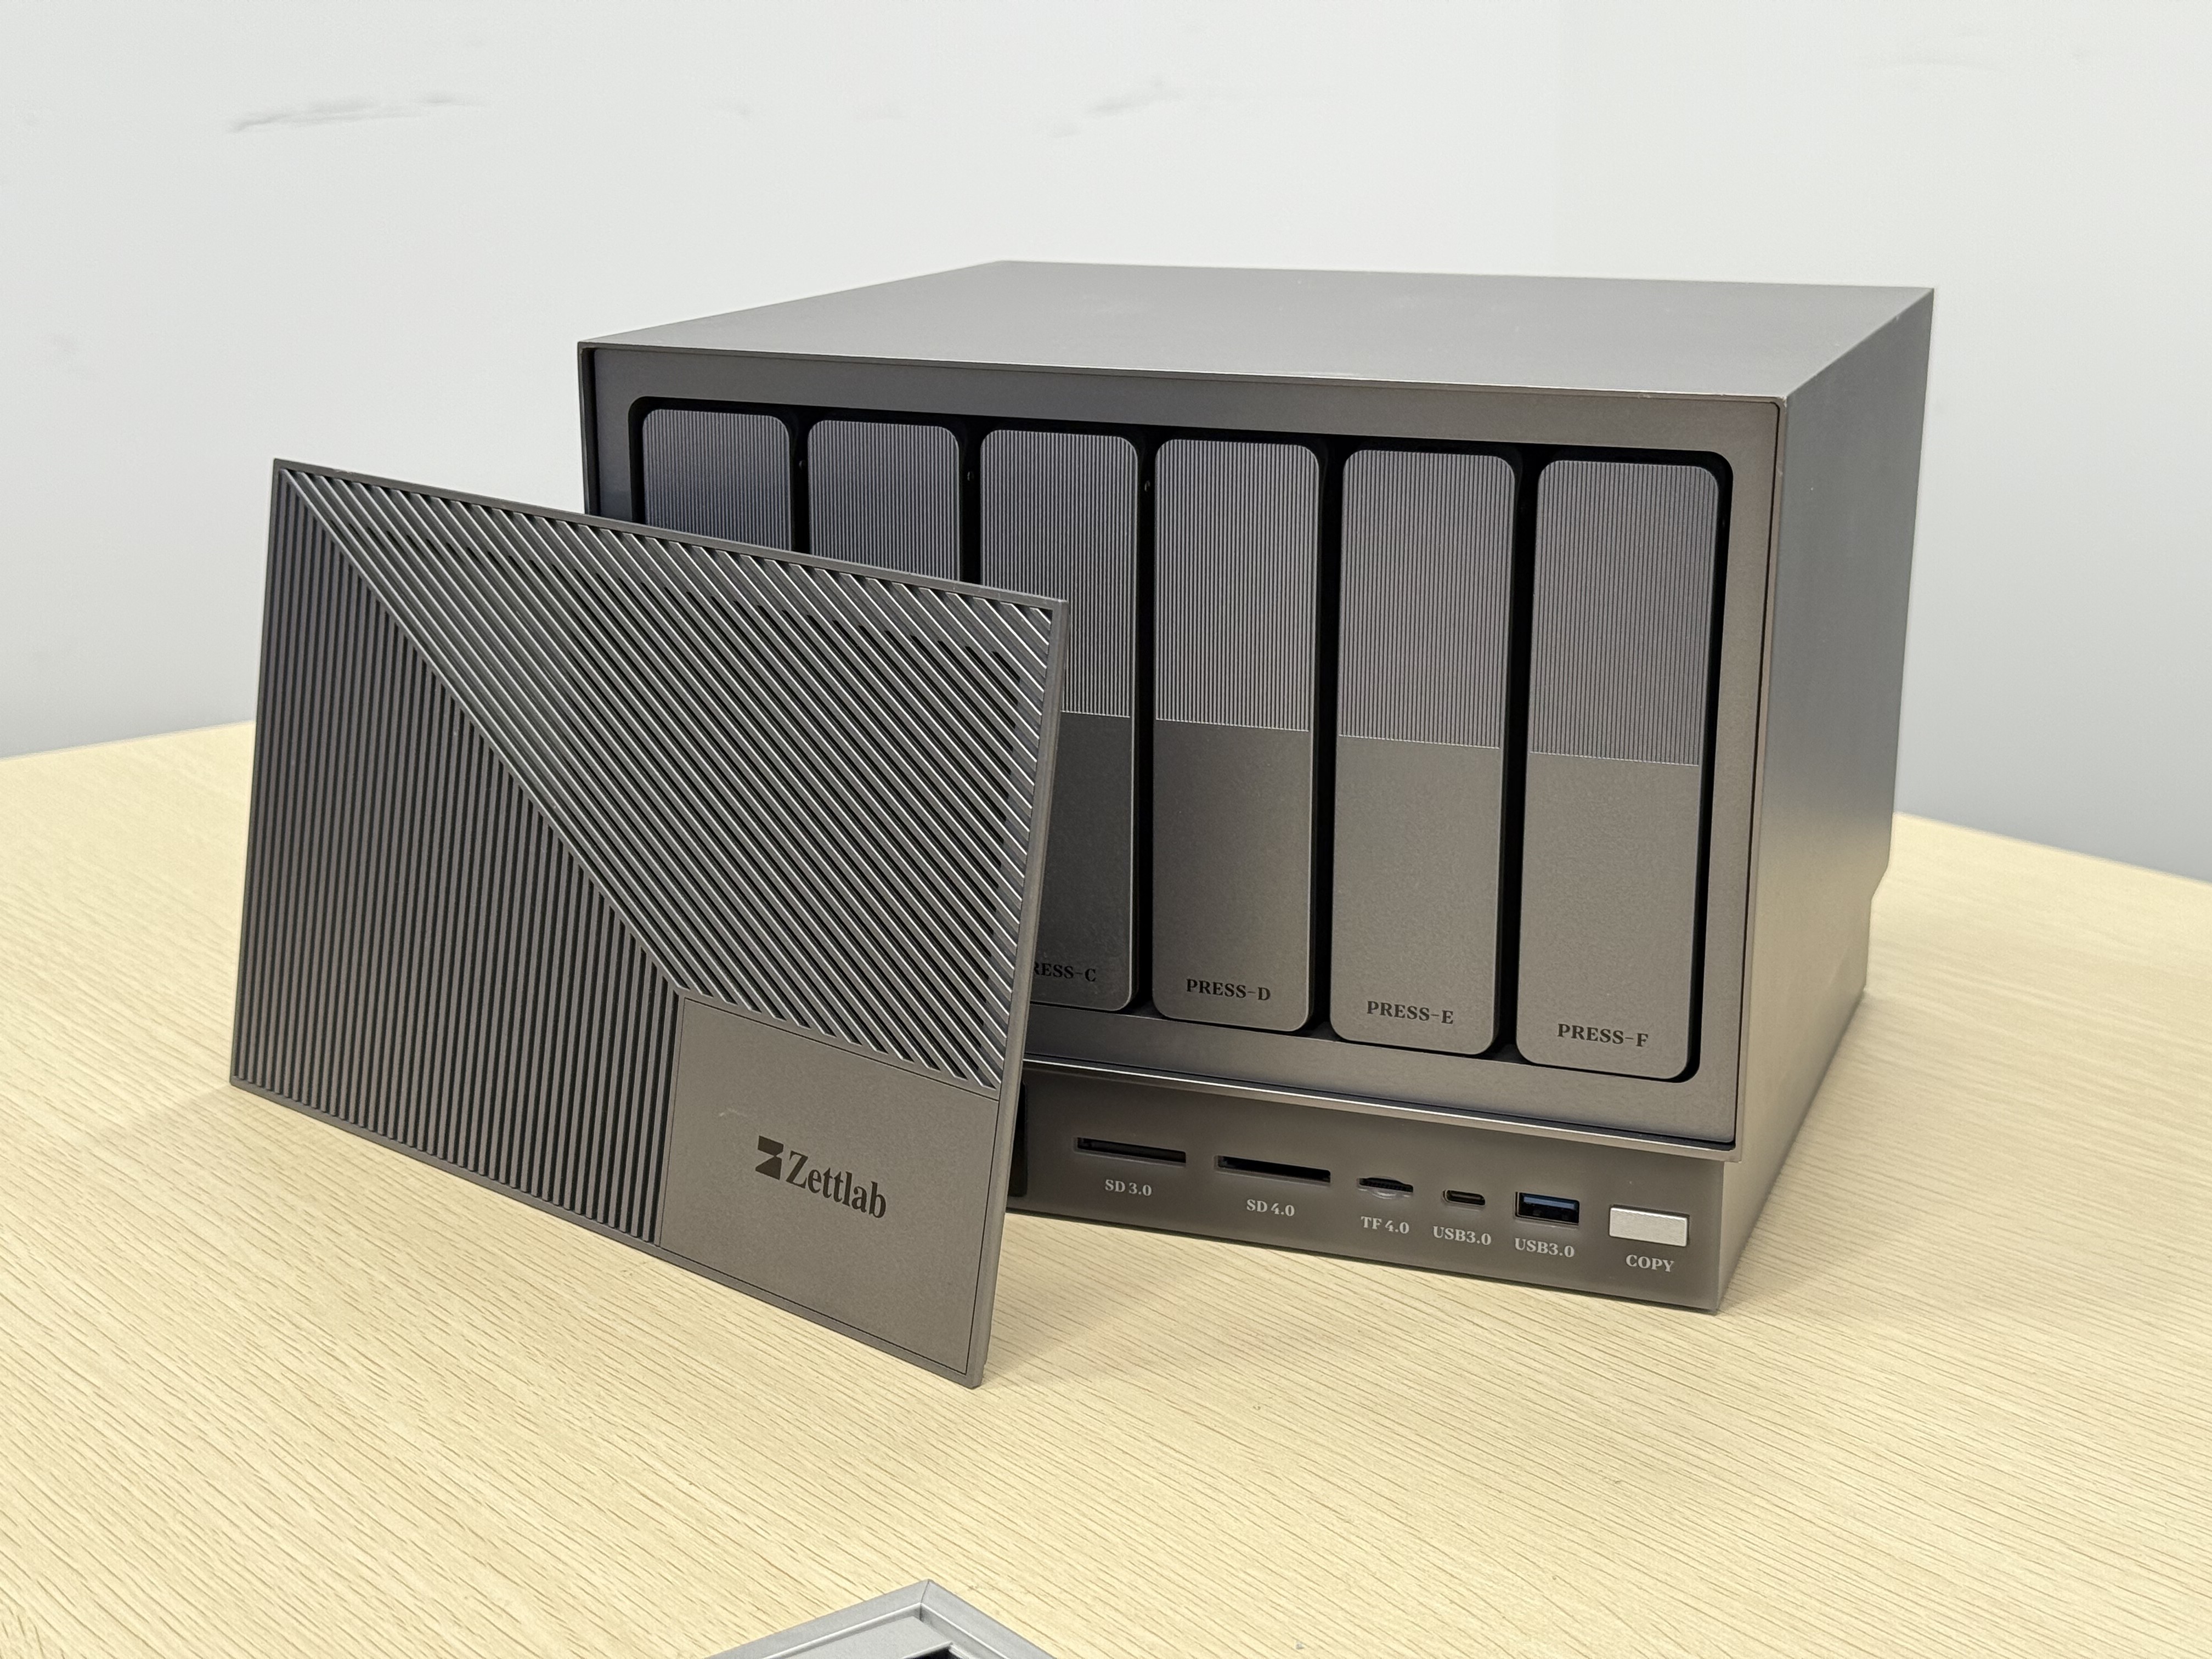
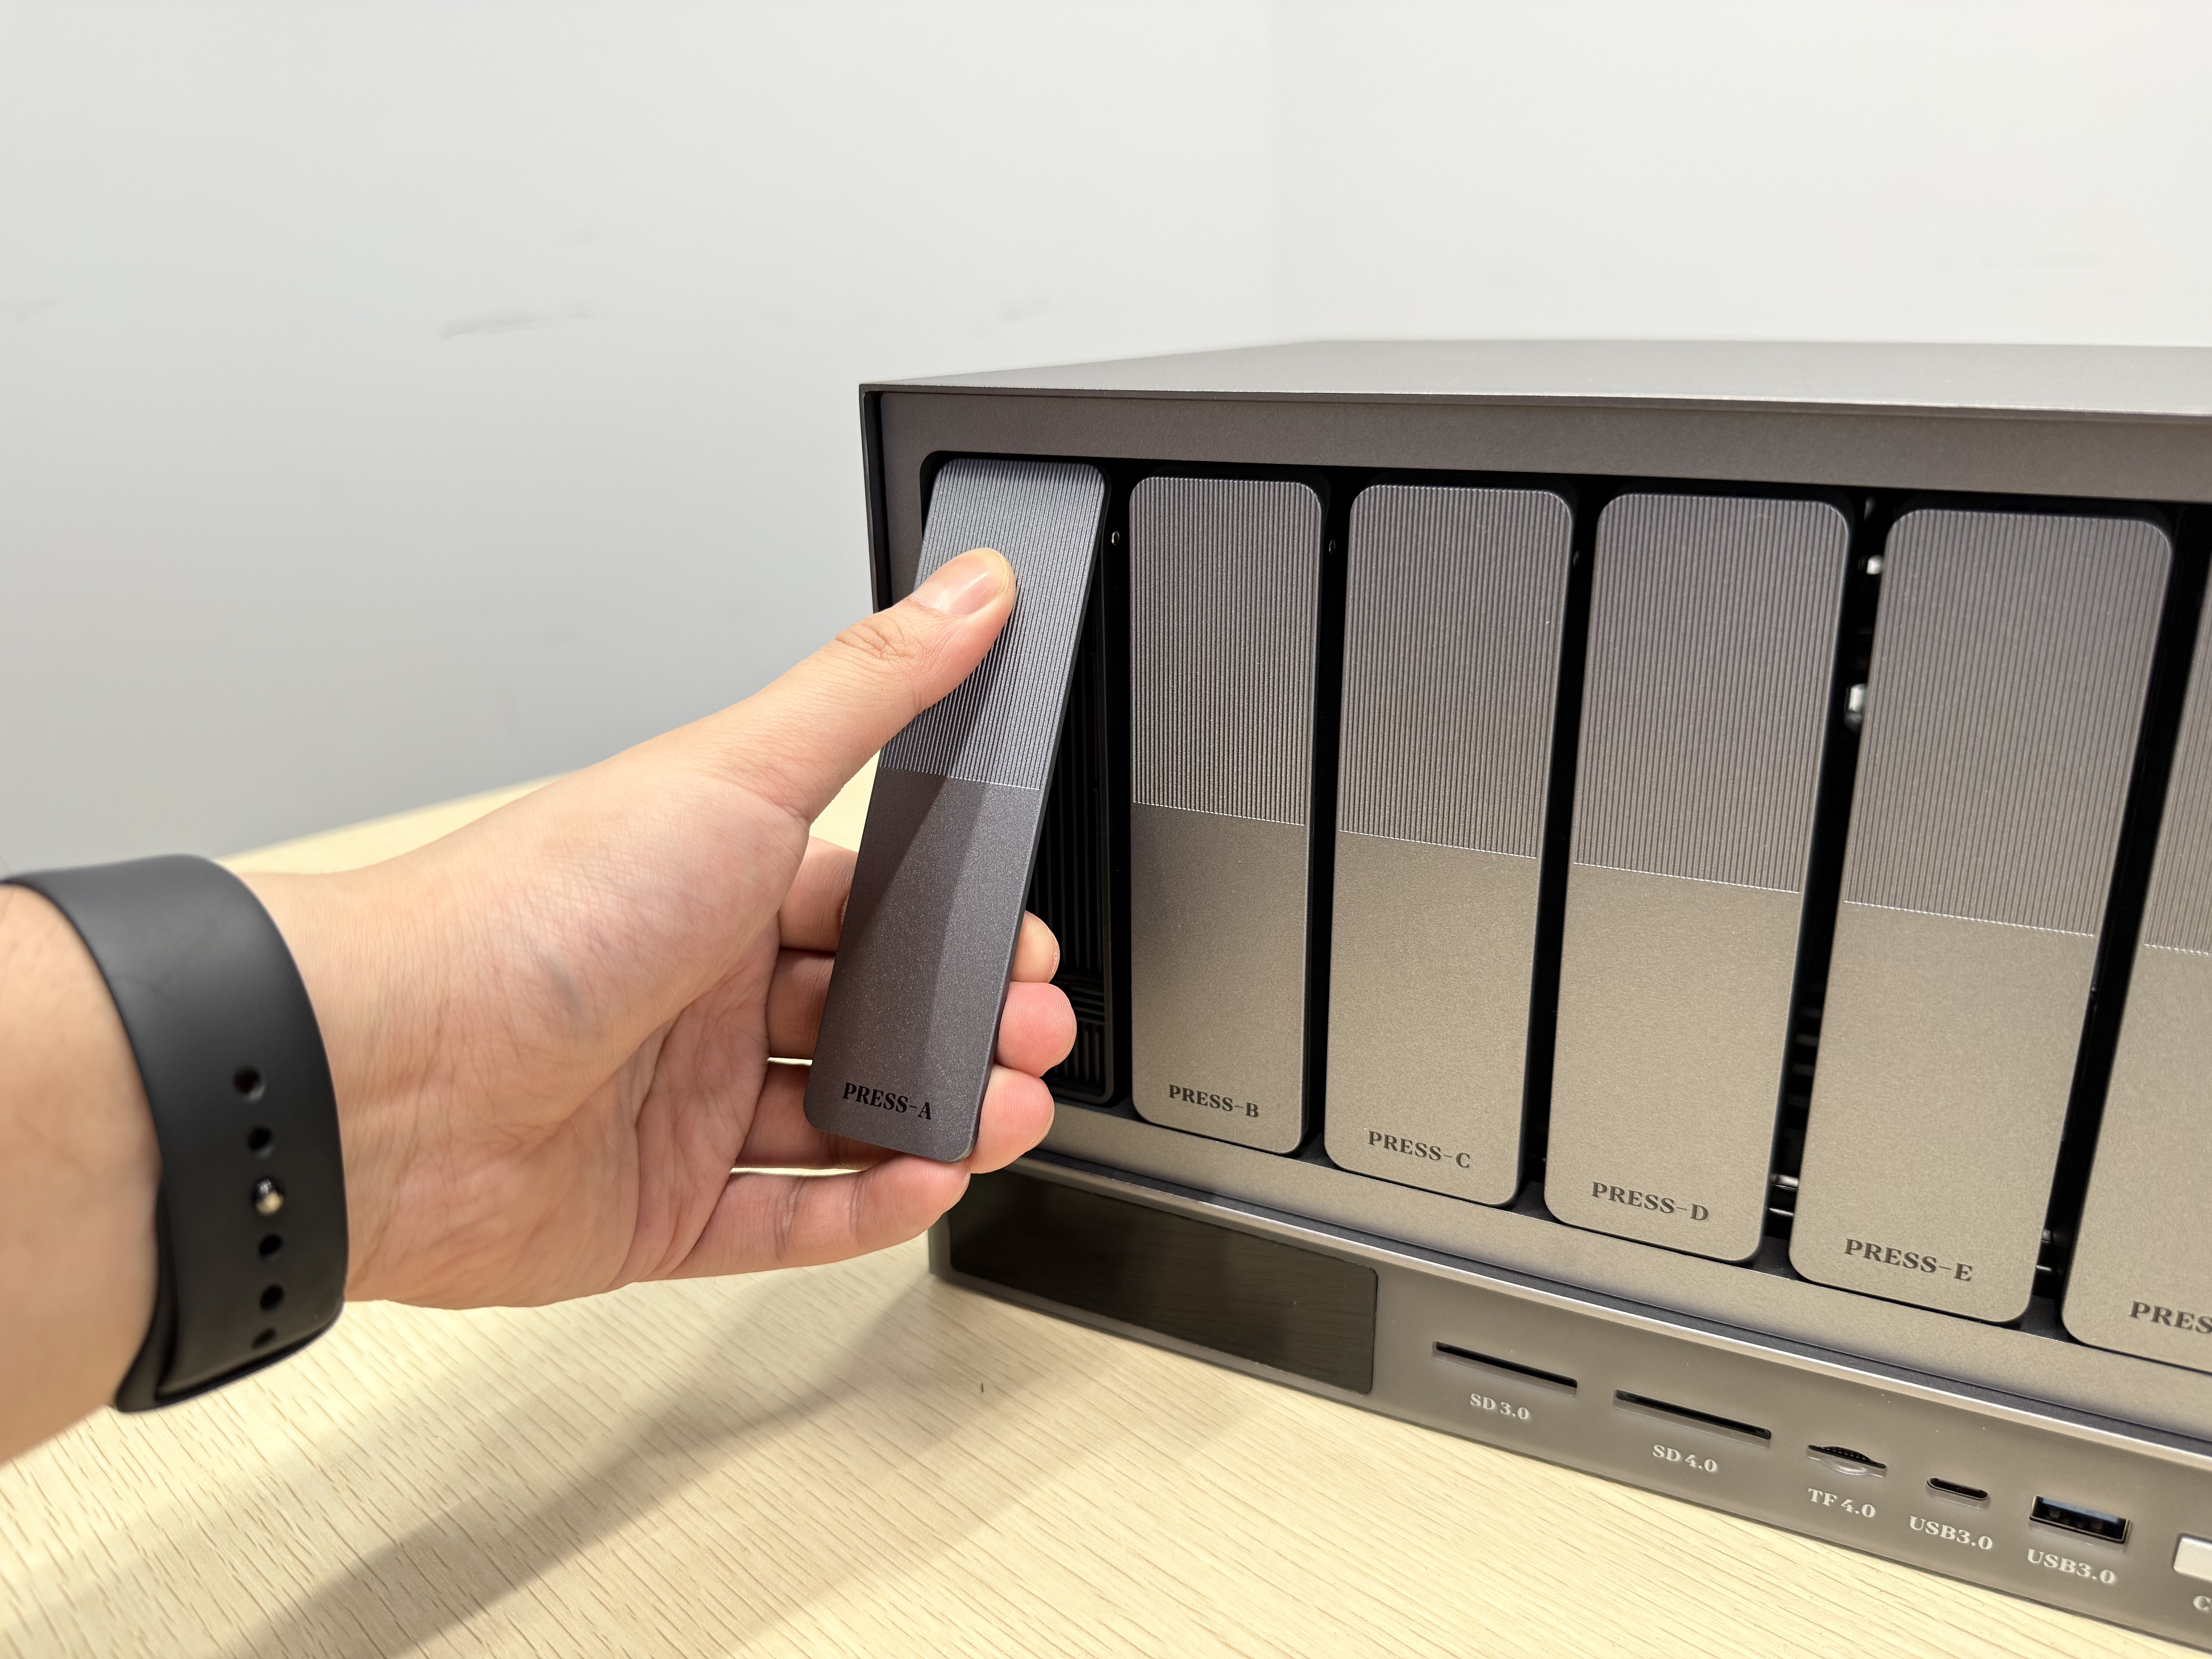
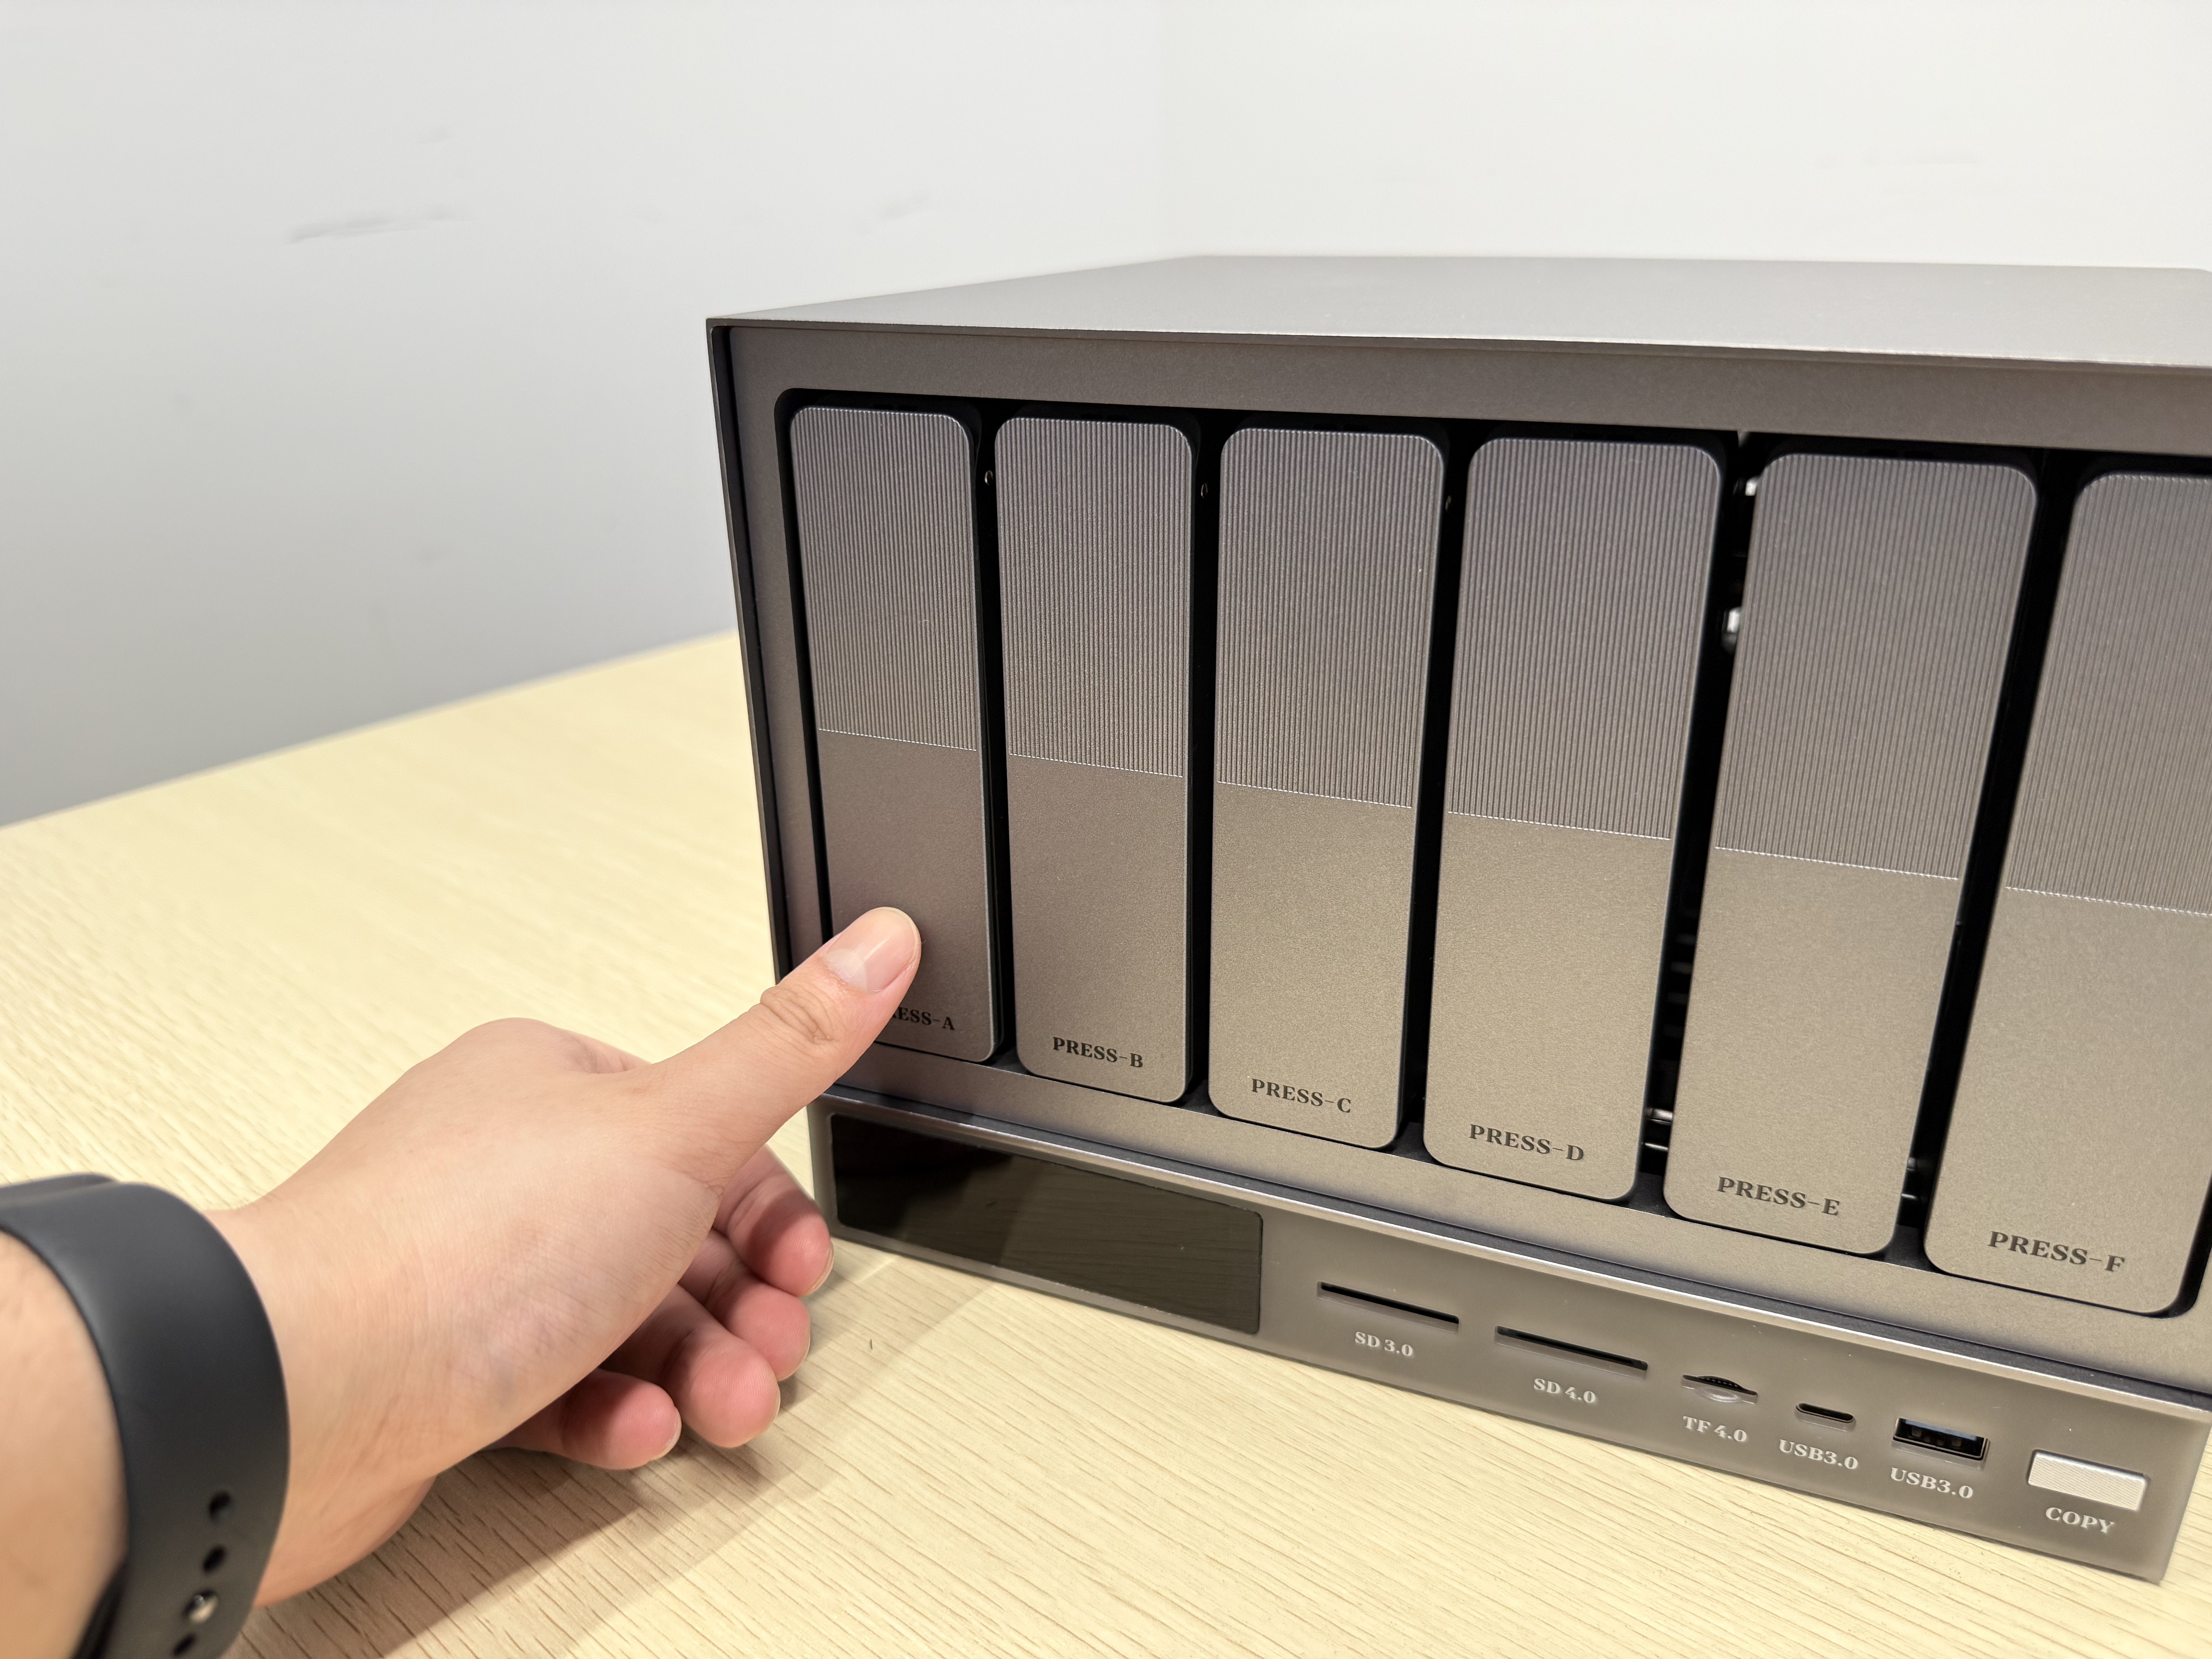
Front
- Remove the front dust filter to see the 6 hard drive bays.
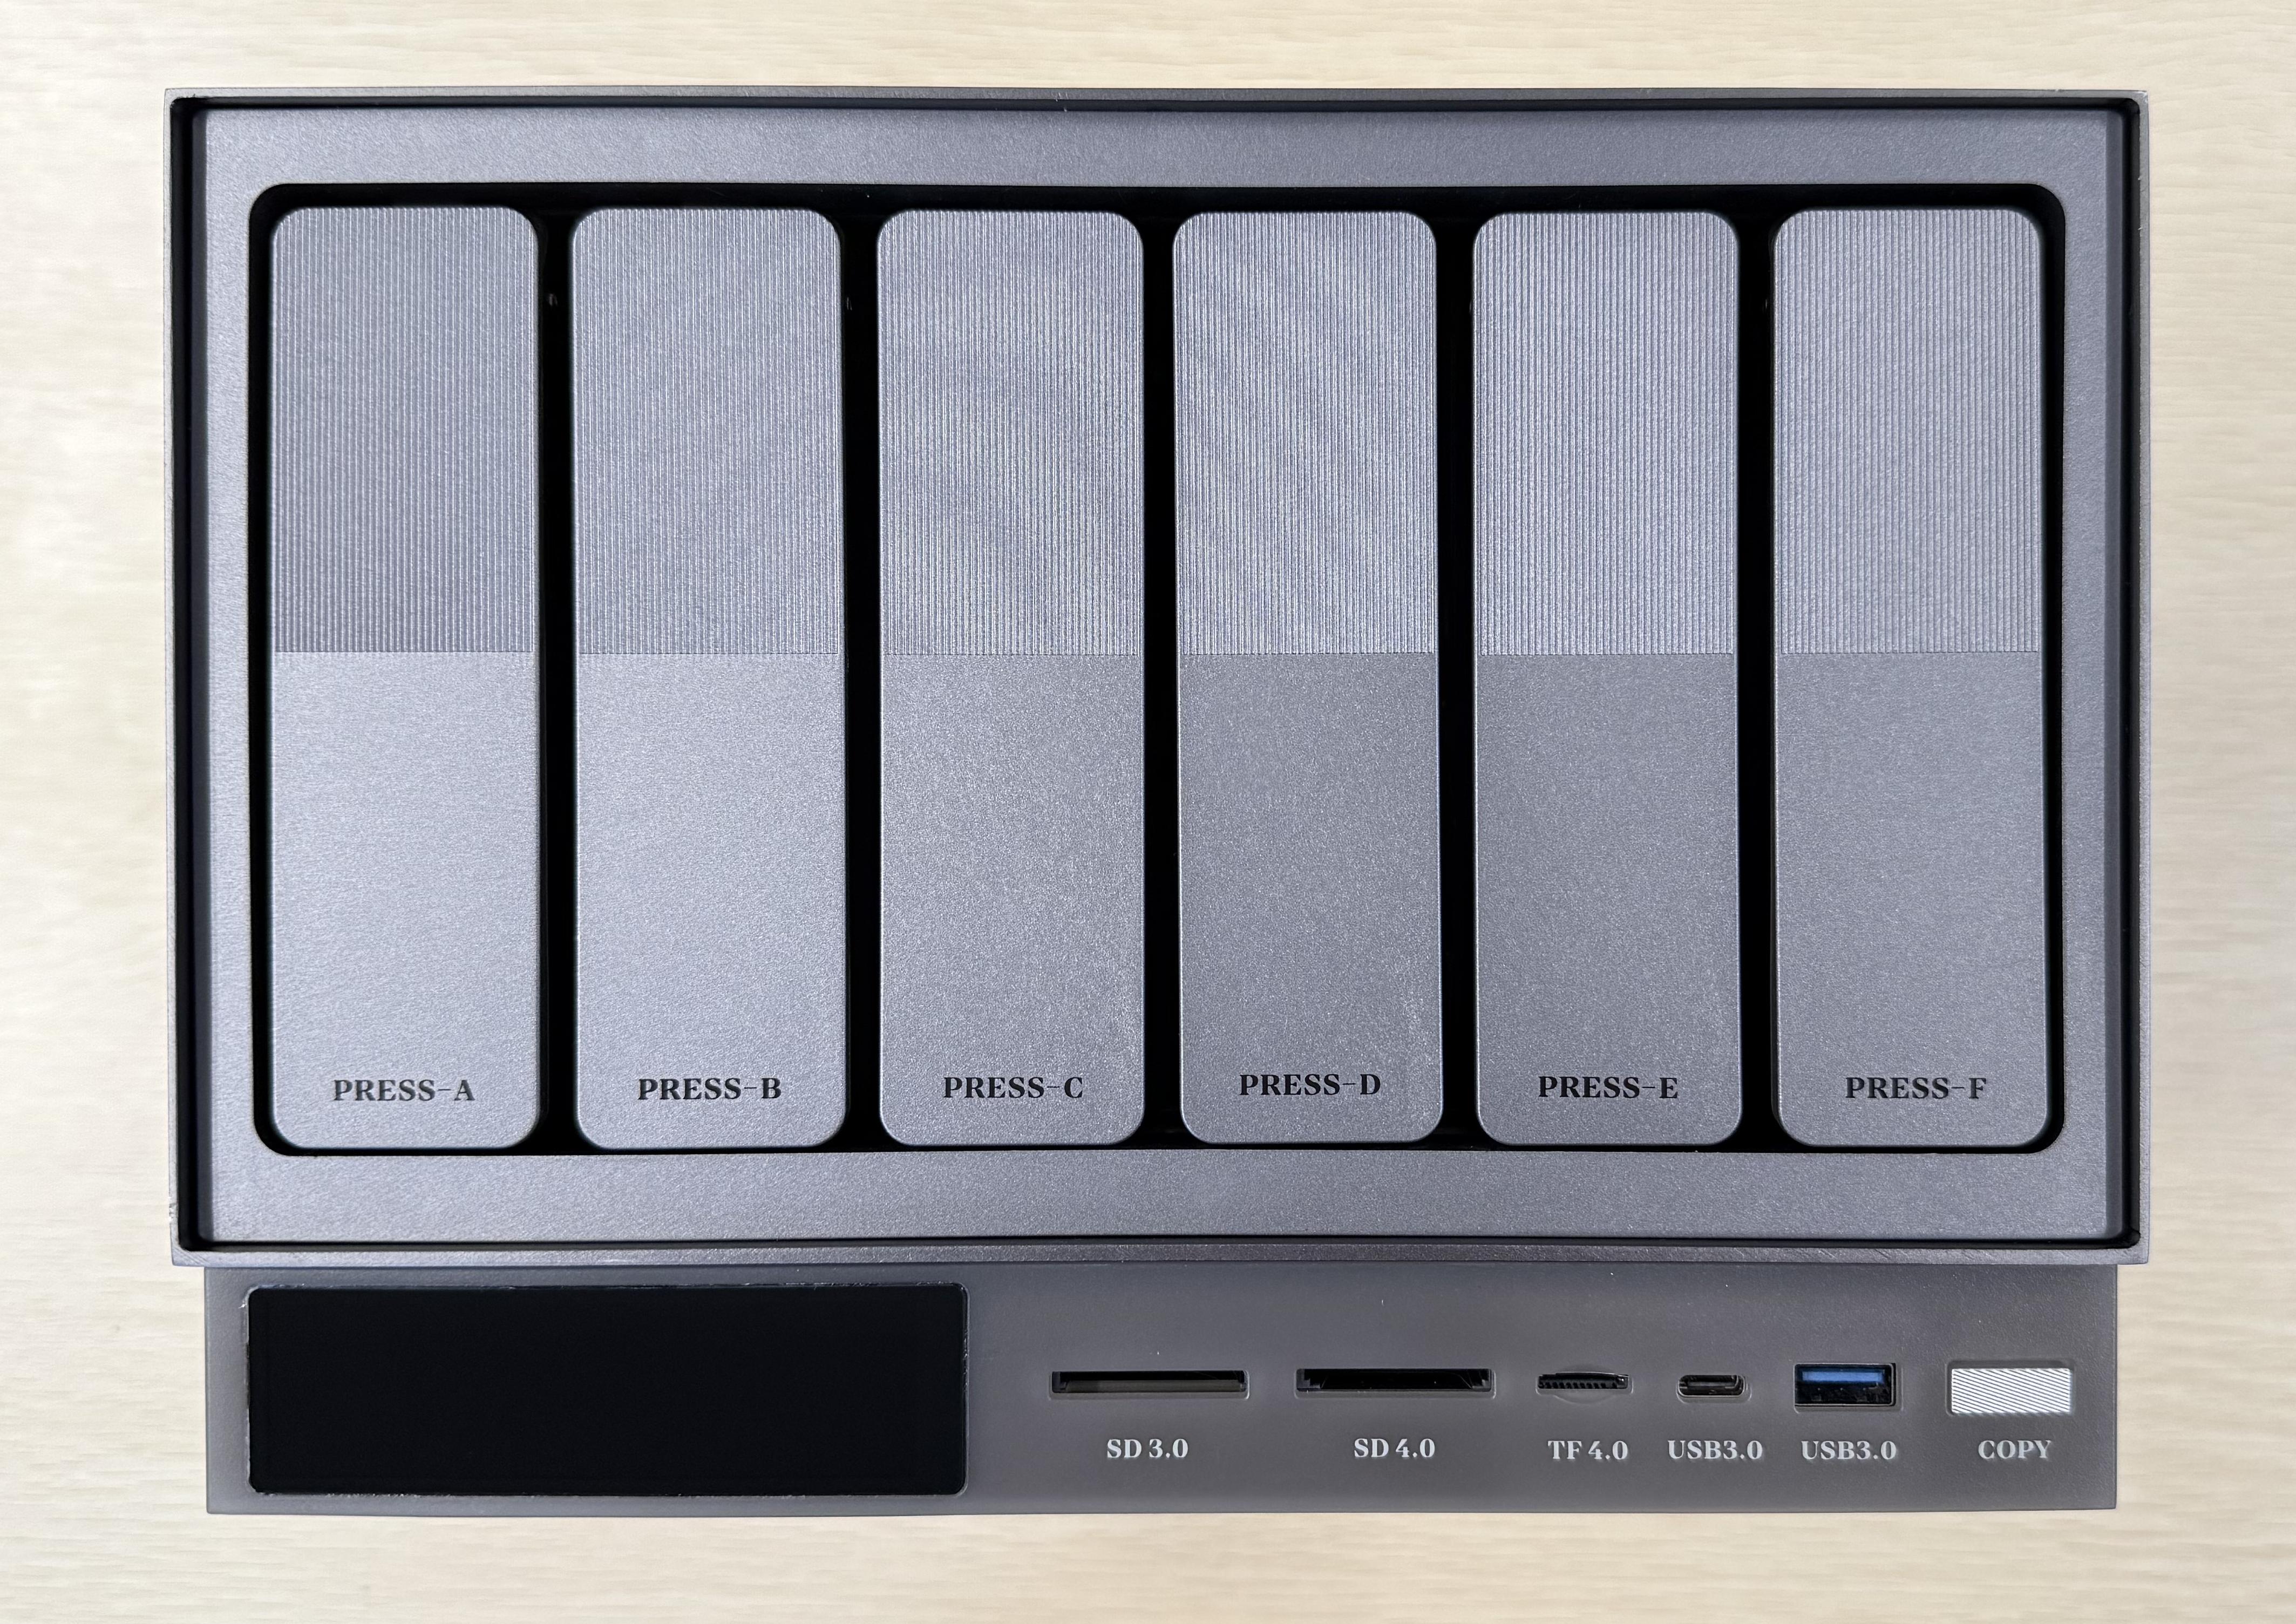
- Below the dust filter, from left to right, you will find: LCD display, SD3.0 interface, SD4.0 interface, TF 4.0 interface, USB3 Gen1 (Type C) interface, and USB3 Gen1 (Type A) interface.

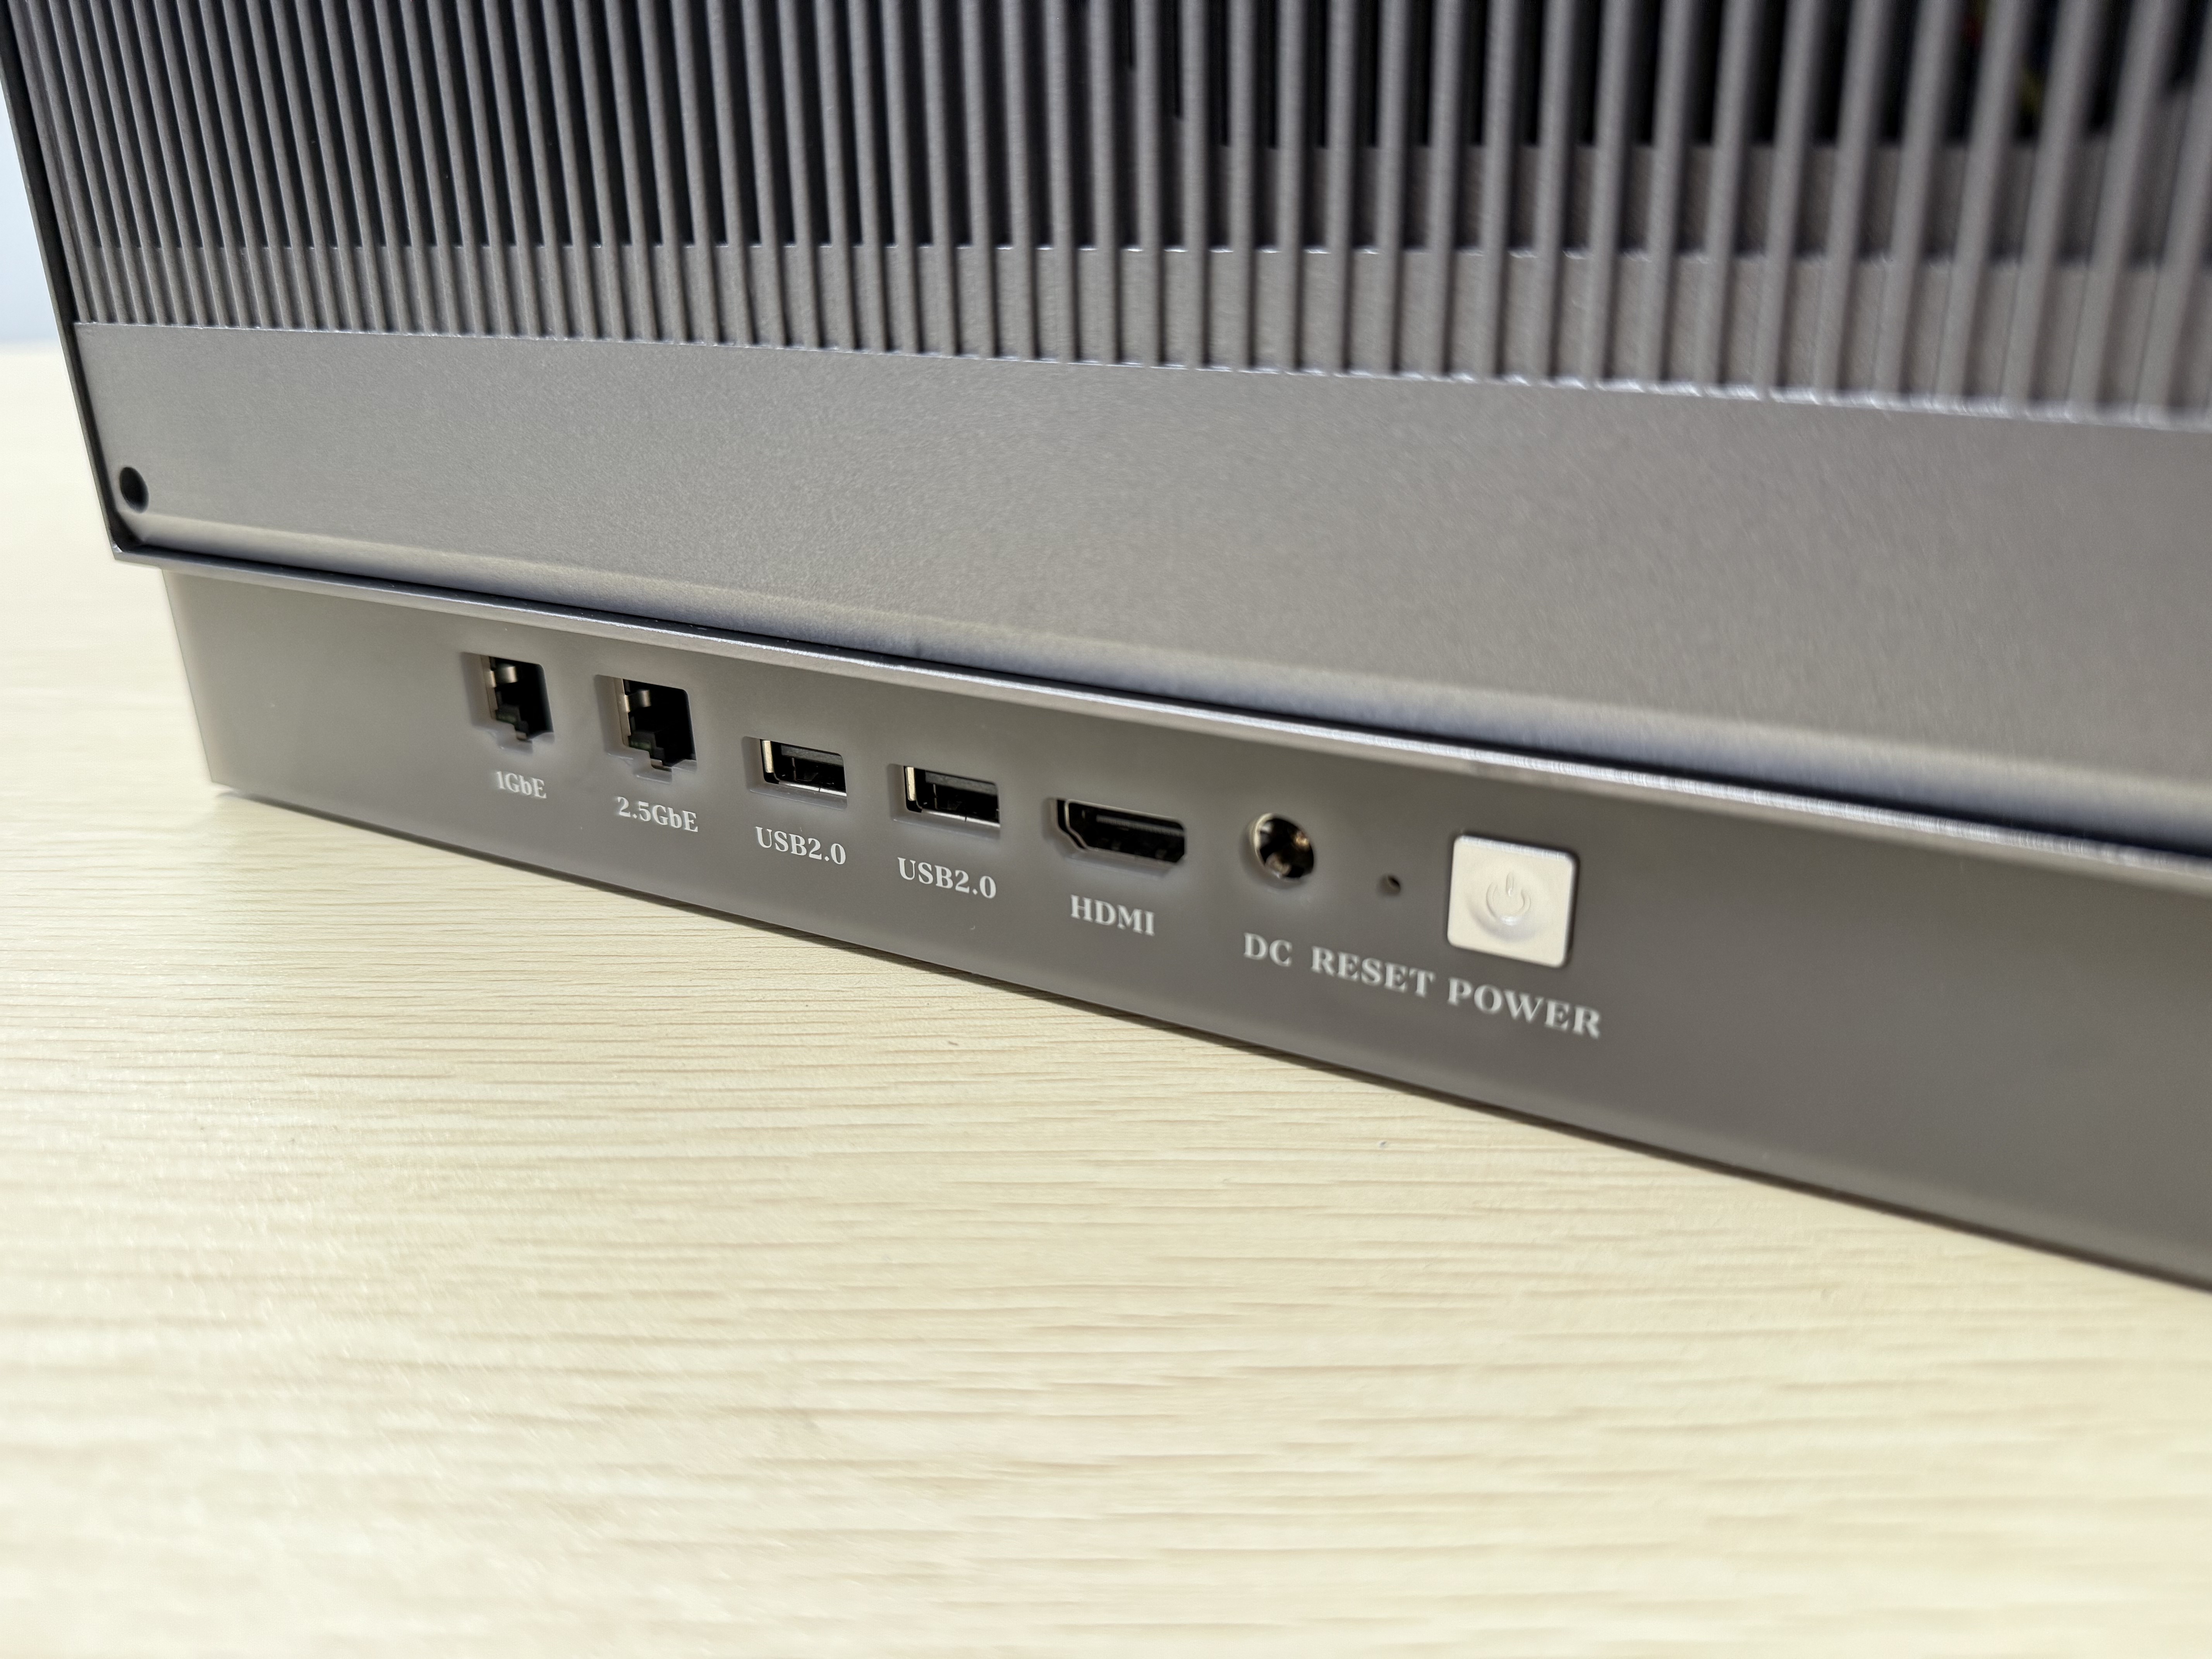
Back
- A magnetic dust filter is included in the packaging. Remove it and attach it to the fan exhaust port.

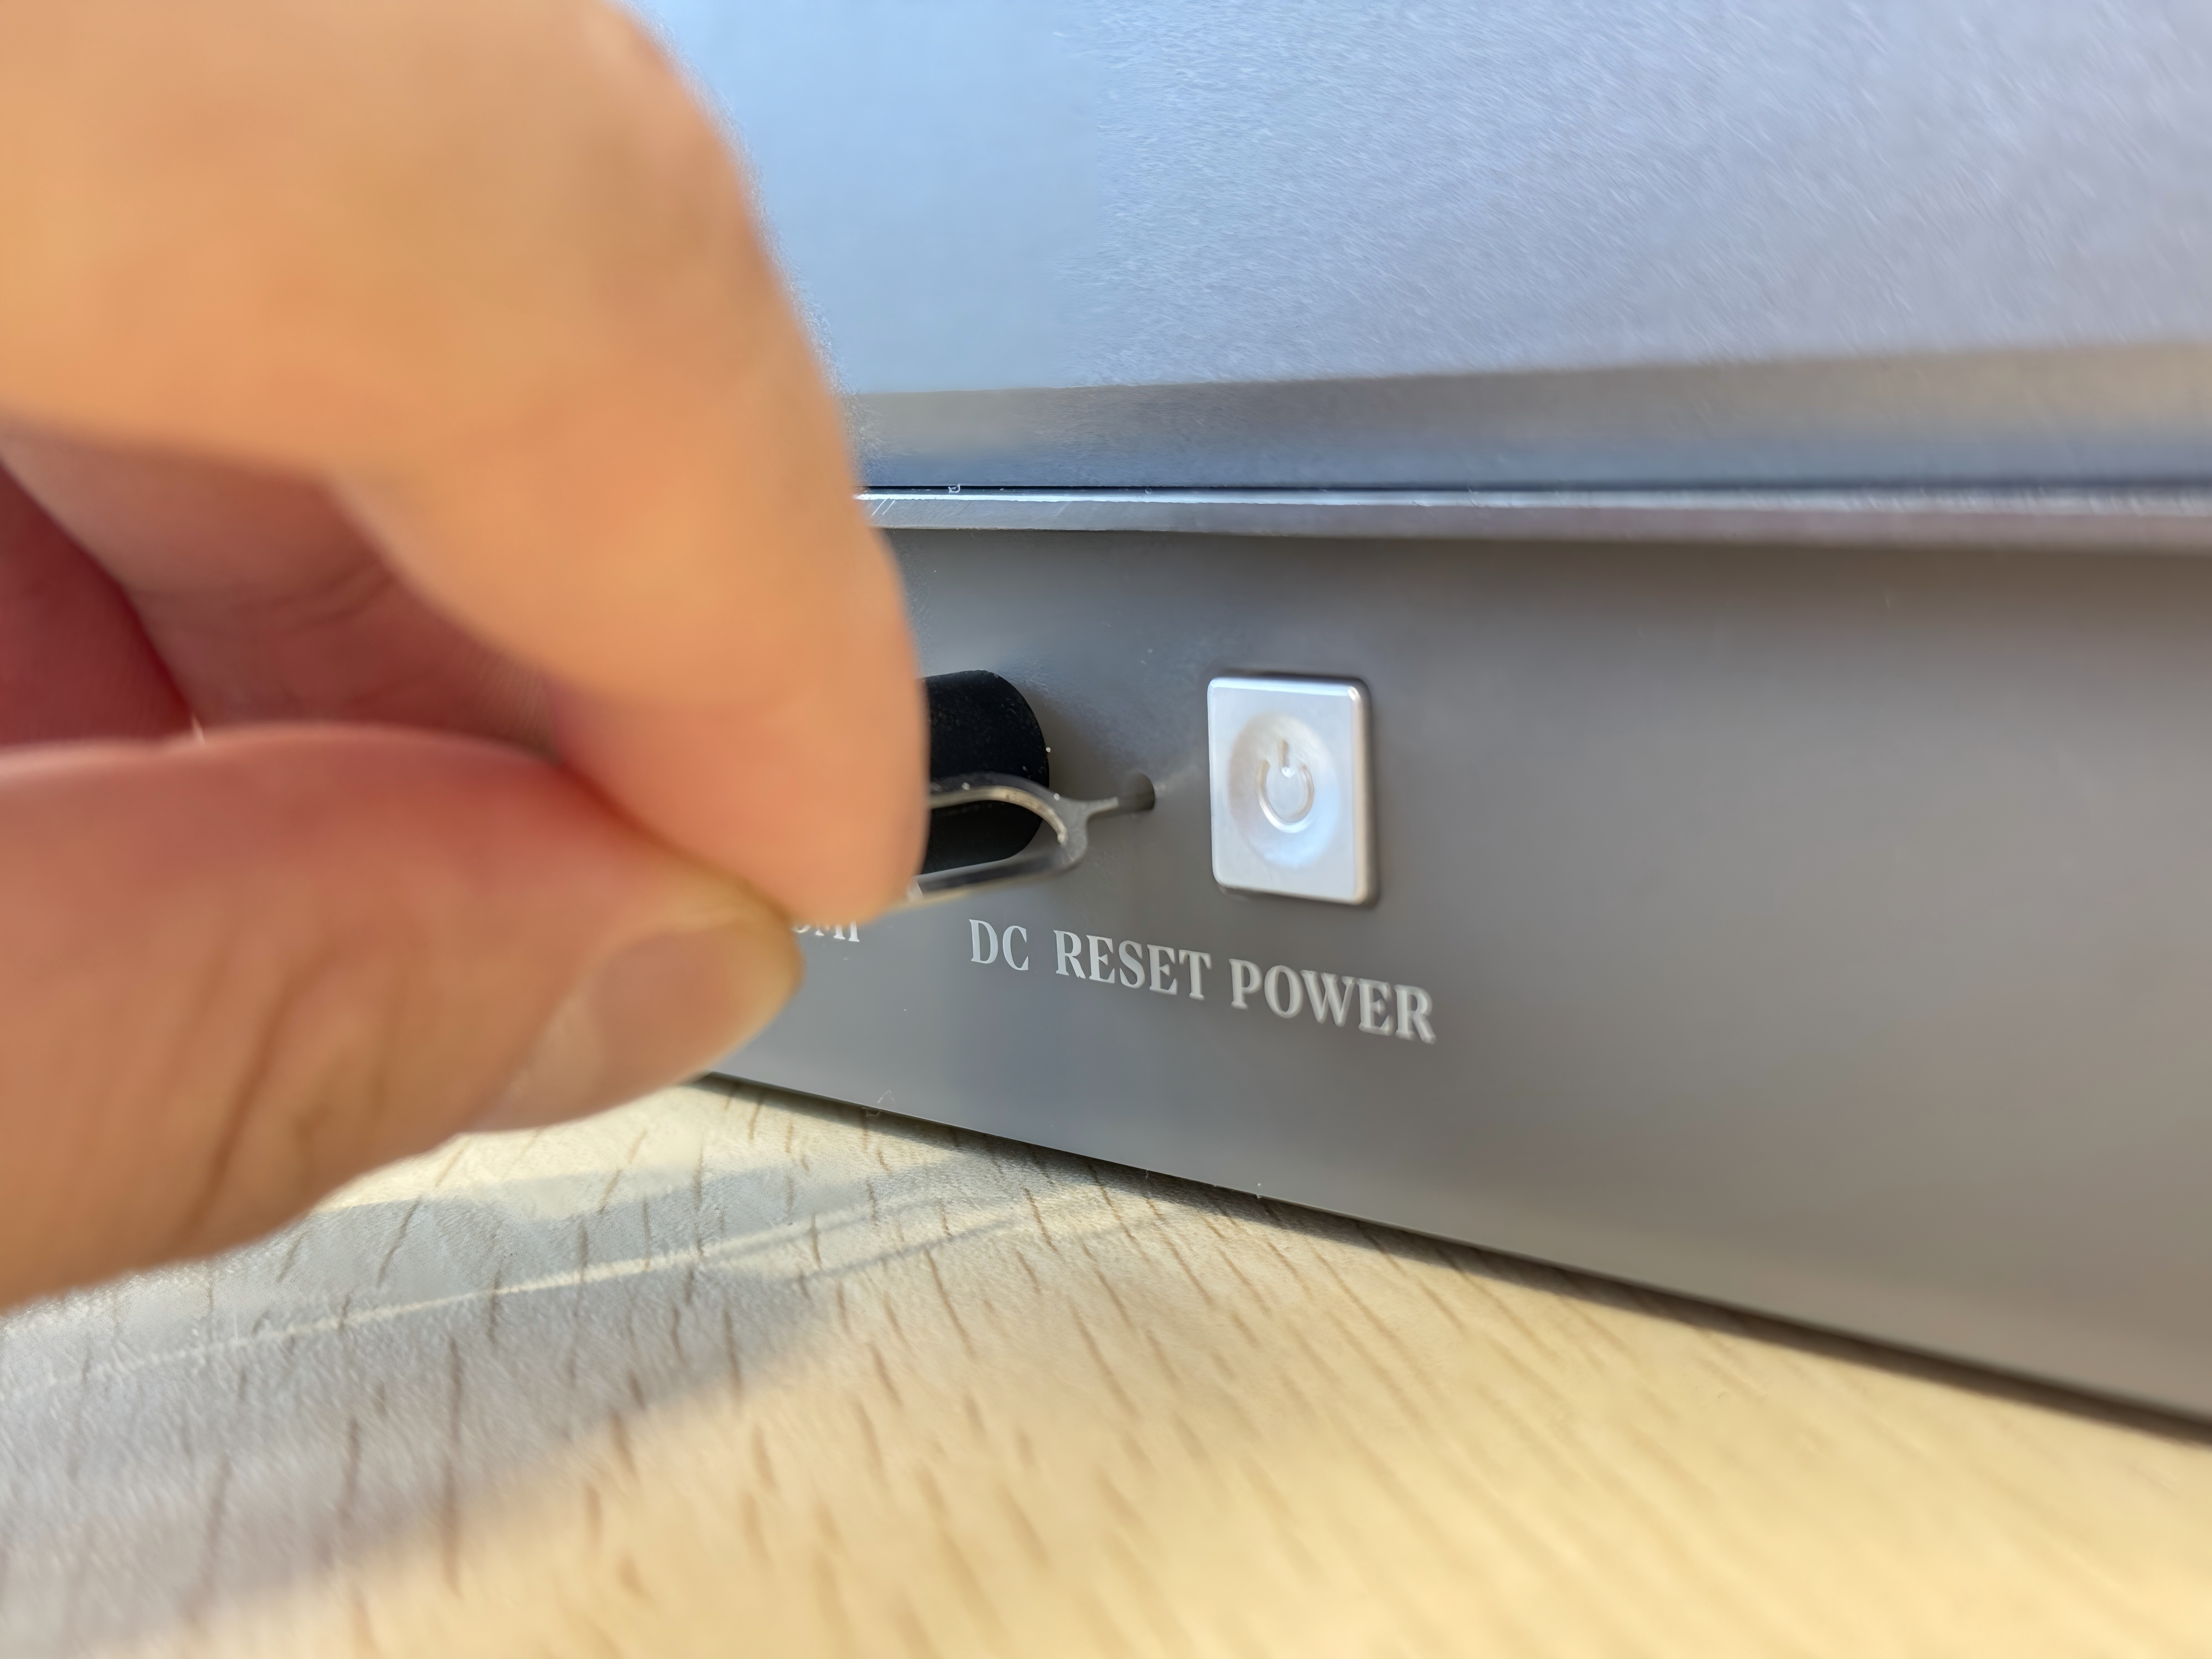
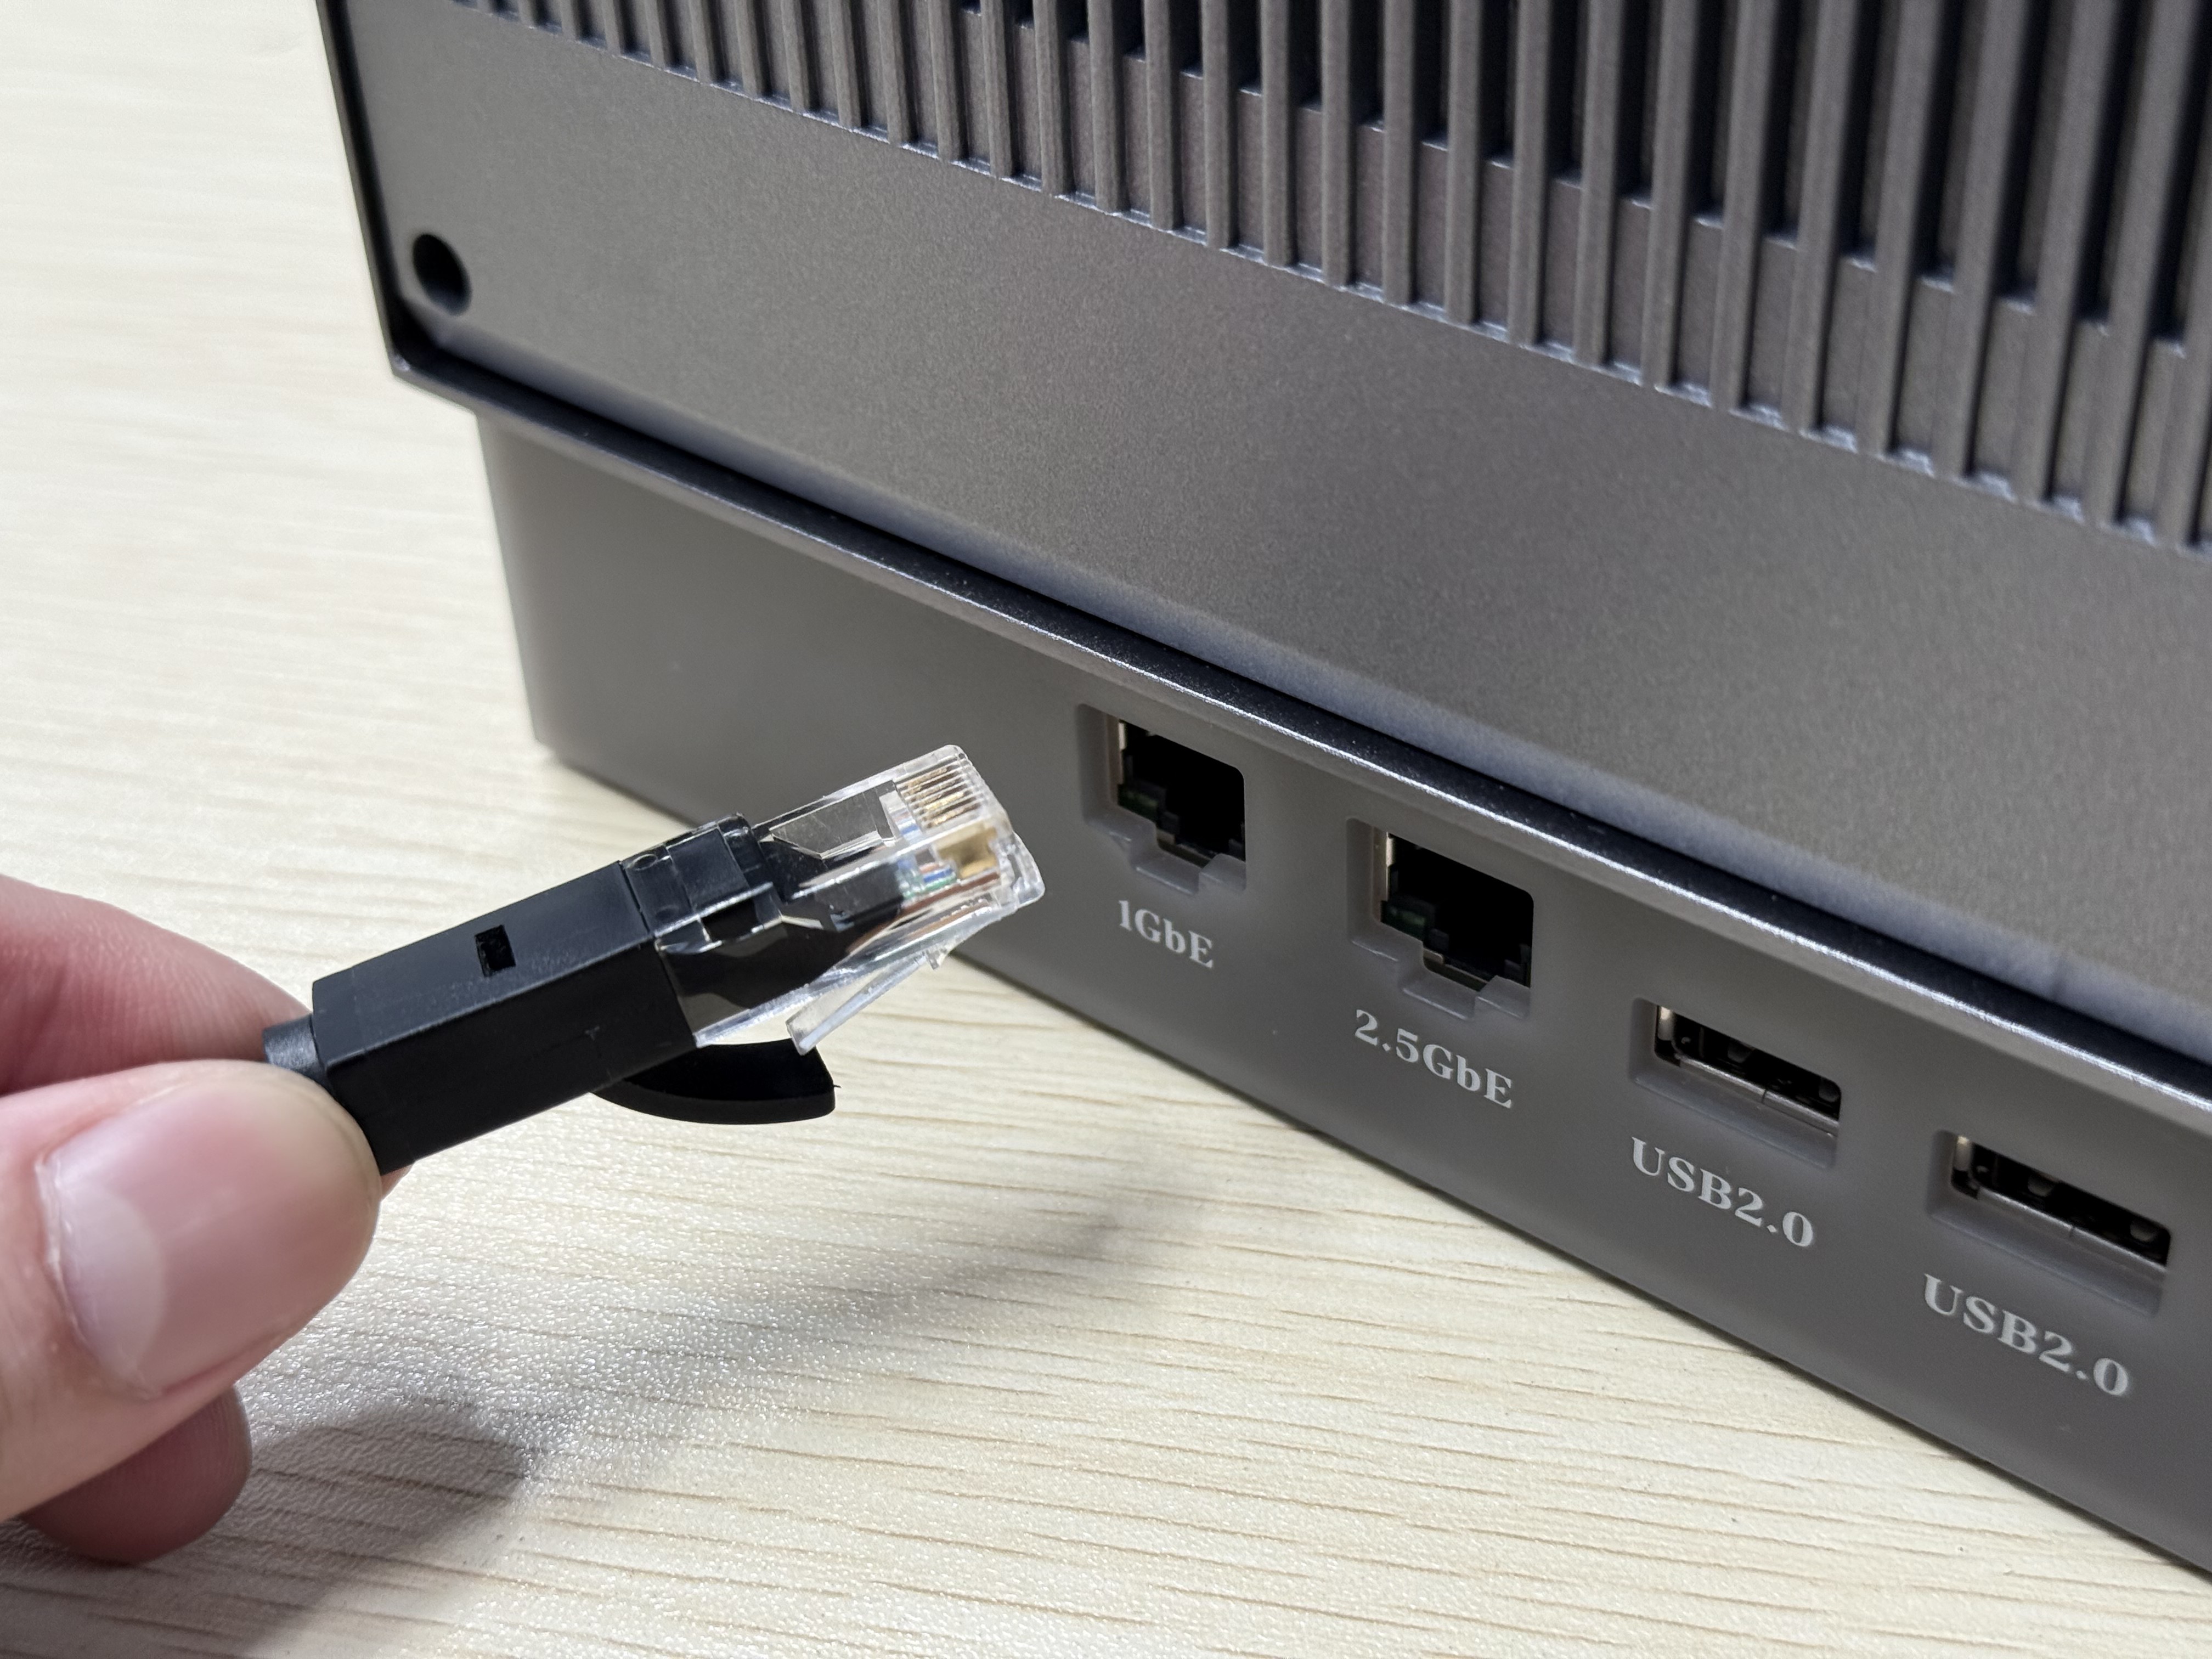
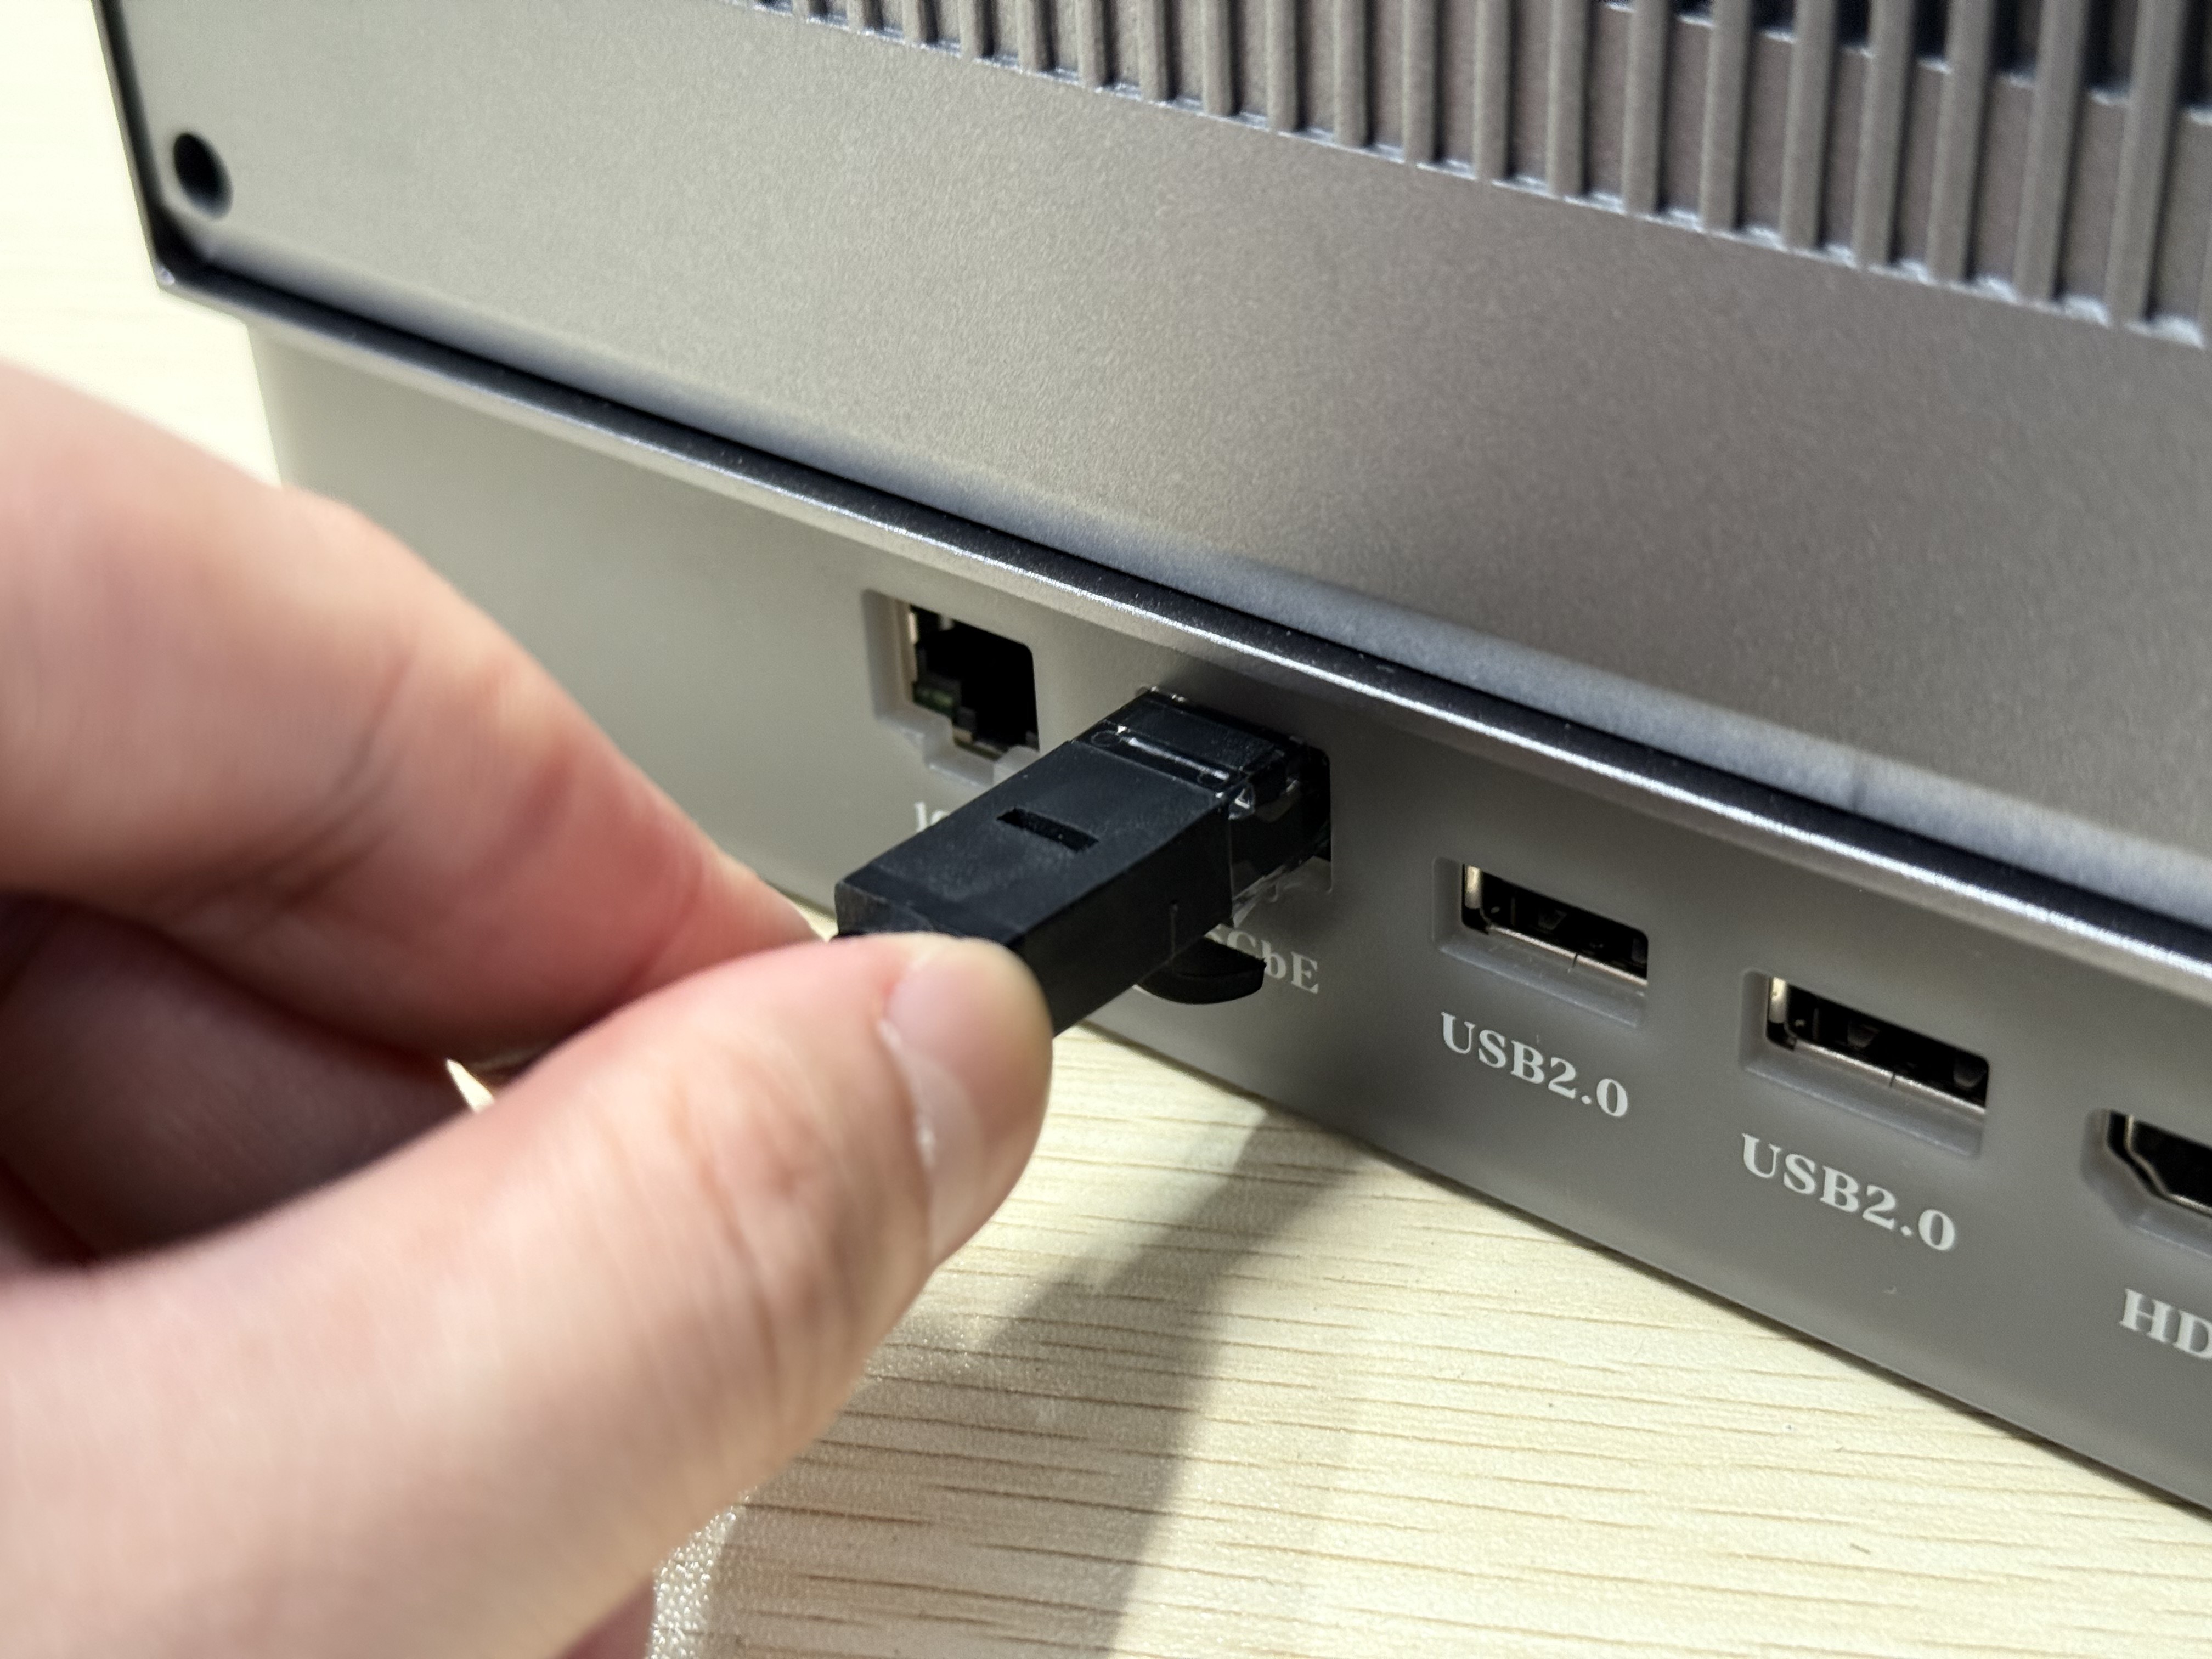
- Below the dust filter, from left to right, you will find: 1GbE port, 2.5GbE port, two USB 2.0 ports, HDMI port, DC power port, RESET hole, and Power button.

Packaging List
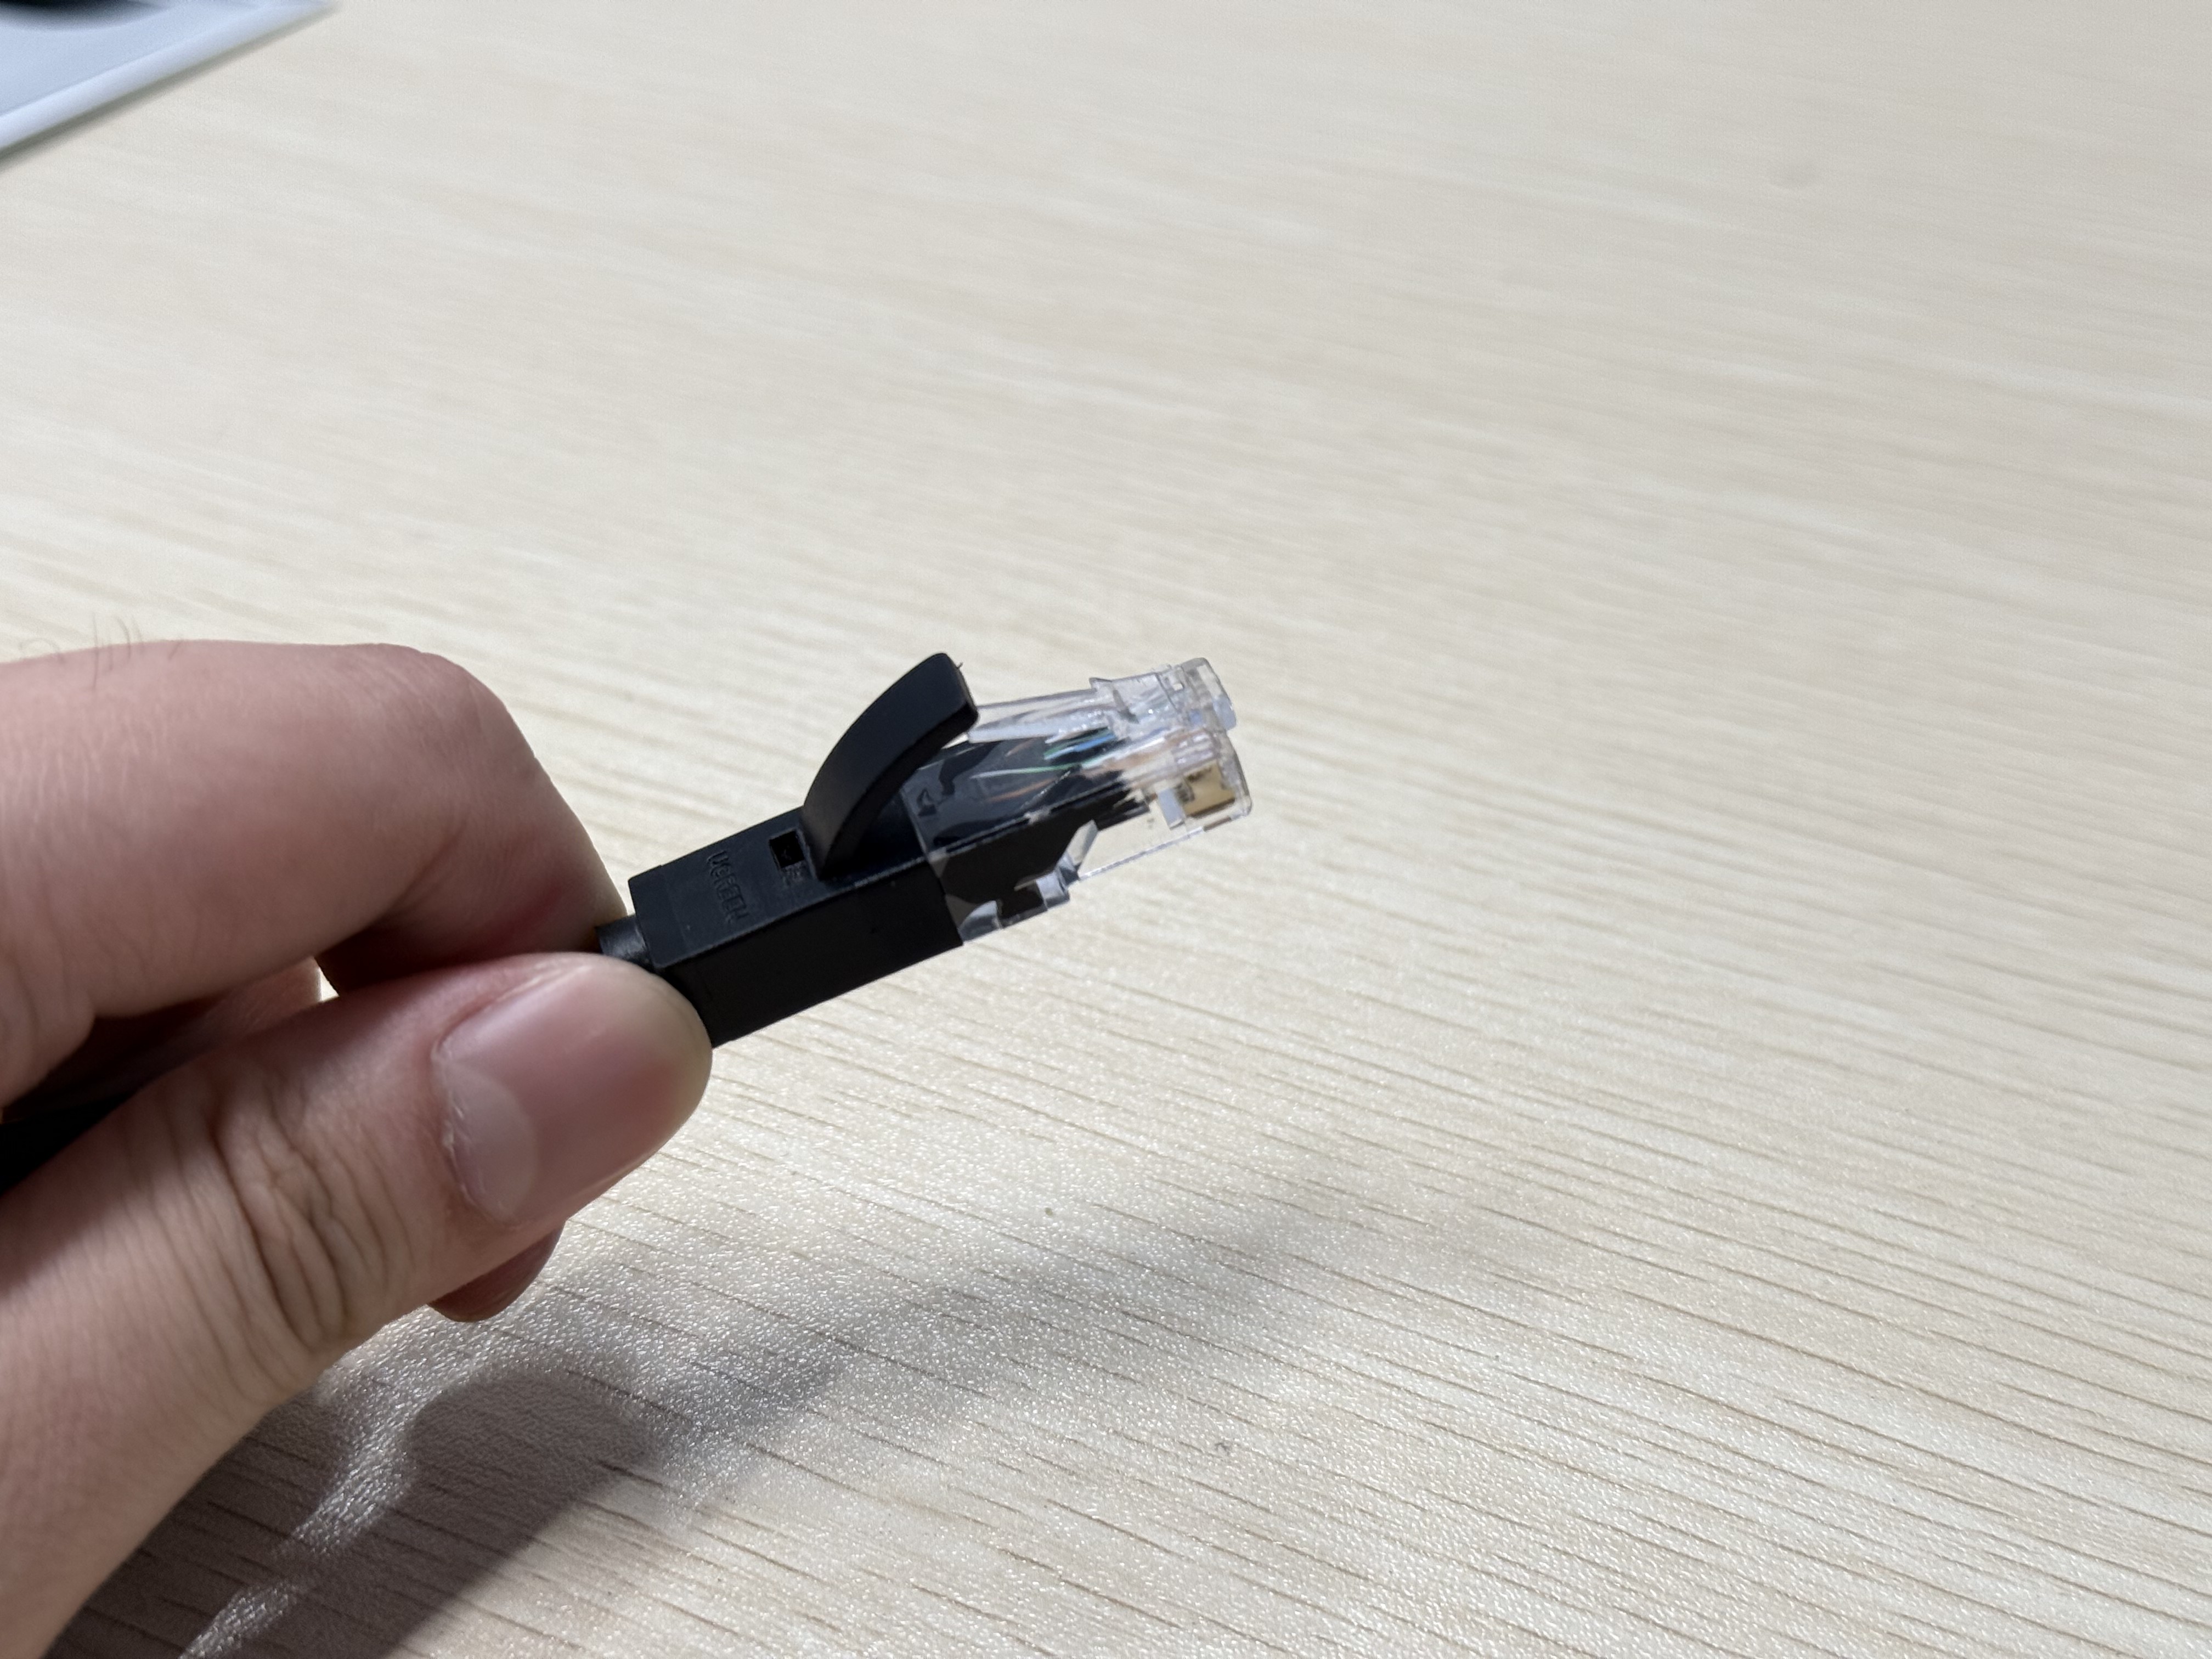
- Gigabit Ethernet cable
- Power cord (varies by region standard)
- Power adapter
- Thermal silicone pads
- M.2 hard drive mounting screws
How to Install Hard Drives
3.5-inch Hard Drive Installation
Preparations
- Prepare a 3.5-inch hard drive (not included). Note that creating a storage pool requires formatting the hard drive, so ensure there is no important data on the drive or that data has been backed up.
- Ensure the device is powered off before starting the installation (if not, press and hold the Power Button on the back until the device shuts down).
3.5-inch Installation Steps
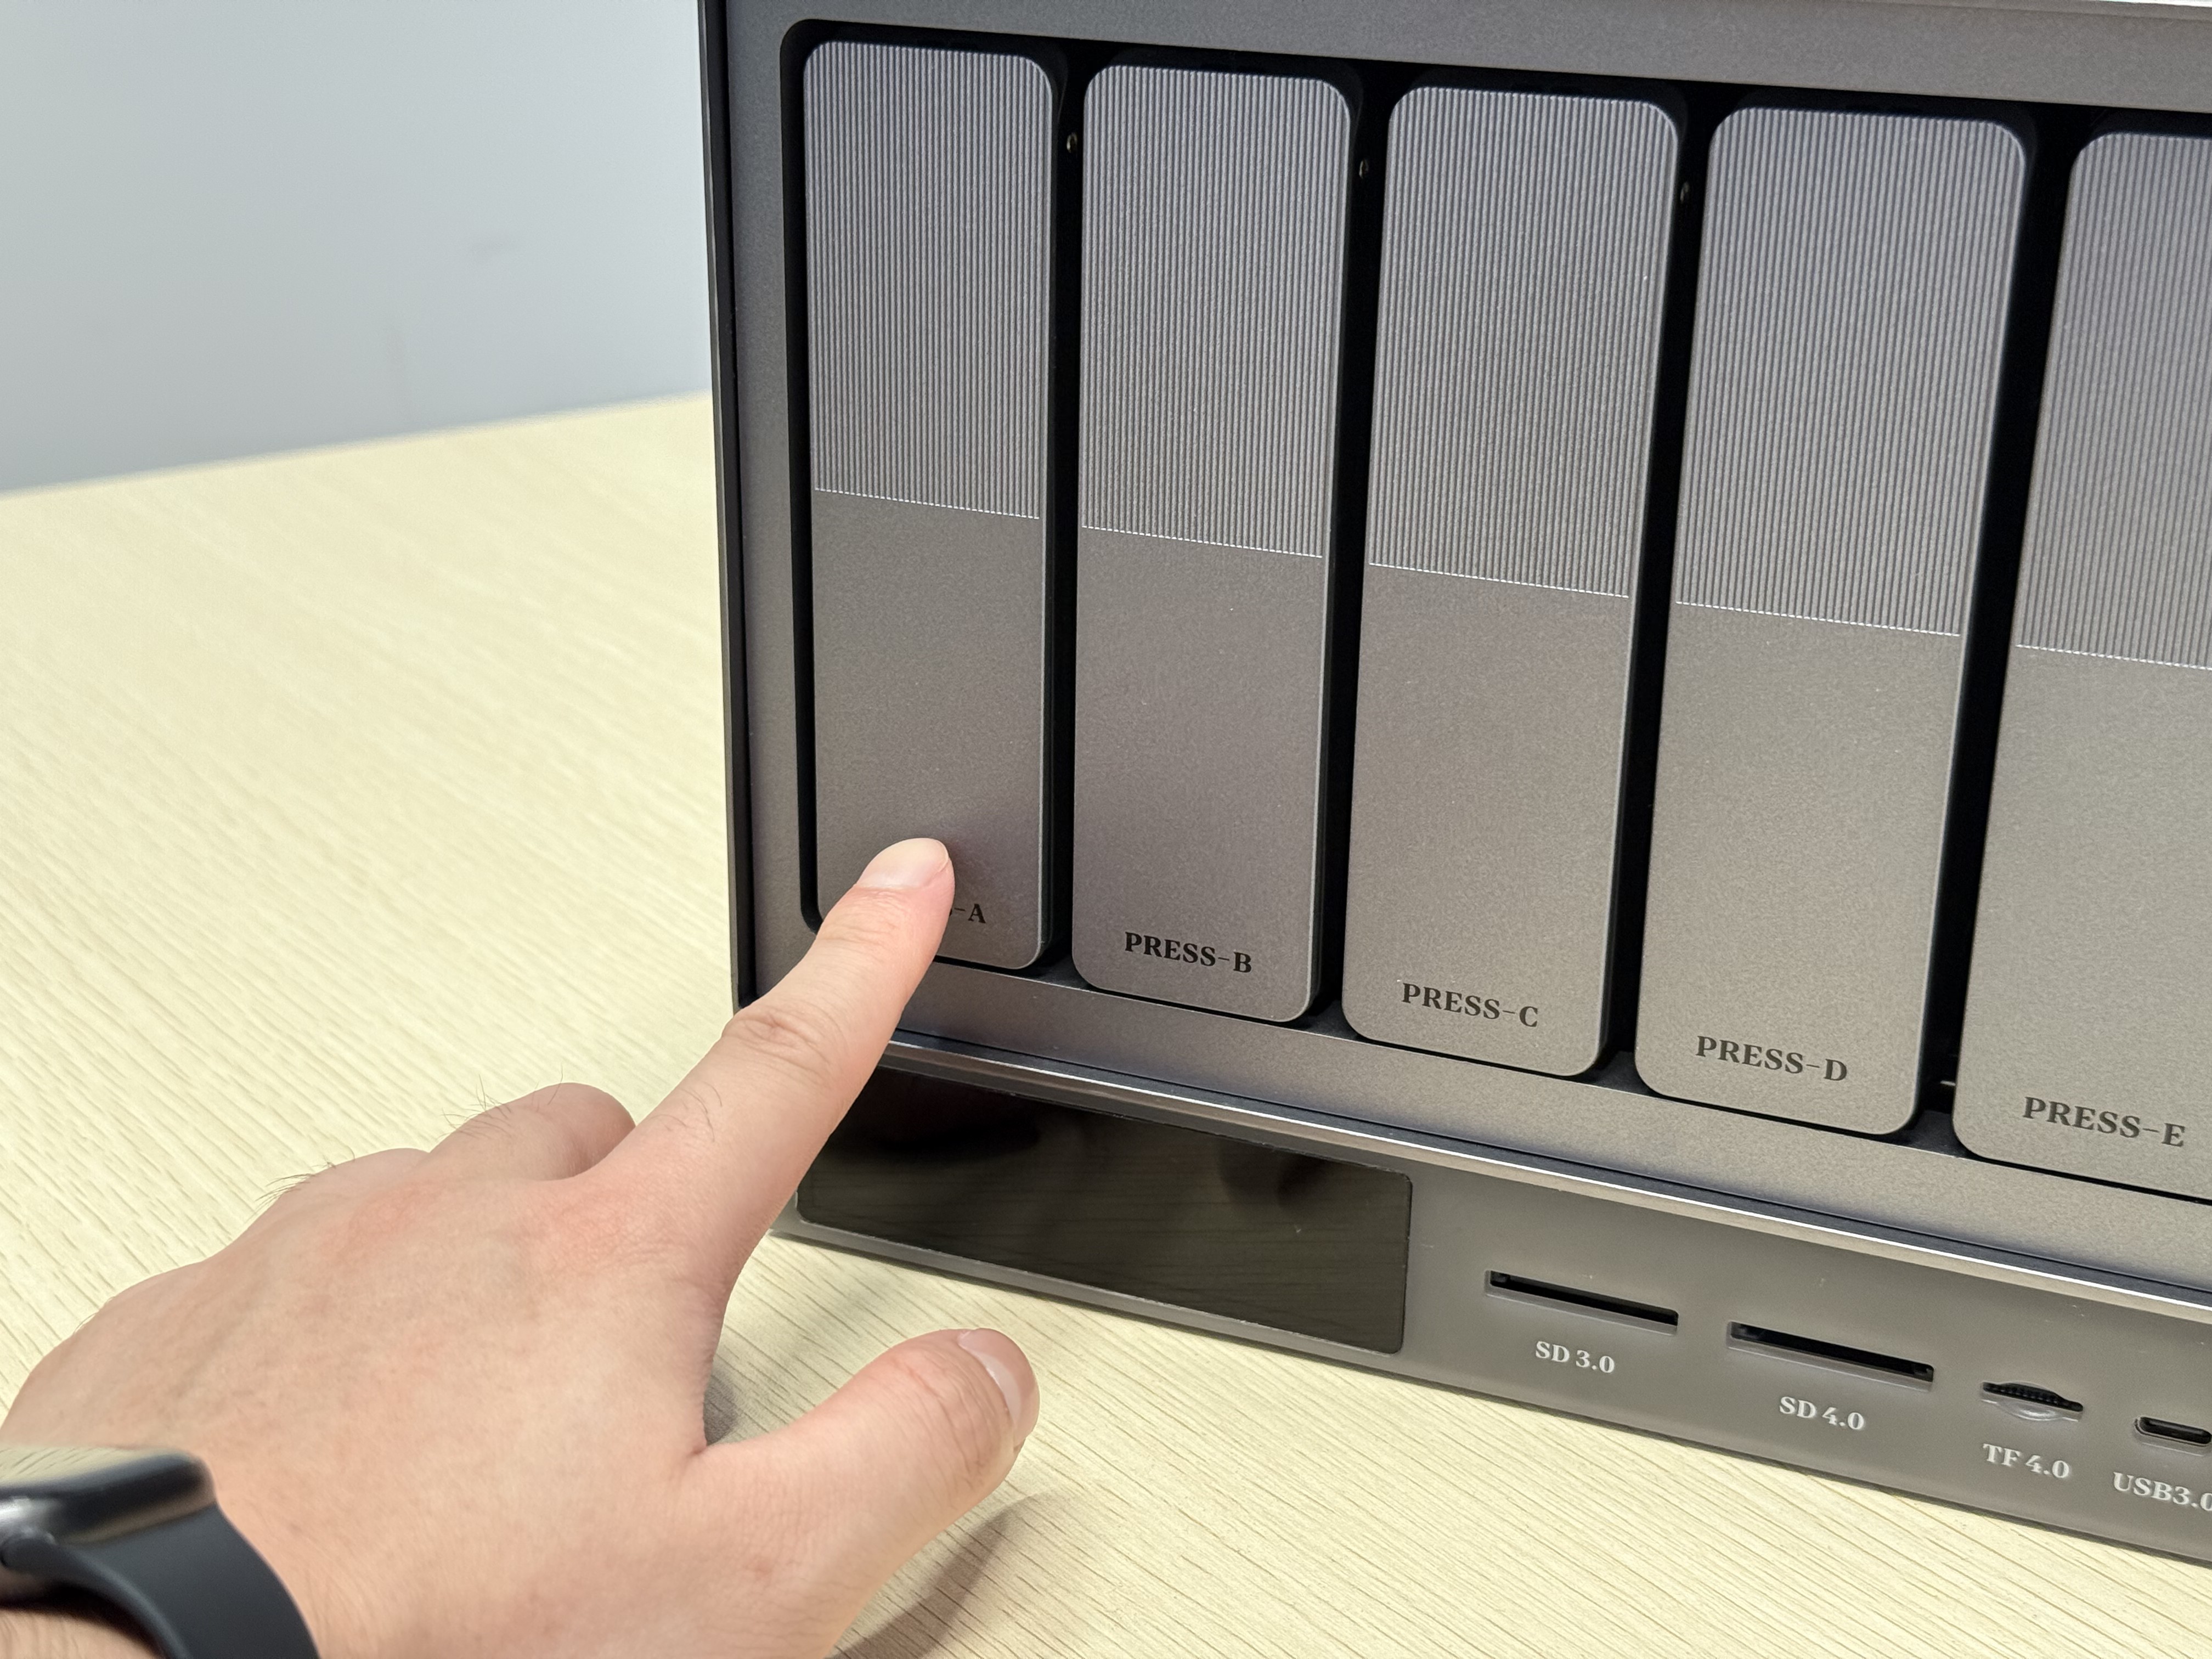
- Remove the front dust filter.
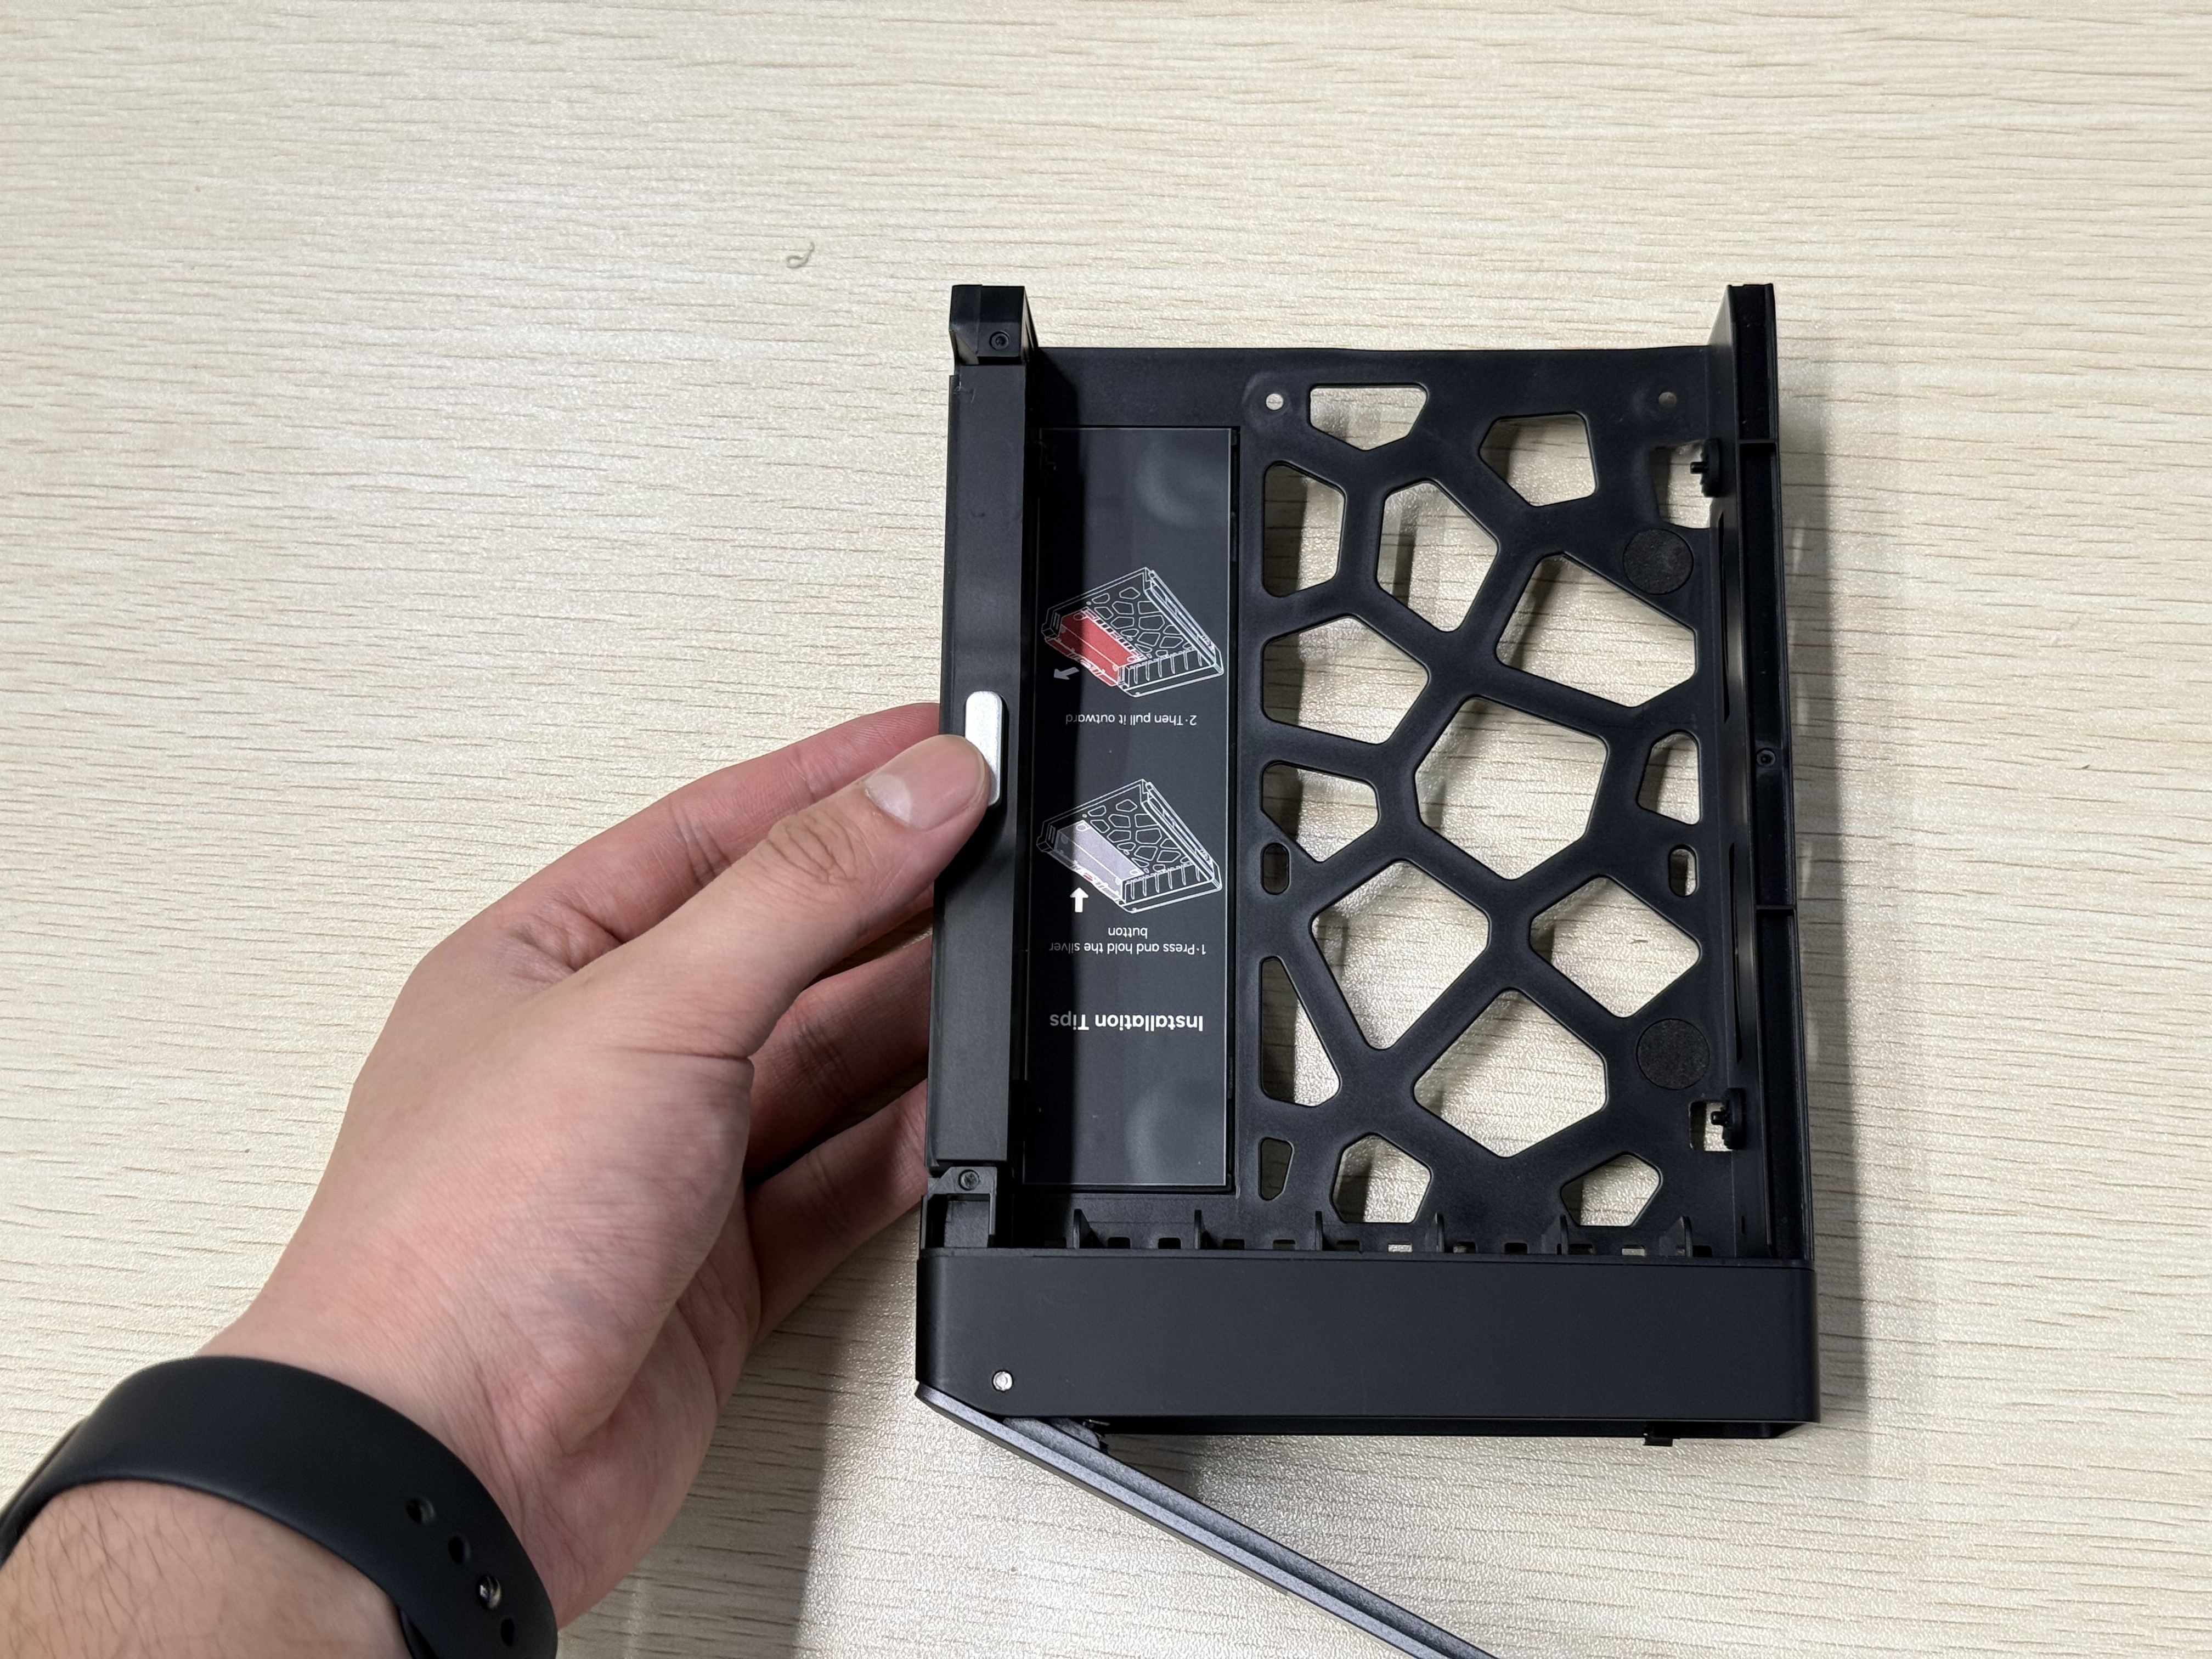
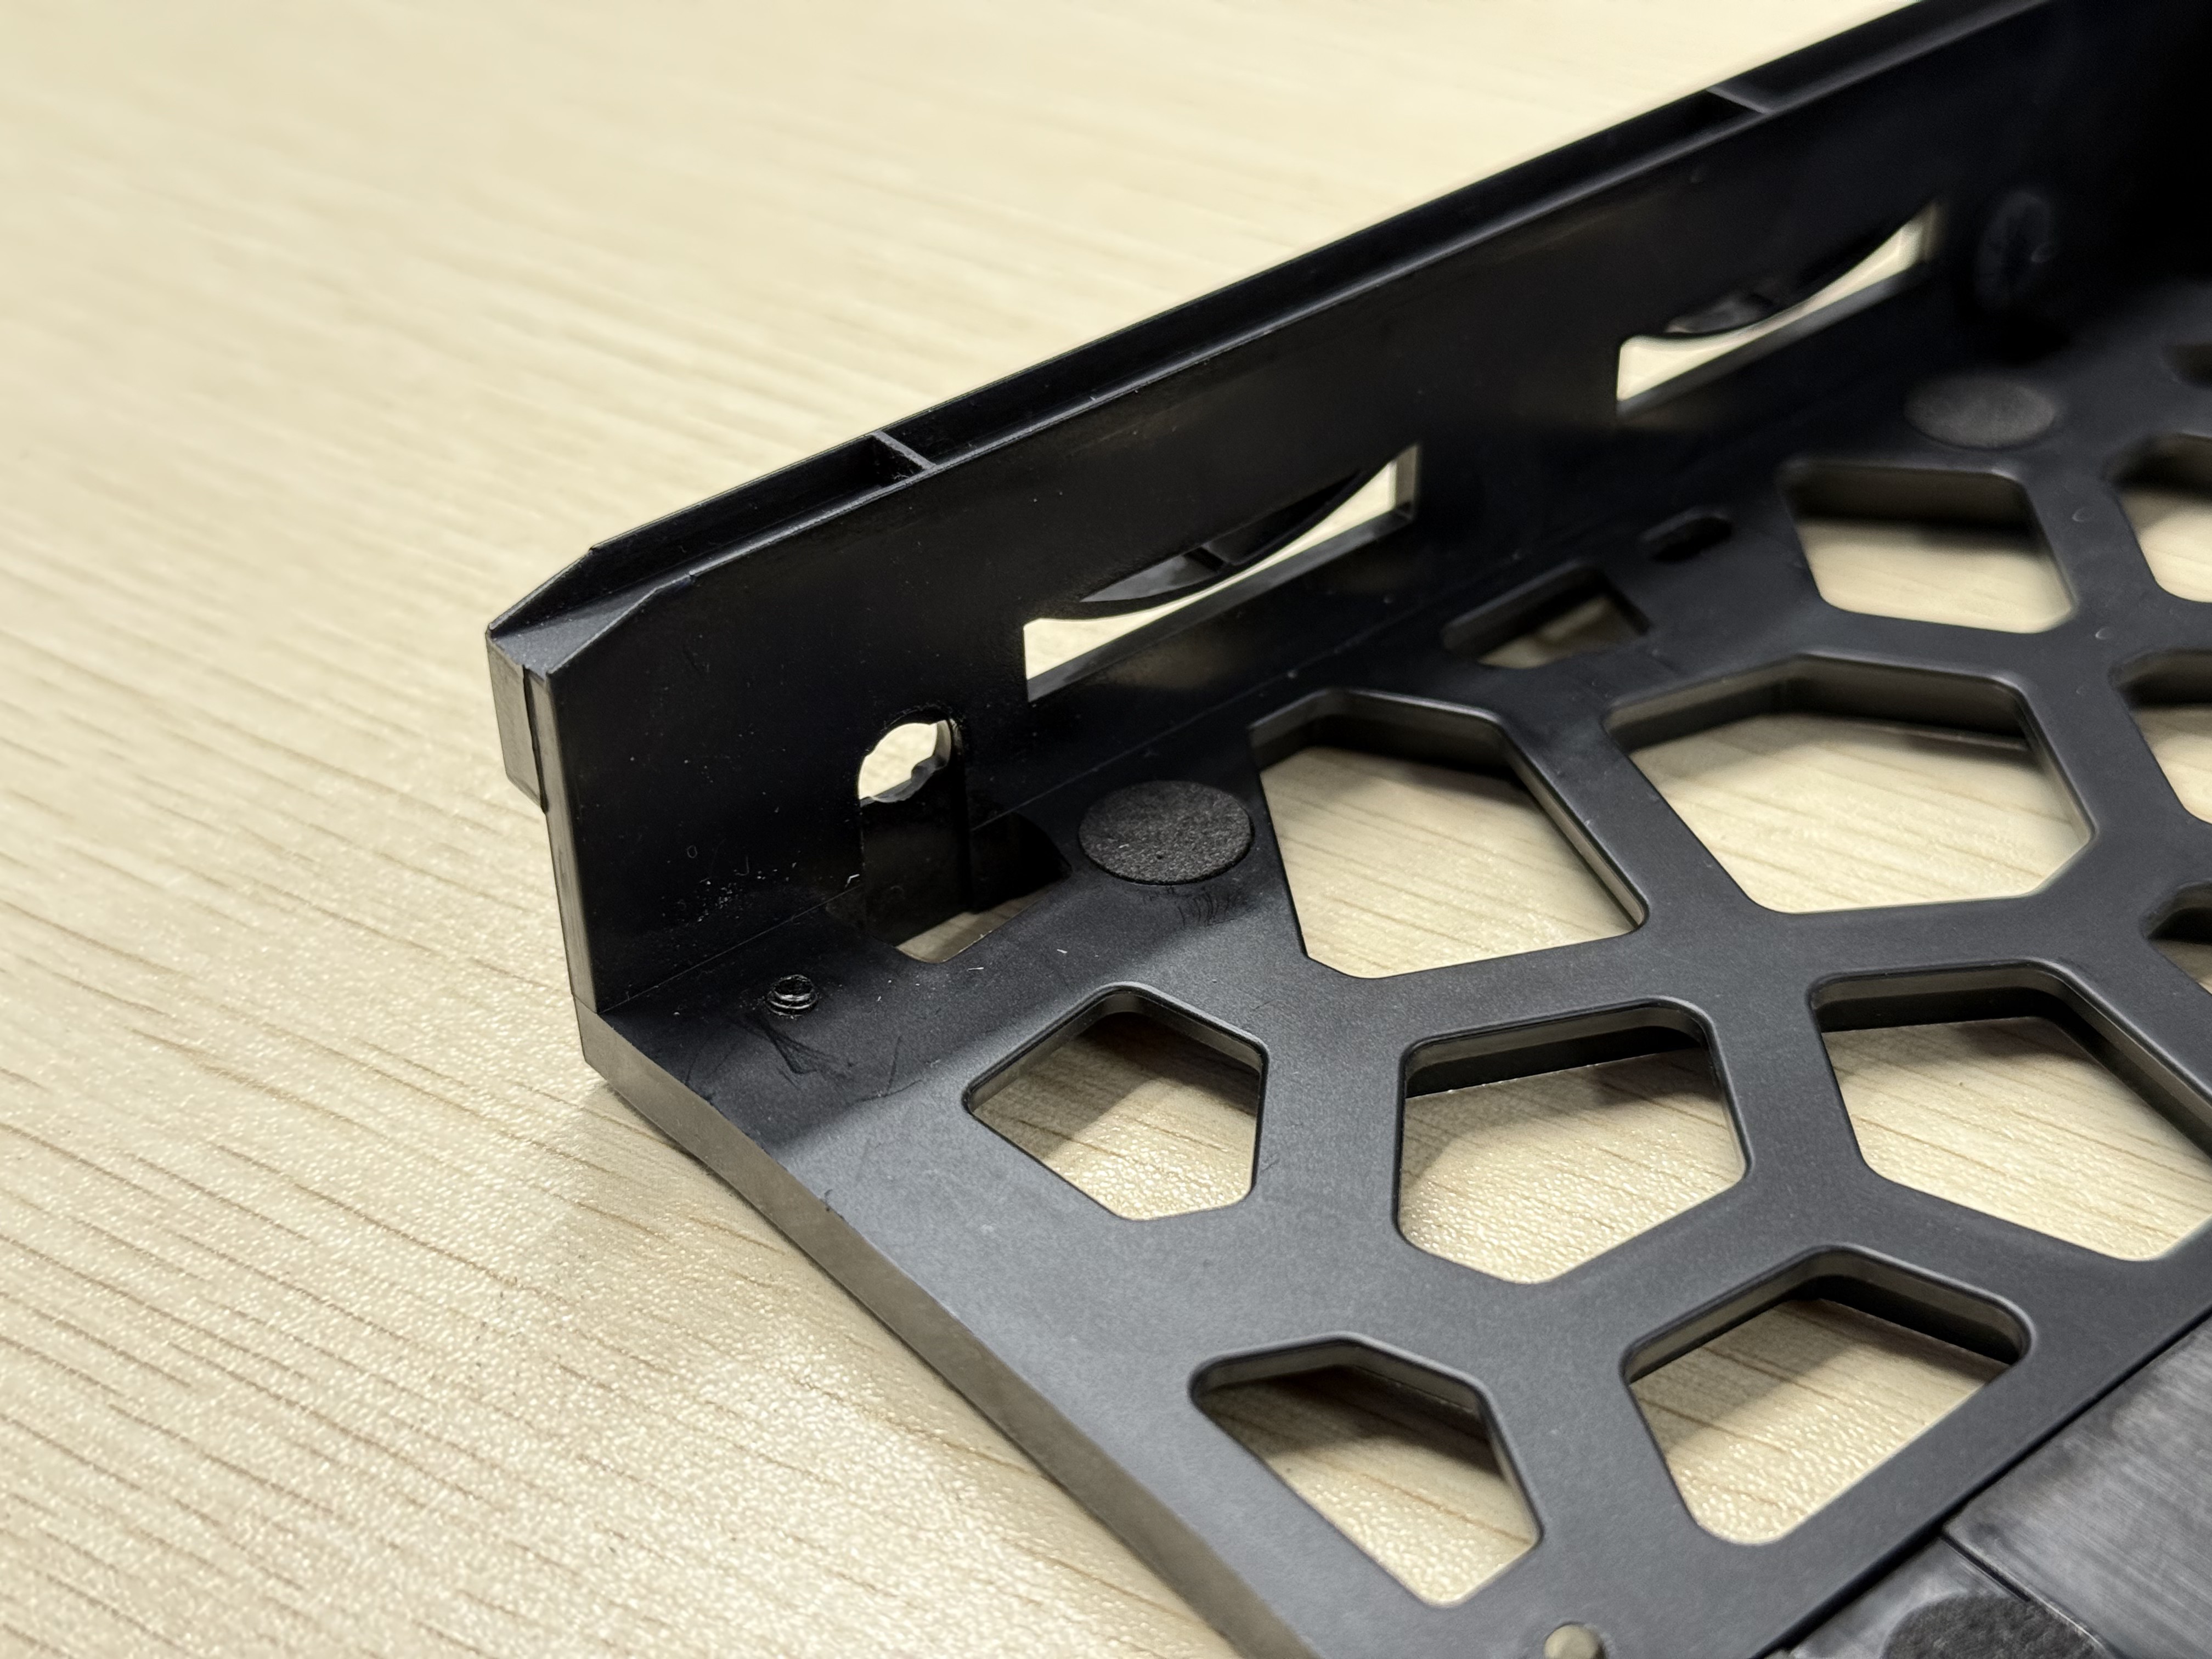
- Press the logo area on the hard drive bay to release the handle, then pull out the bay.

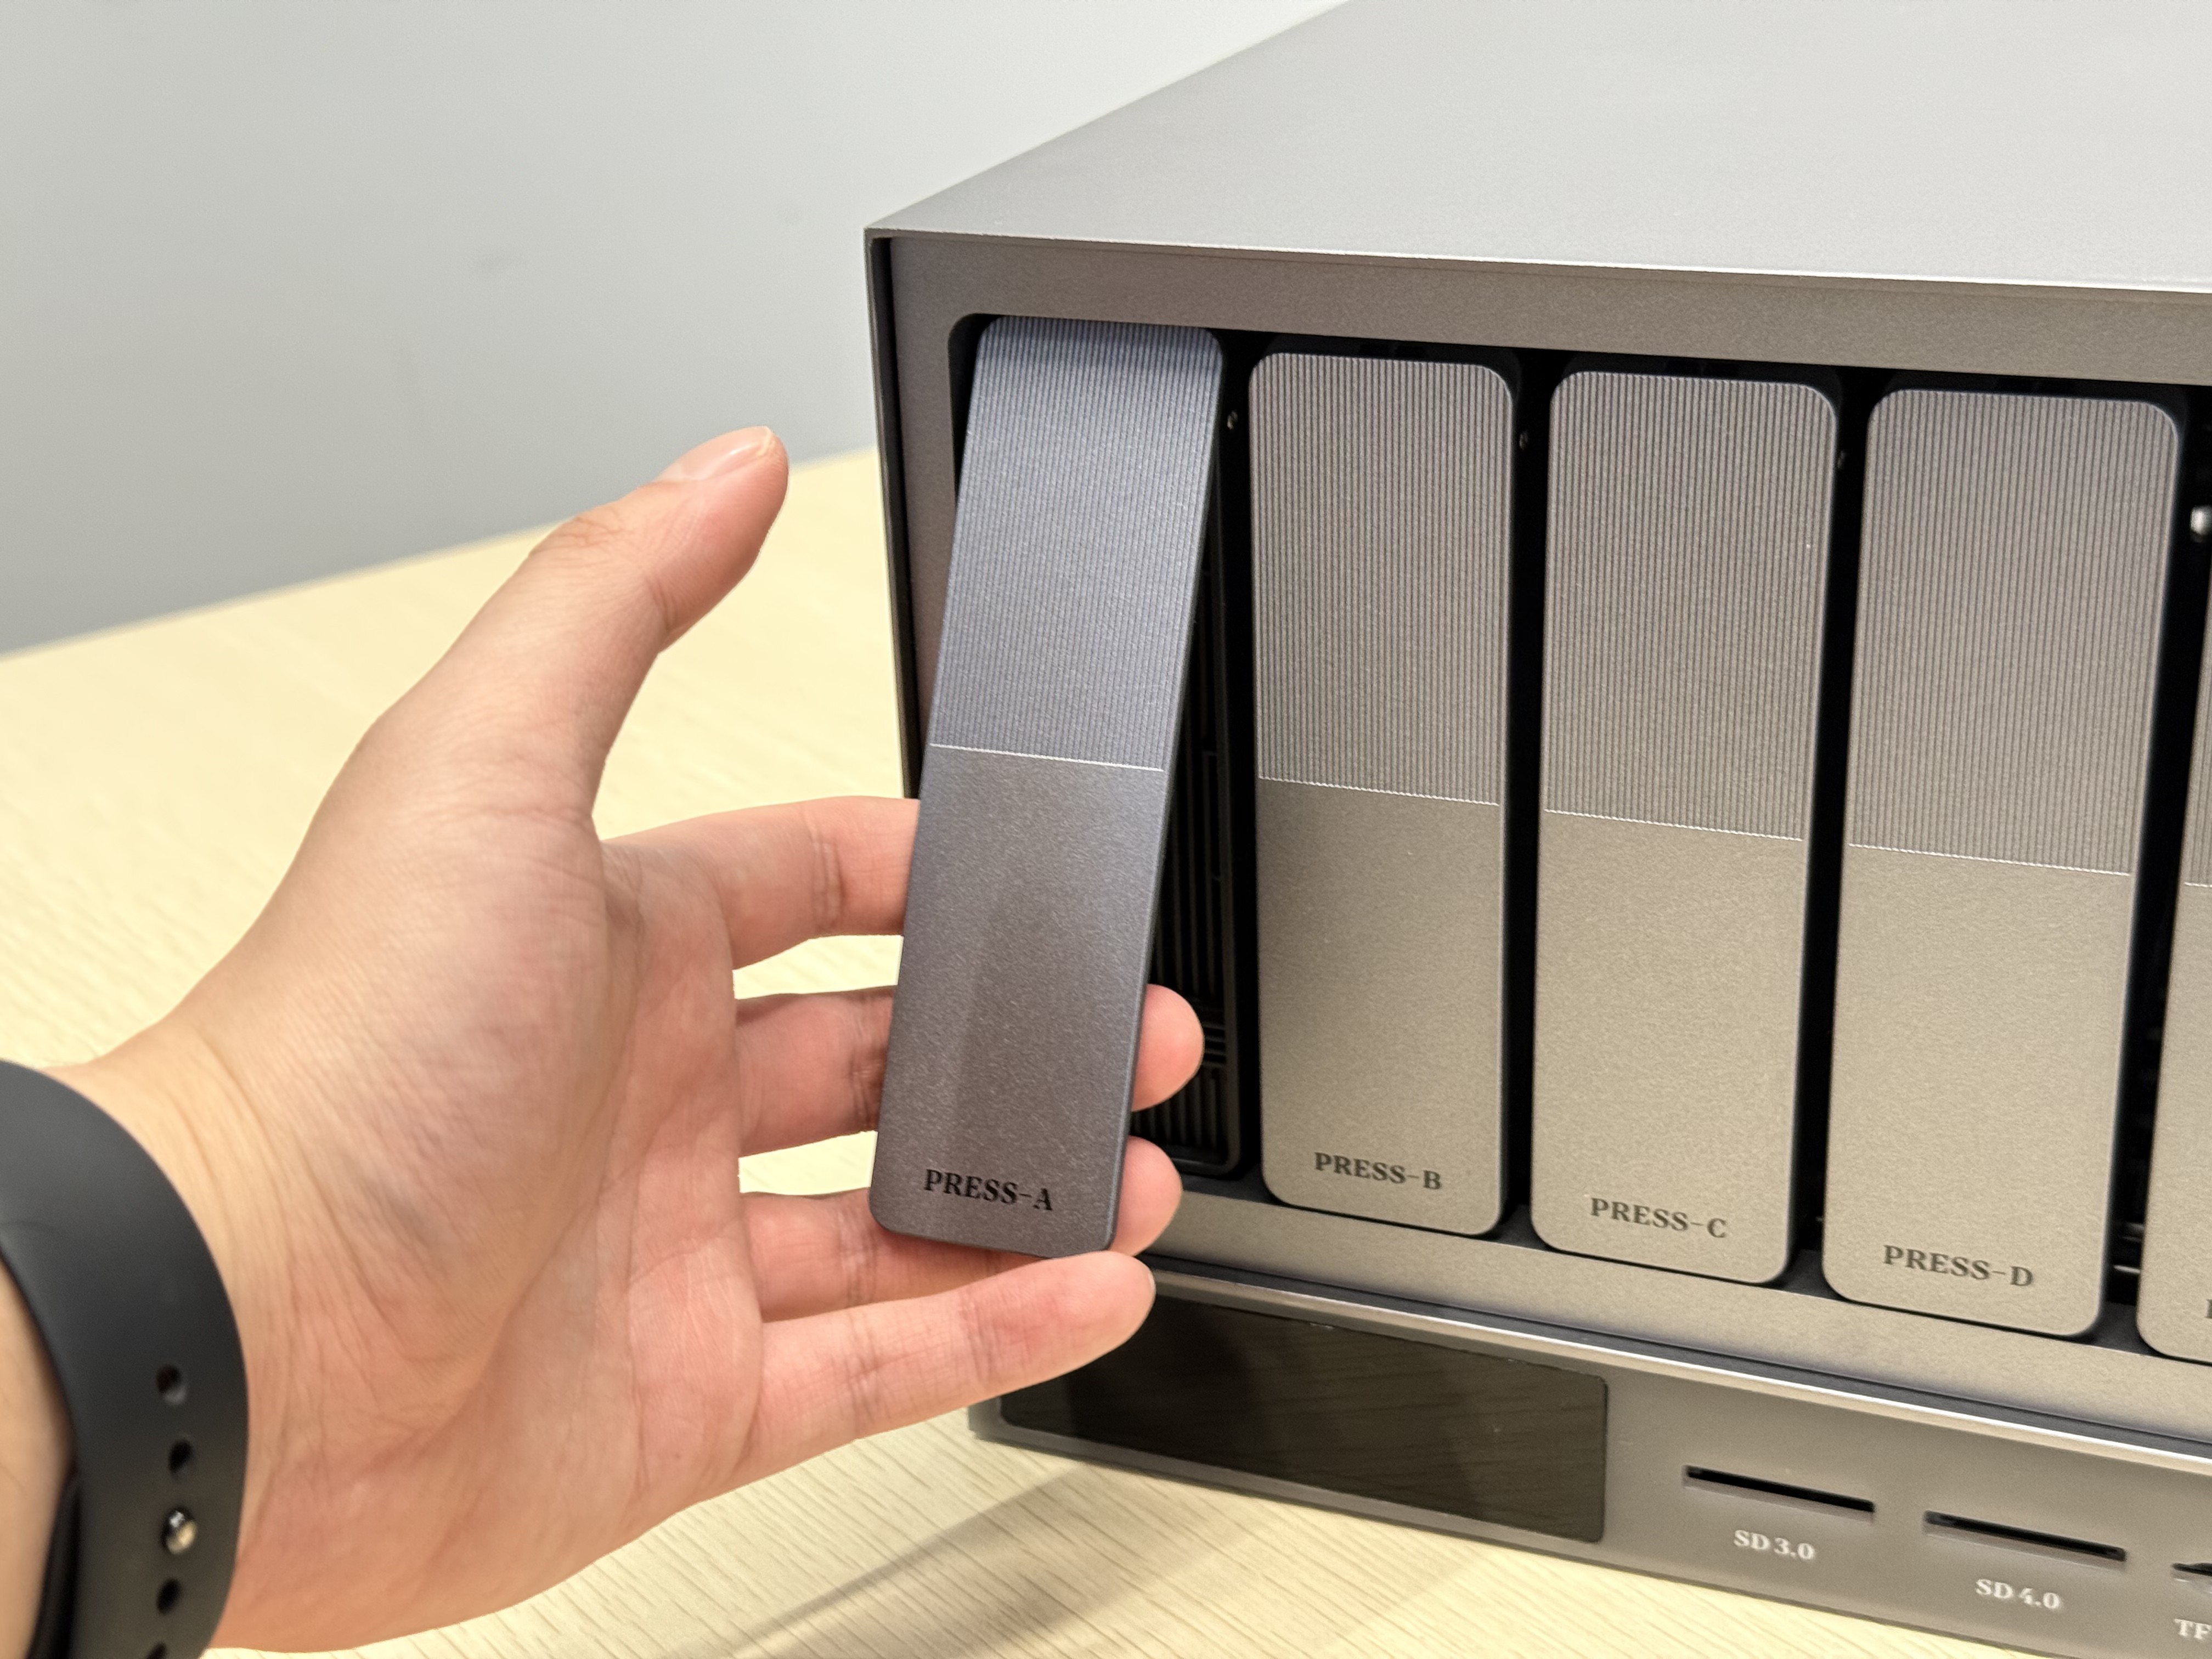
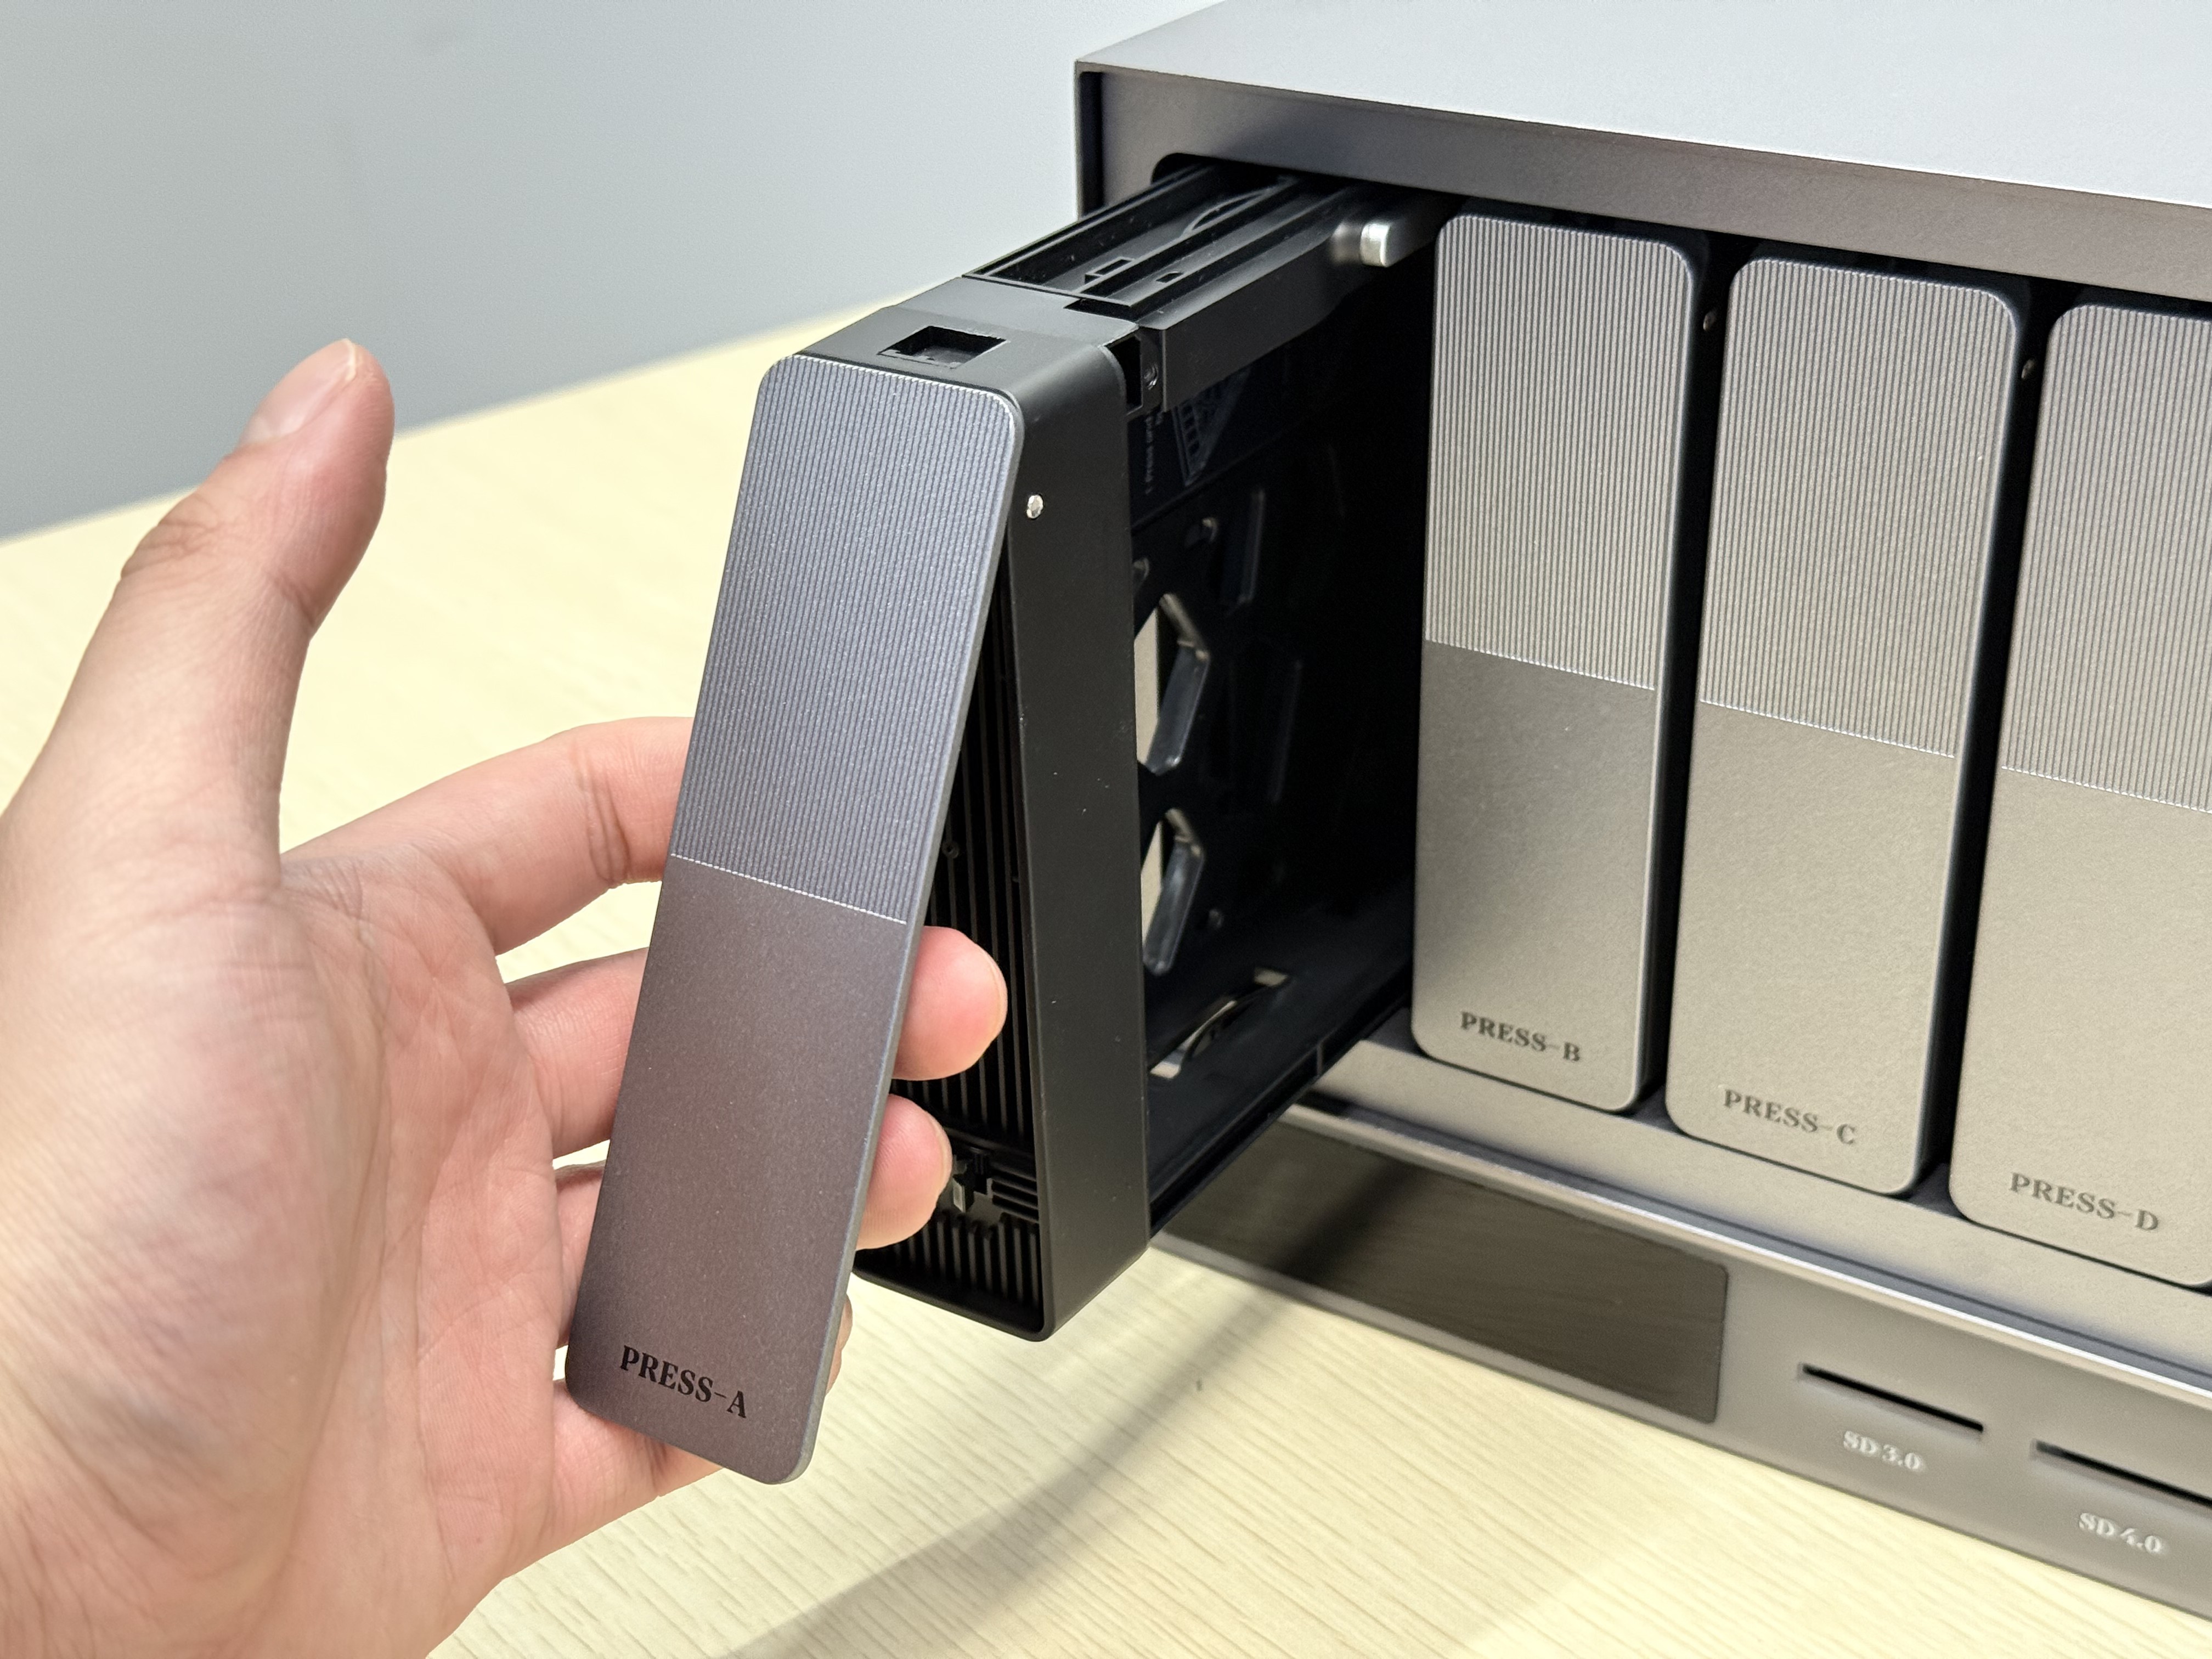
- Hold the silver button on the hard drive bay and pull it outward.

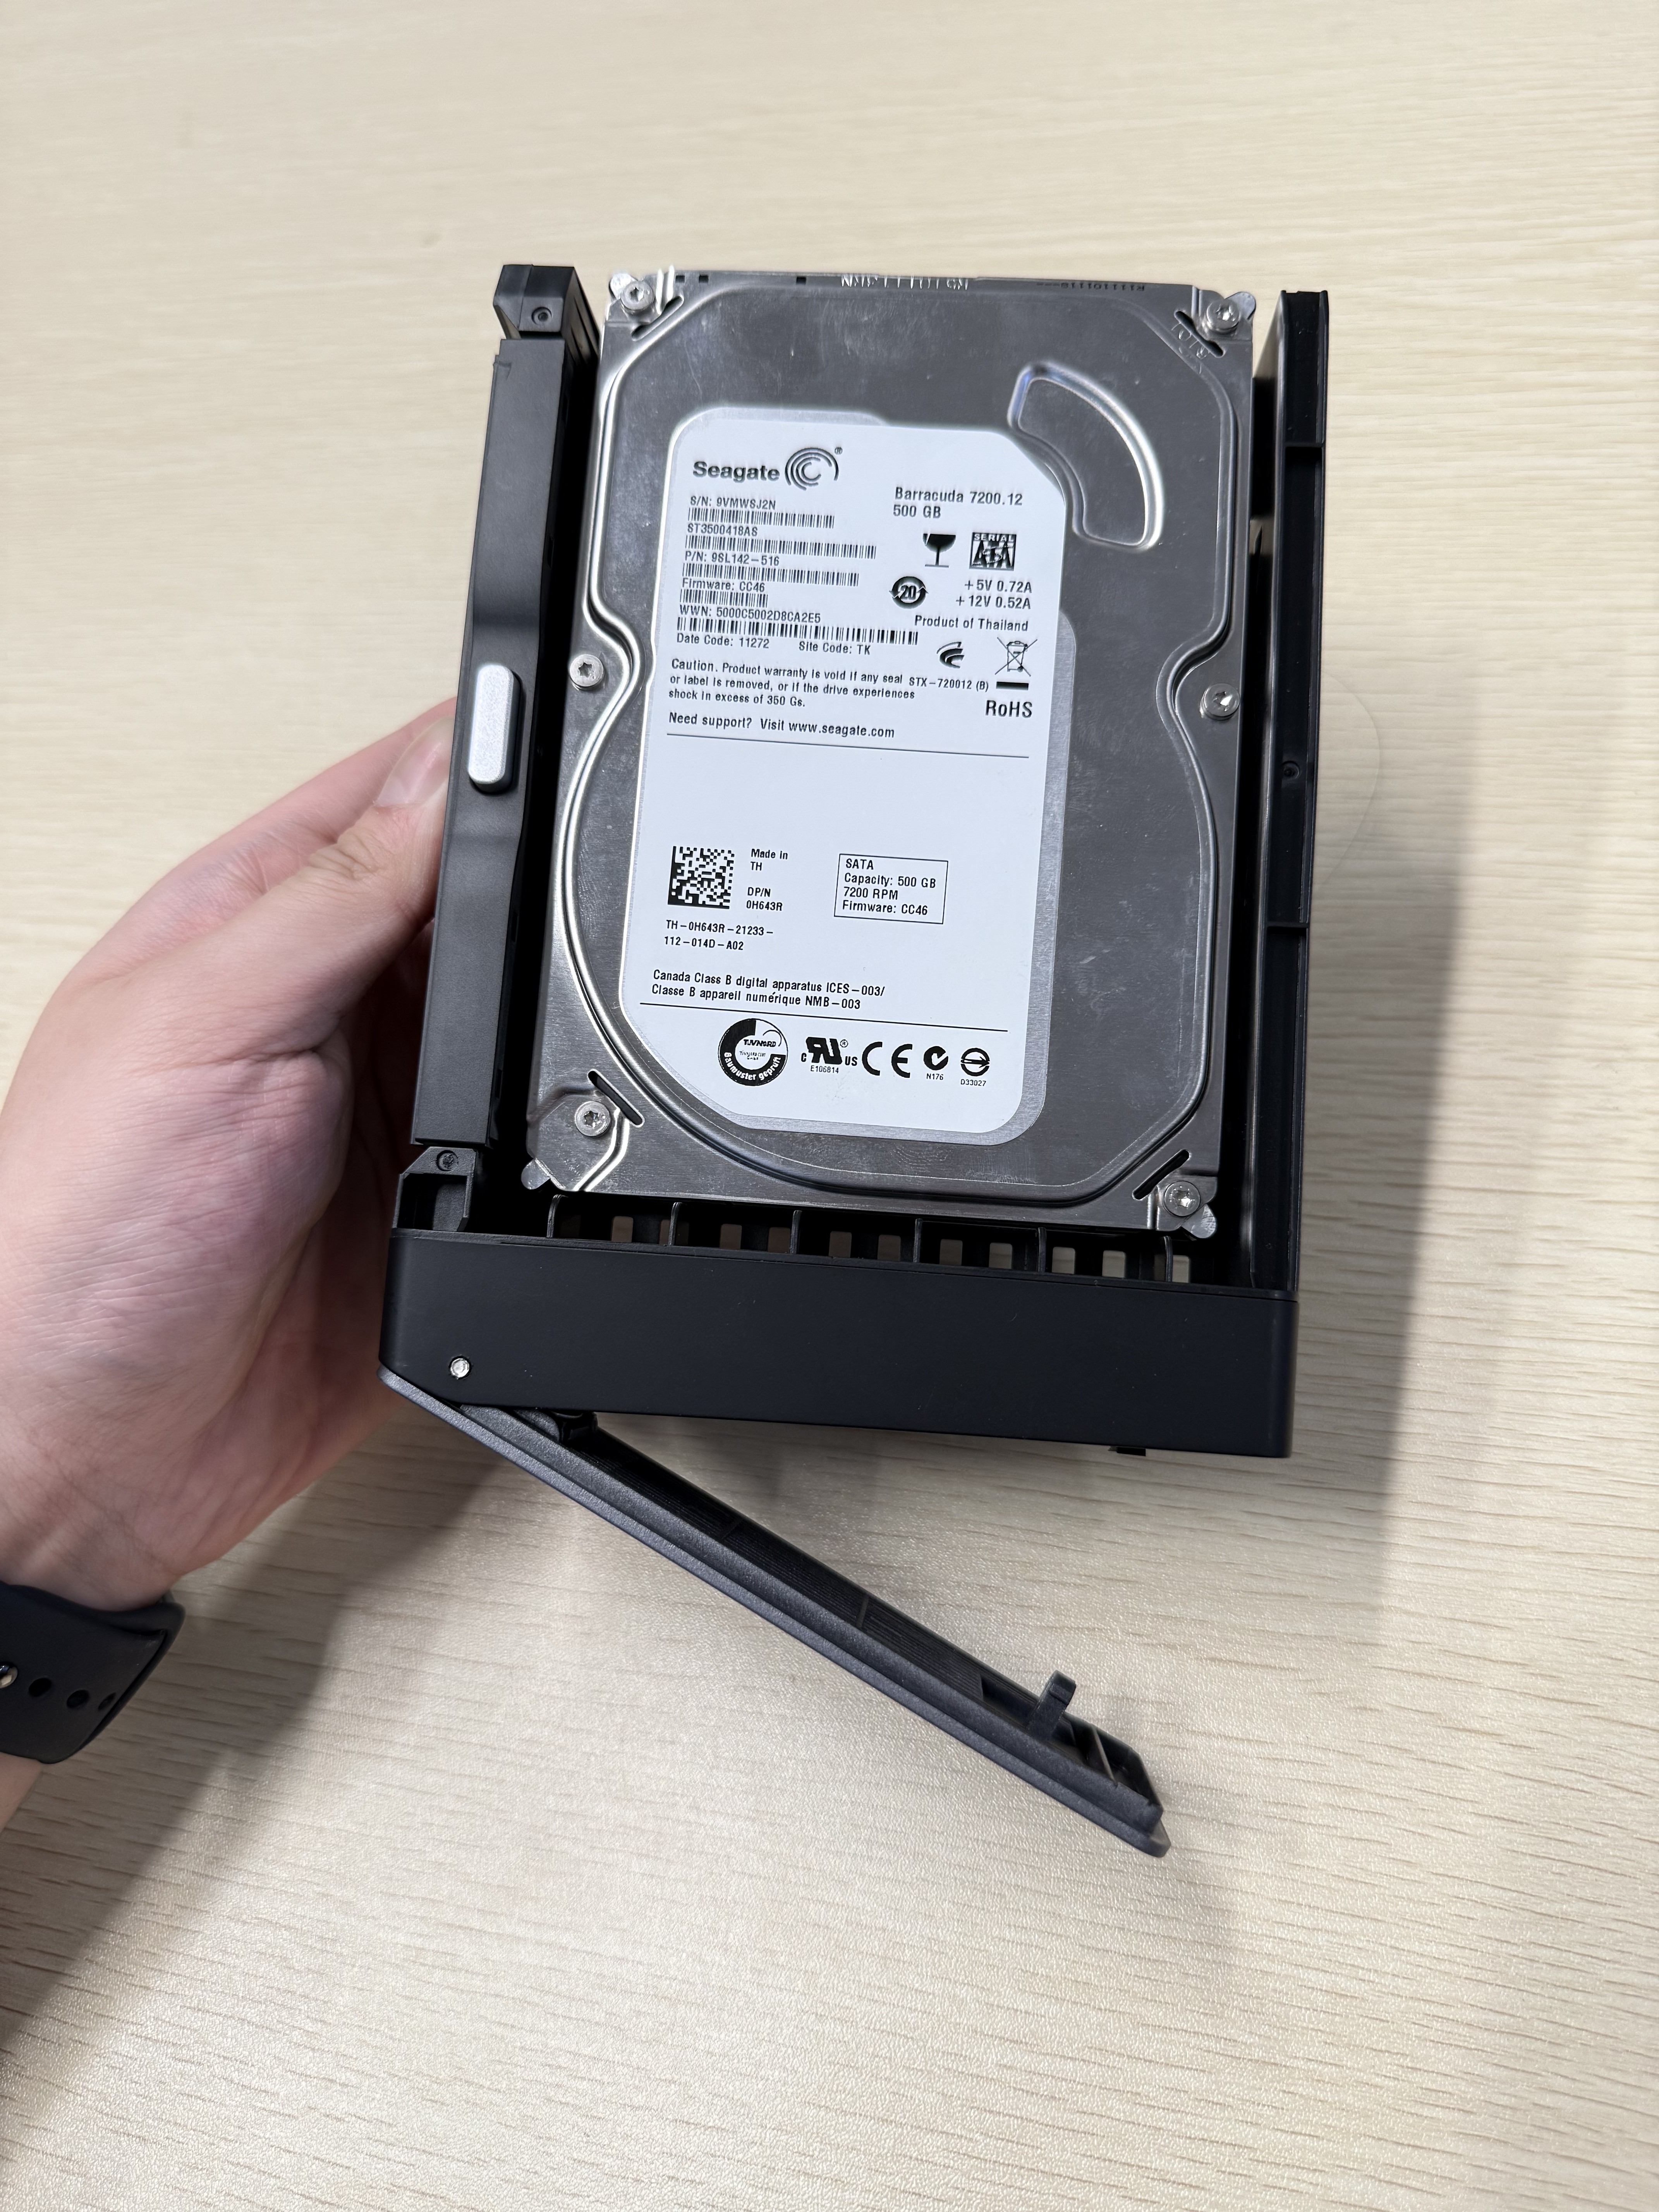
- Insert the hard drive with the label side up and the circuit board facing the bay. Align the bay's protrusions with the hard drive's screw holes.
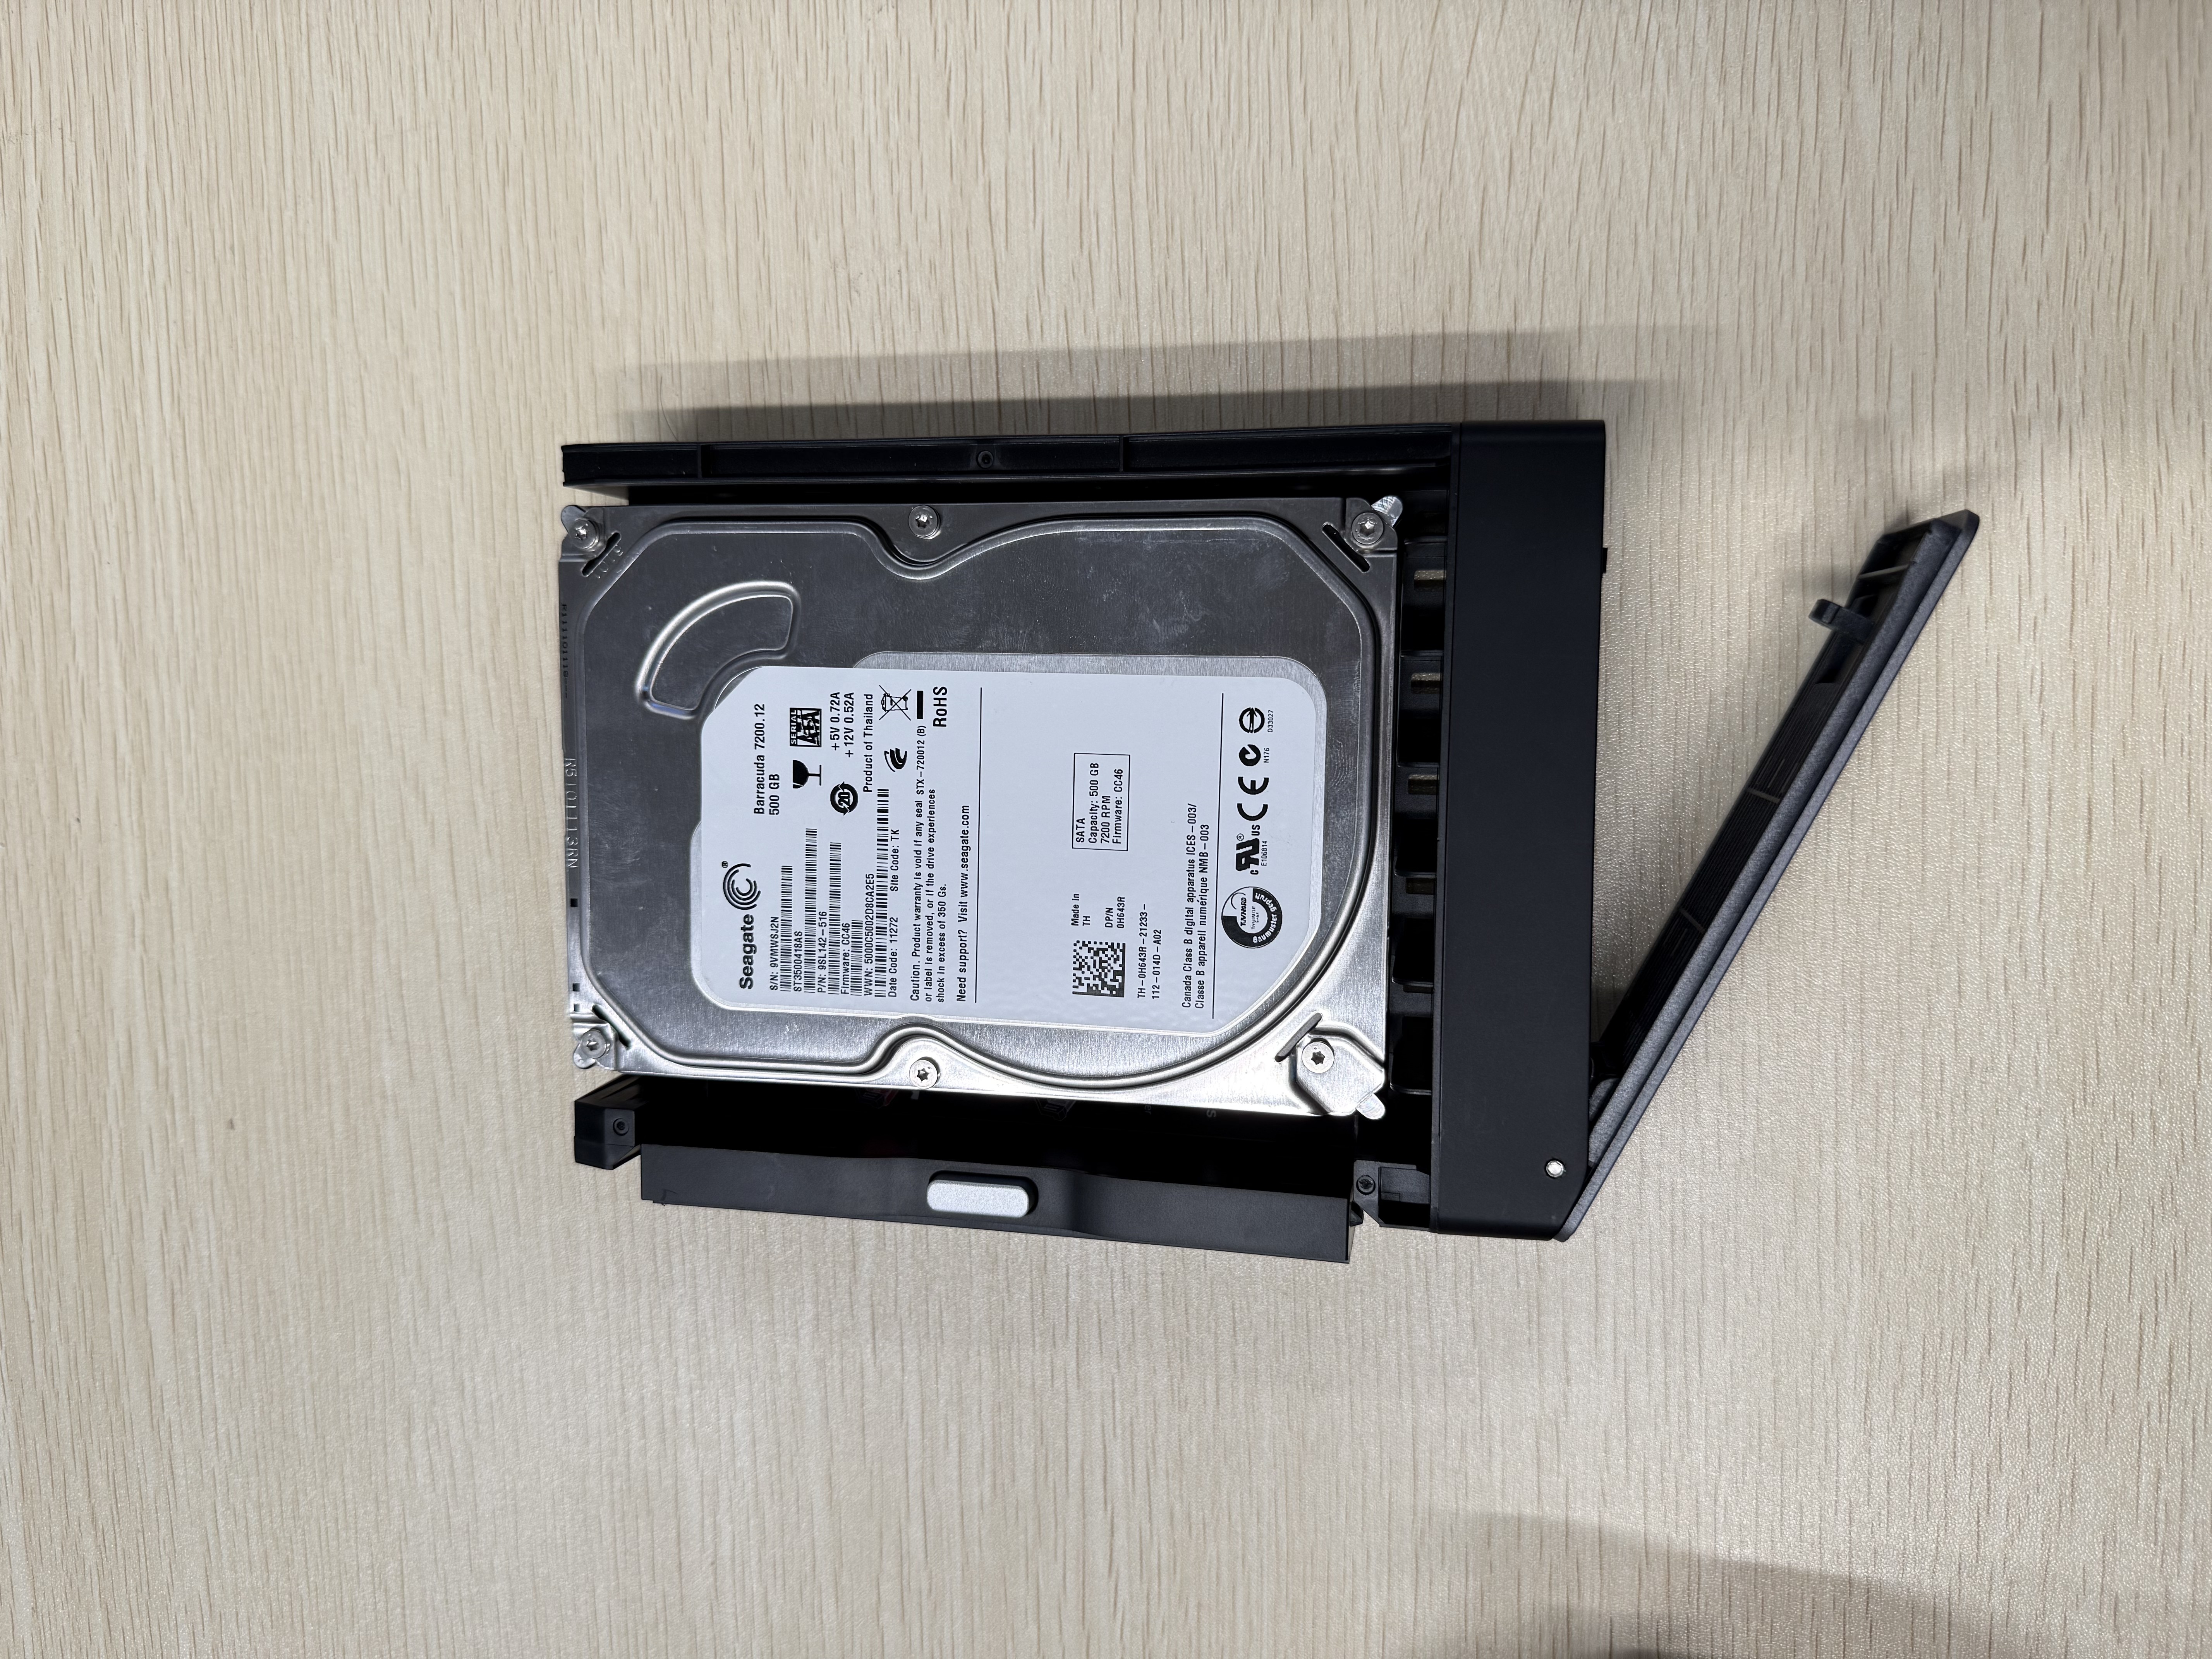
- Close the bay's clamp.
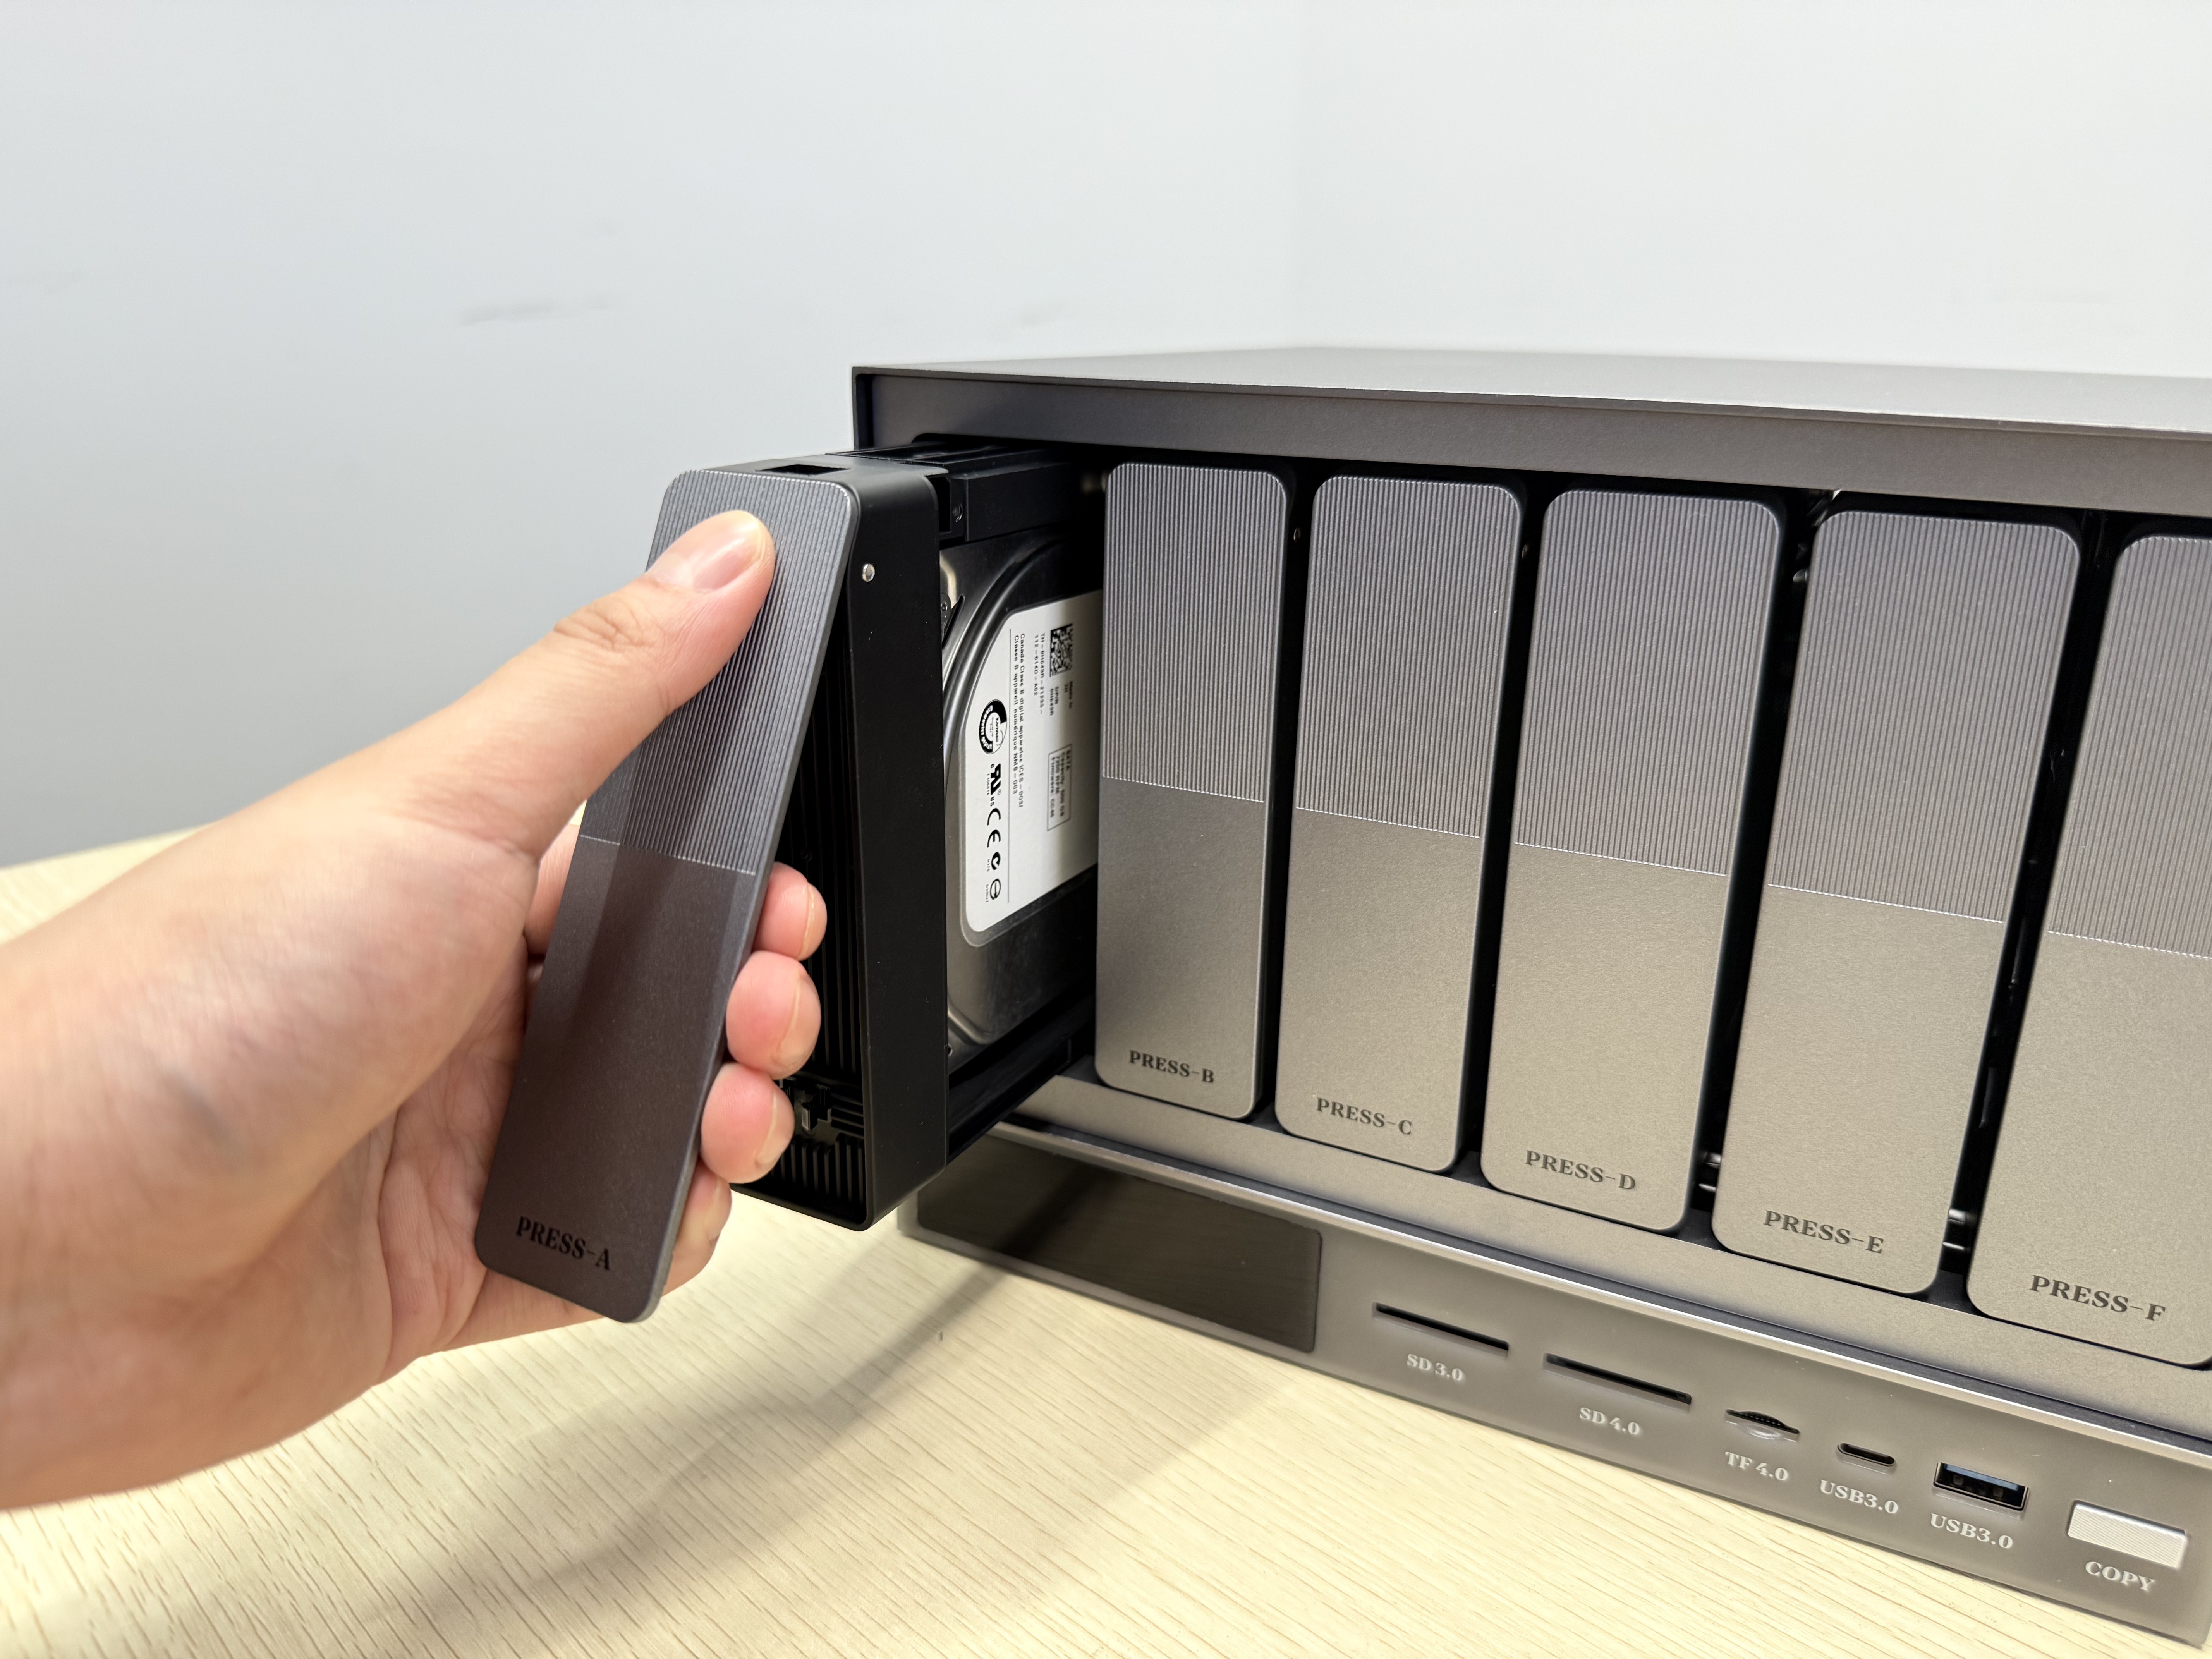
- Push the bay back into the chassis until it clicks into place.
- Press the handle back into place.
- Replace the front dust filter.
2.5-inch Installation
Preparations
- Prepare a 2.5-inch hard drive (not included). Note that creating a storage pool requires formatting the hard drive, so ensure there is no important data on the drive or that data has been backed up.
- Ensure the device is powered off before starting the installation (if not, press and hold the Power Button on the back until the device shuts down).
- Prepare mounting screws for the 2.5-inch hard drive (not included).
2.5-inch Installation Steps
- Remove the front dust filter.
- Press the logo area on the hard drive bay to release the handle, then pull out the bay.
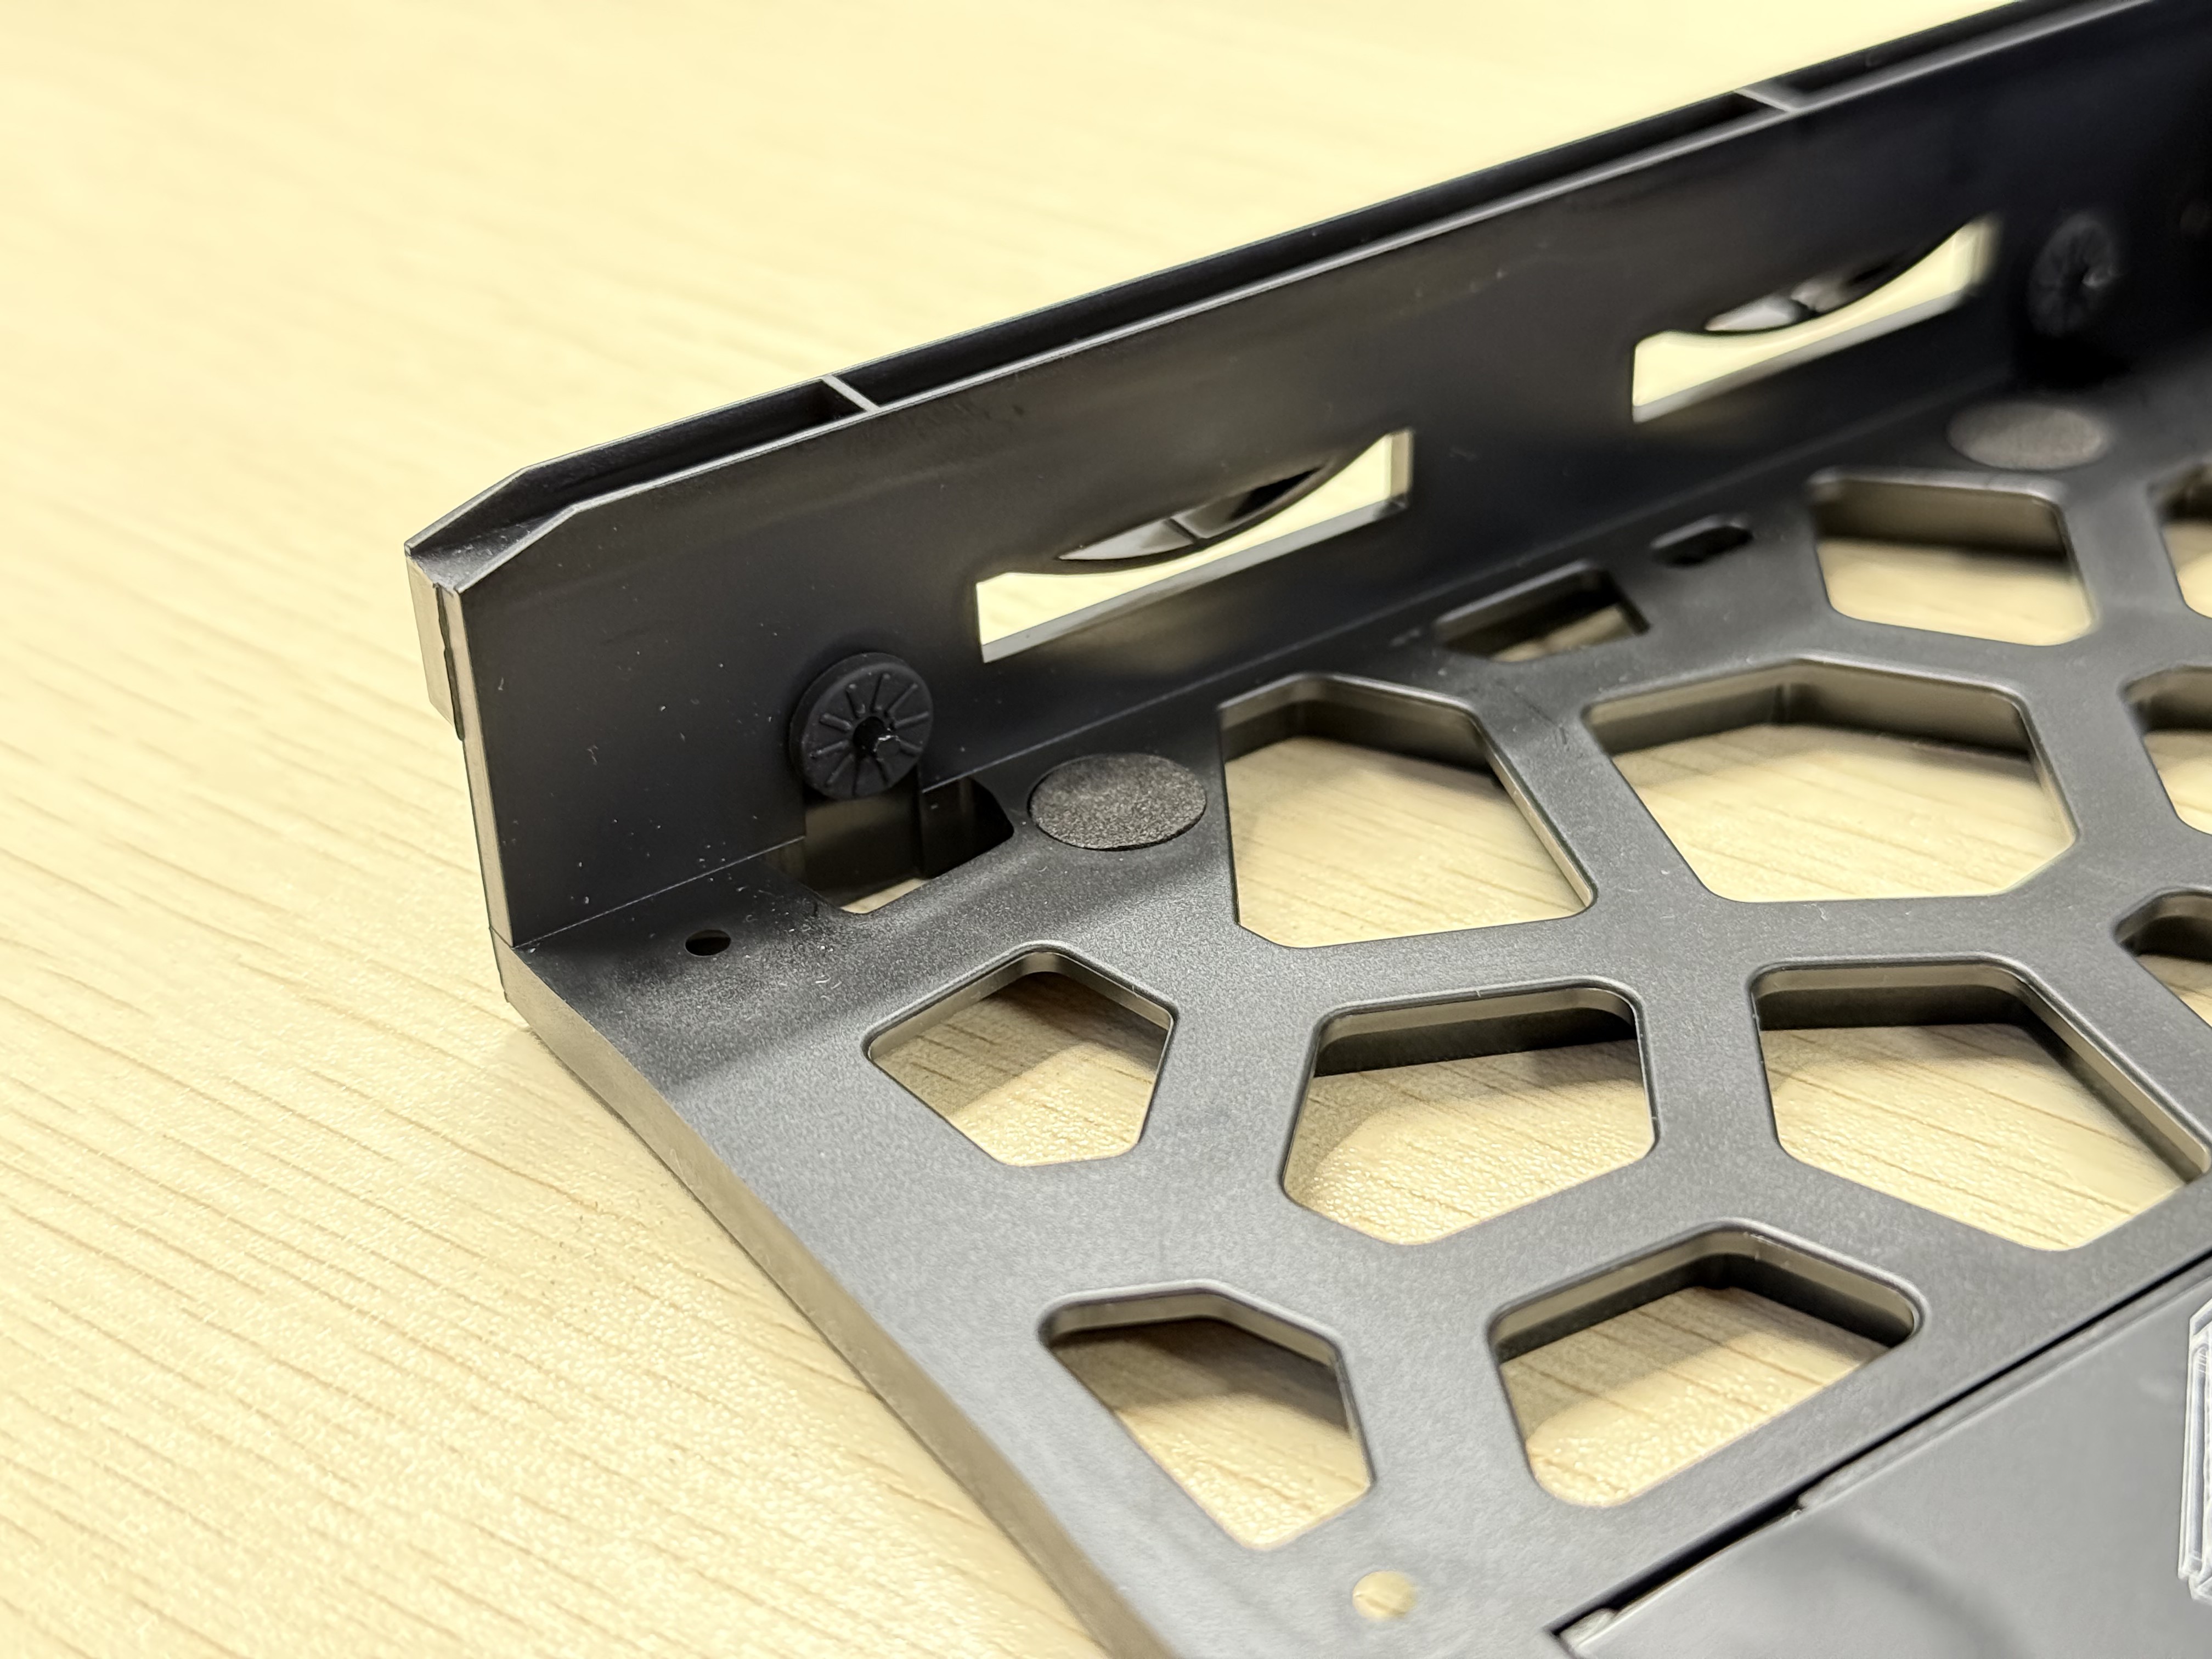
- Locate the shock-absorbing pad on the bottom left of the hard drive bay, farthest from the release handle.
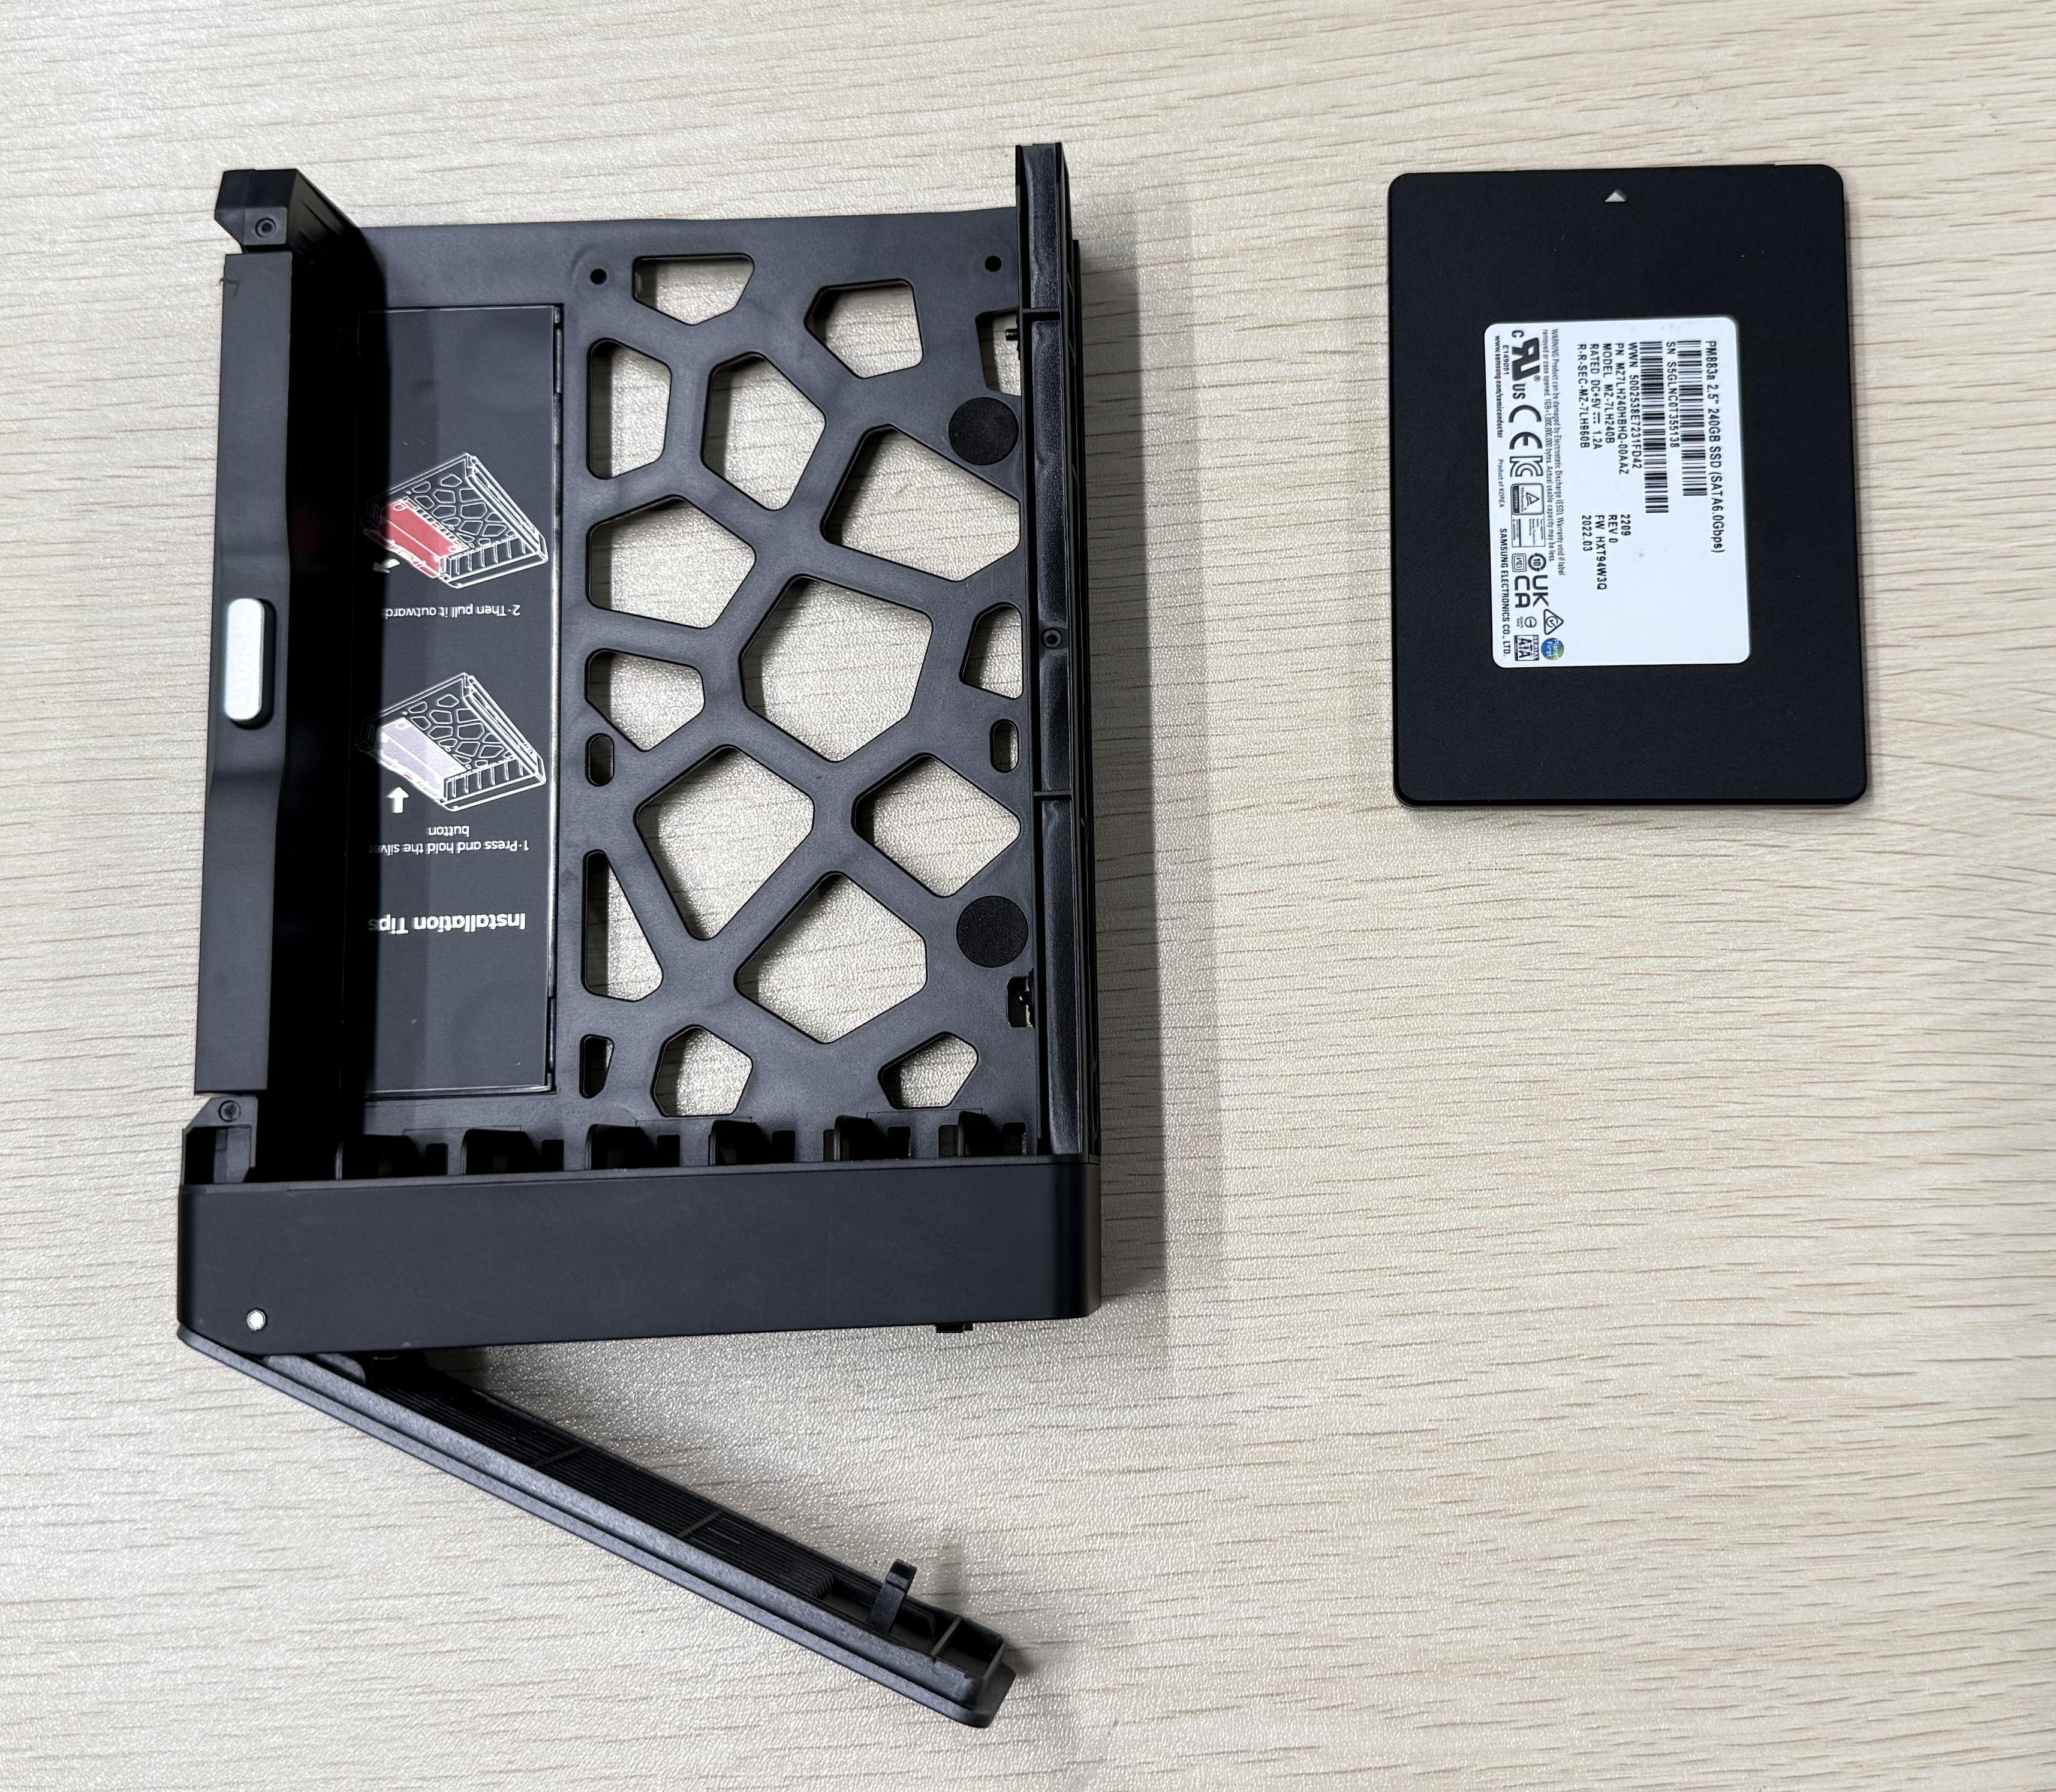
- Place the hard drive label side up into the bay.
- Flip the bay over and secure the hard drive with the mounting screws. Tighten them firmly.
- Push the bay back into the chassis until it clicks into place.
- Press the handle back into place.
- Replace the front cover.
M.2 Hard Drive Installation
Preparation Steps
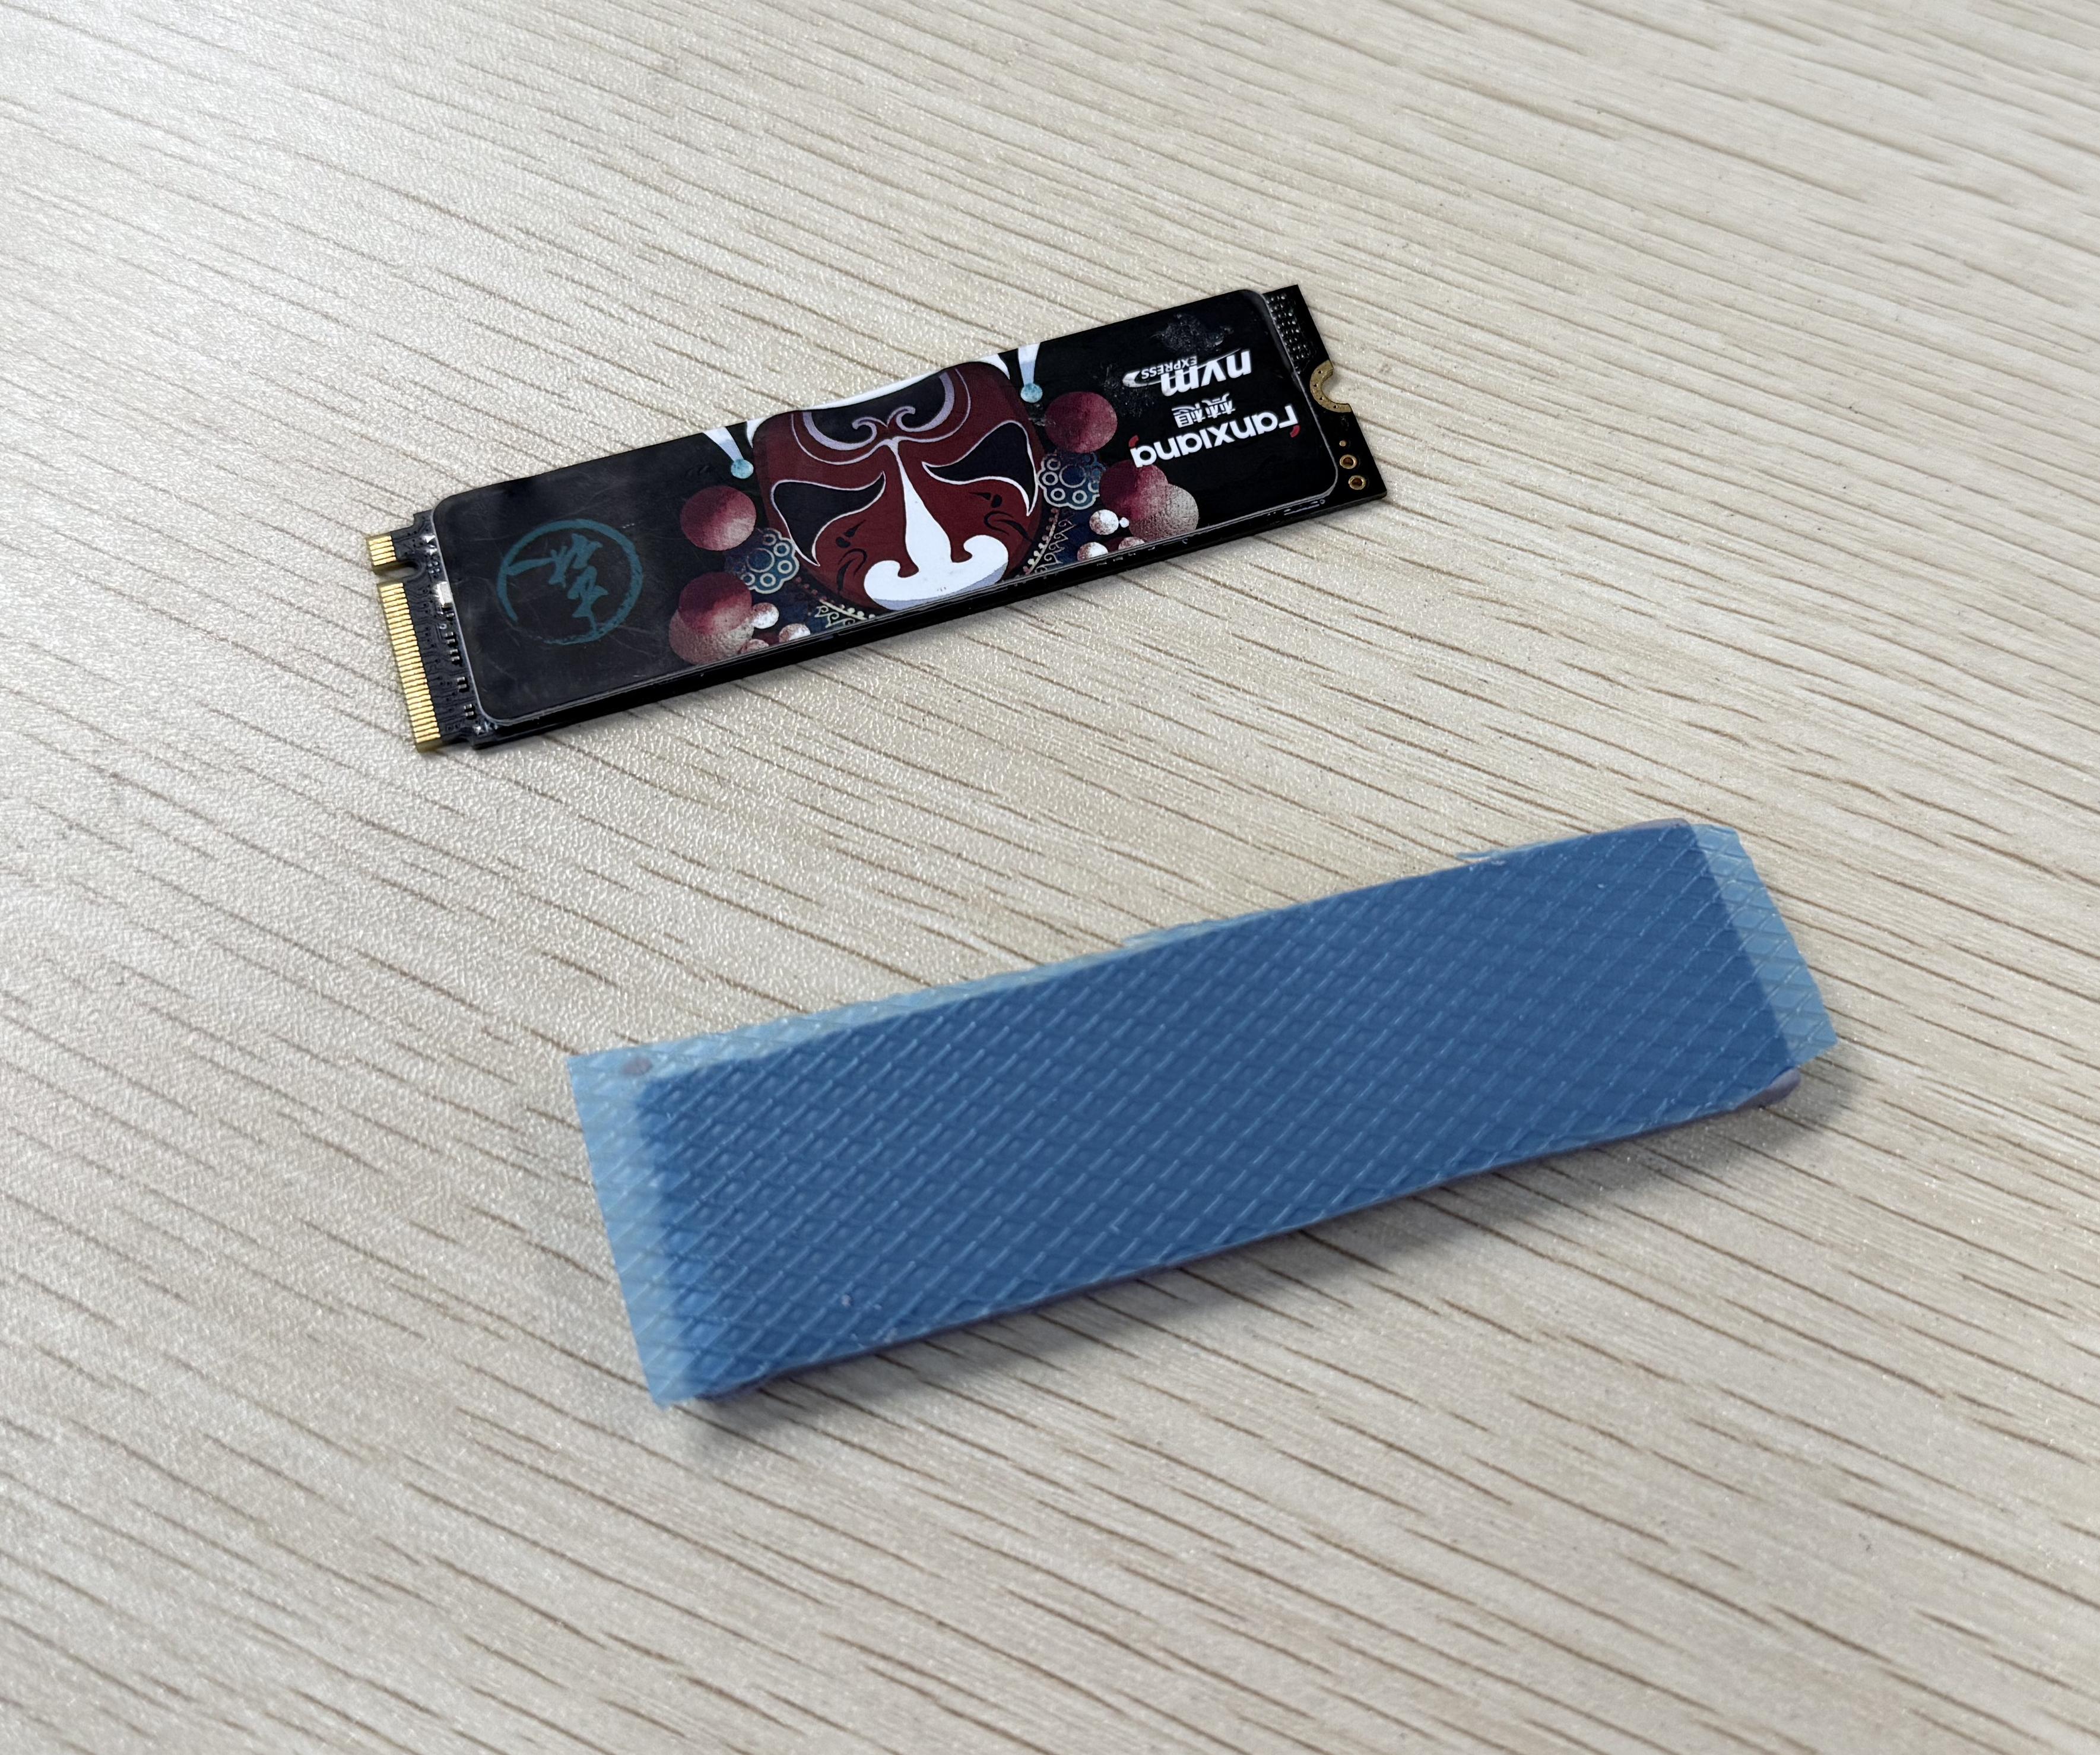
- Prepare an M.2 hard drive (not included). Note that creating a storage pool requires formatting the hard drive, so ensure there is no important data on the drive or that data has been backed up.
- Use the included thermal silicone pad.
- Use the included mounting screws for the M.2 hard drive.
- Ensure the device is powered off before starting the installation (if not, press and hold the Power Button on the back until the device shuts down).
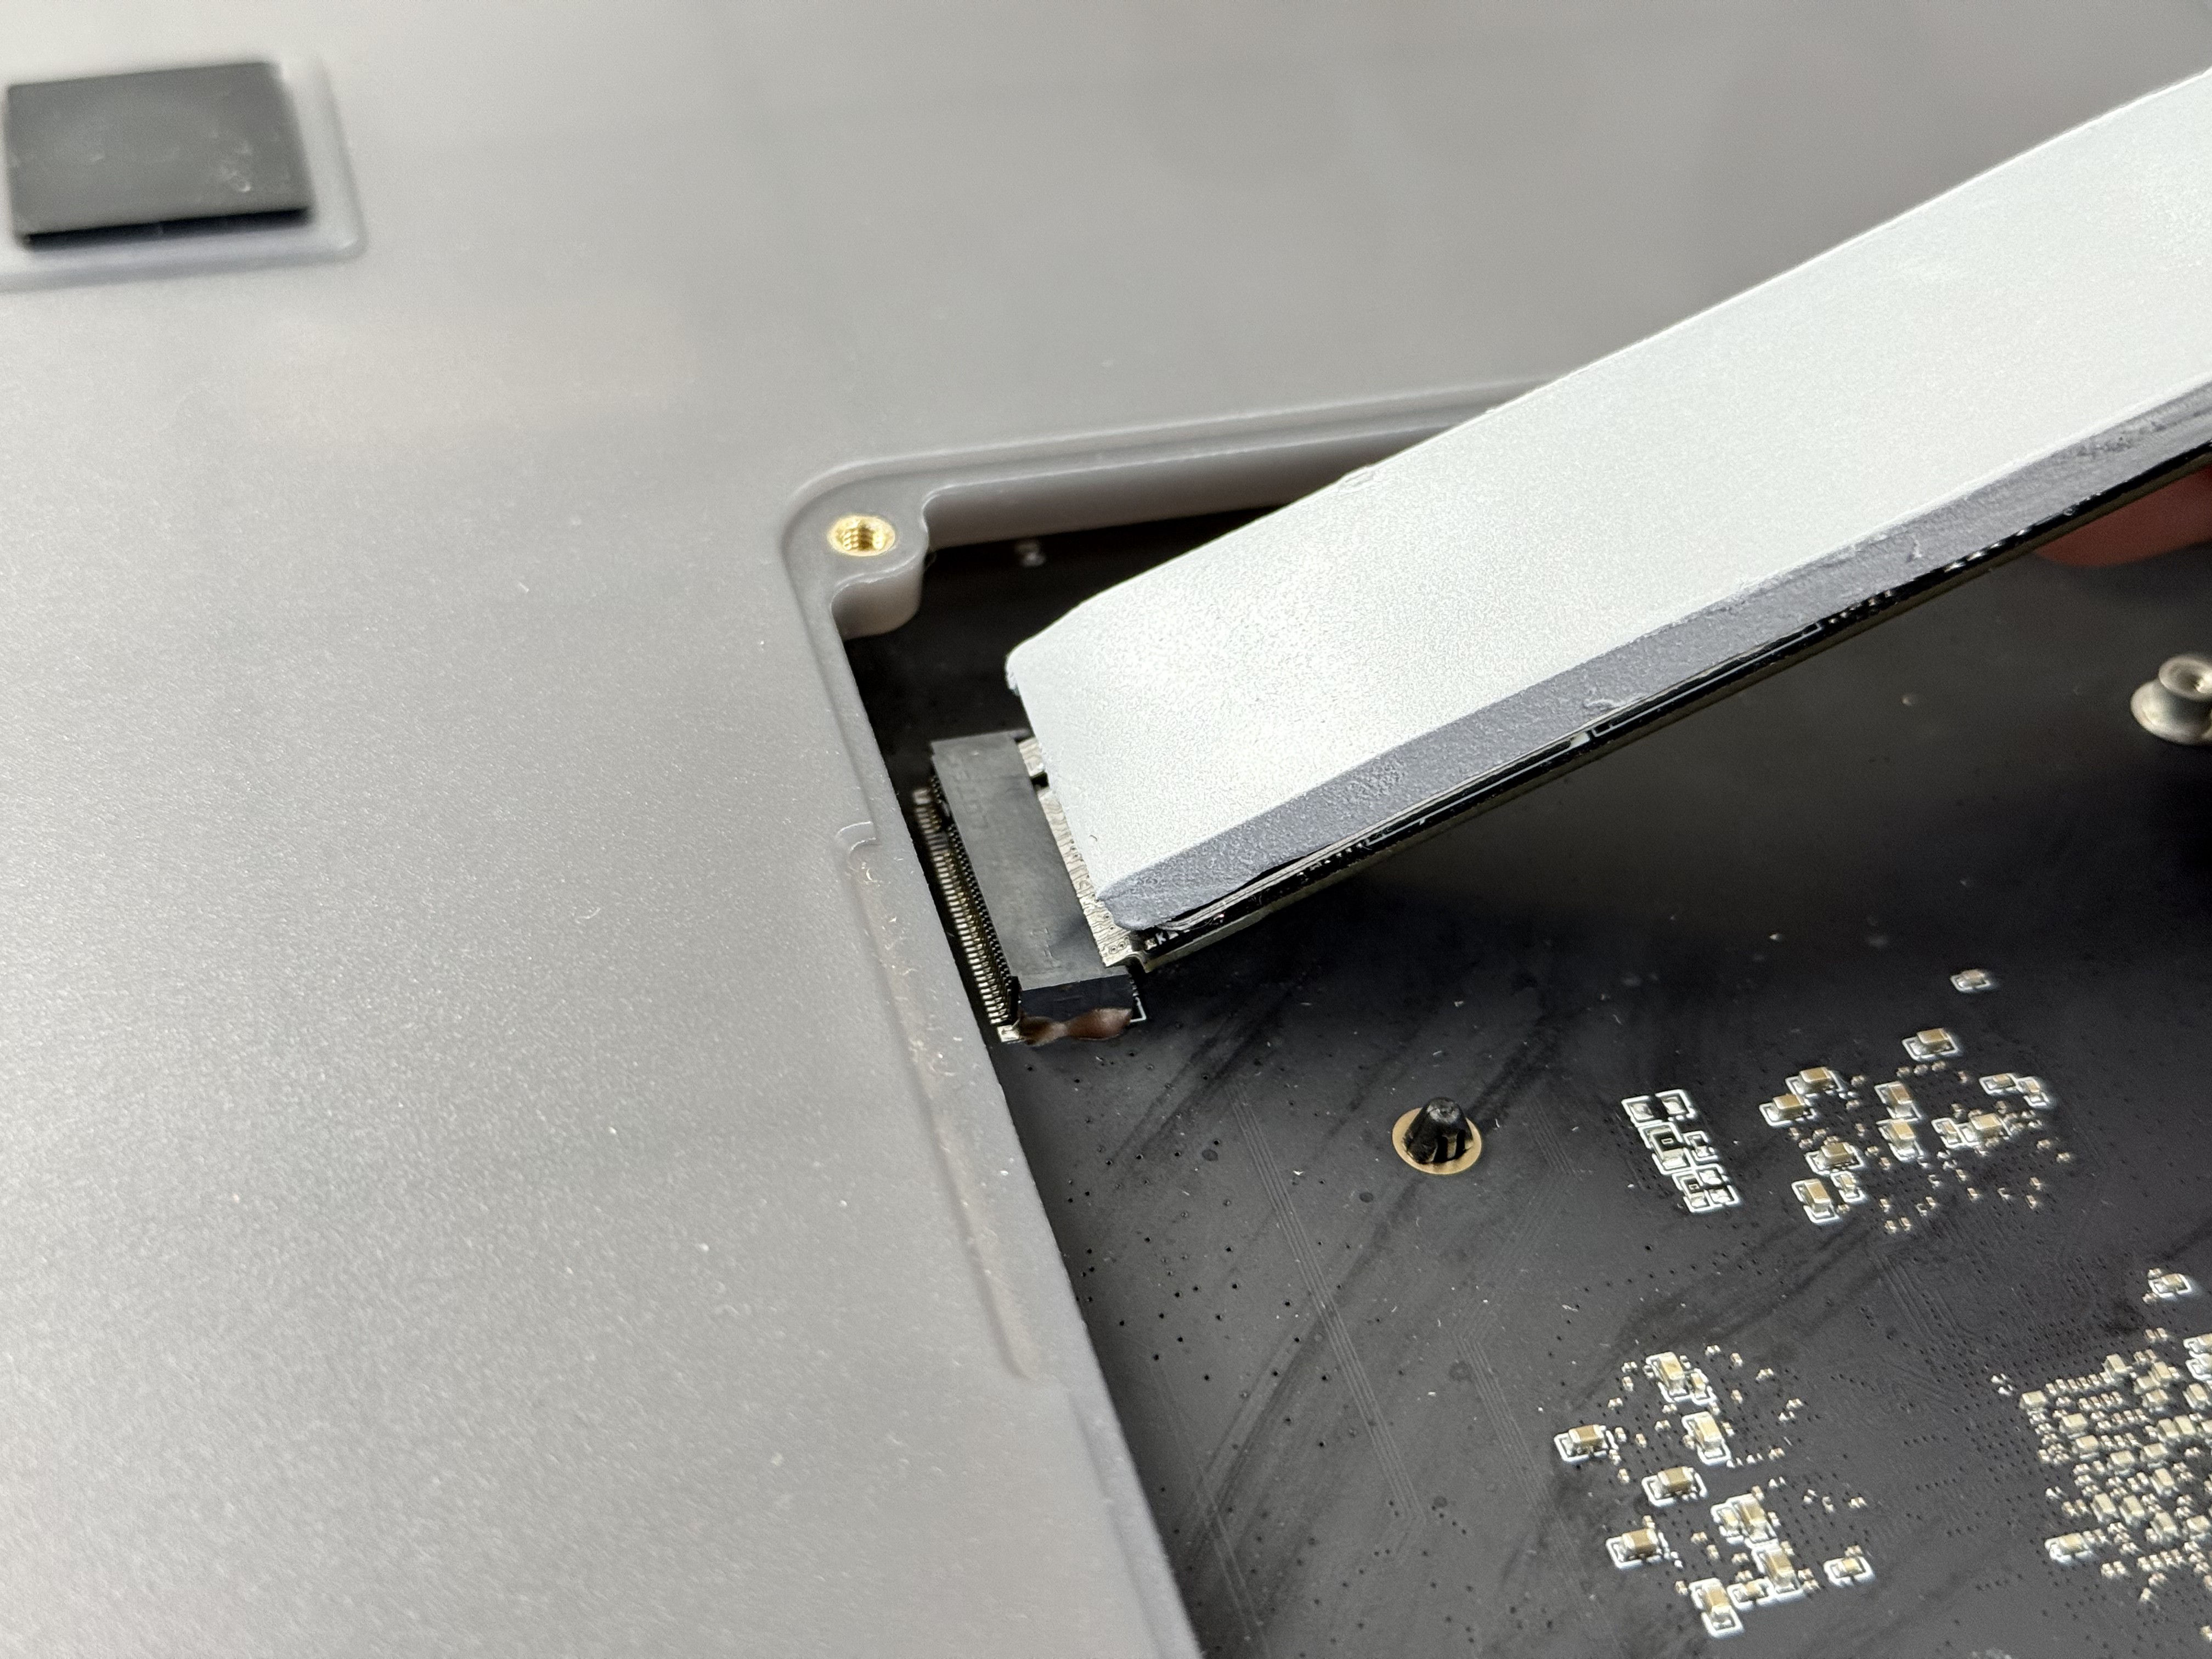
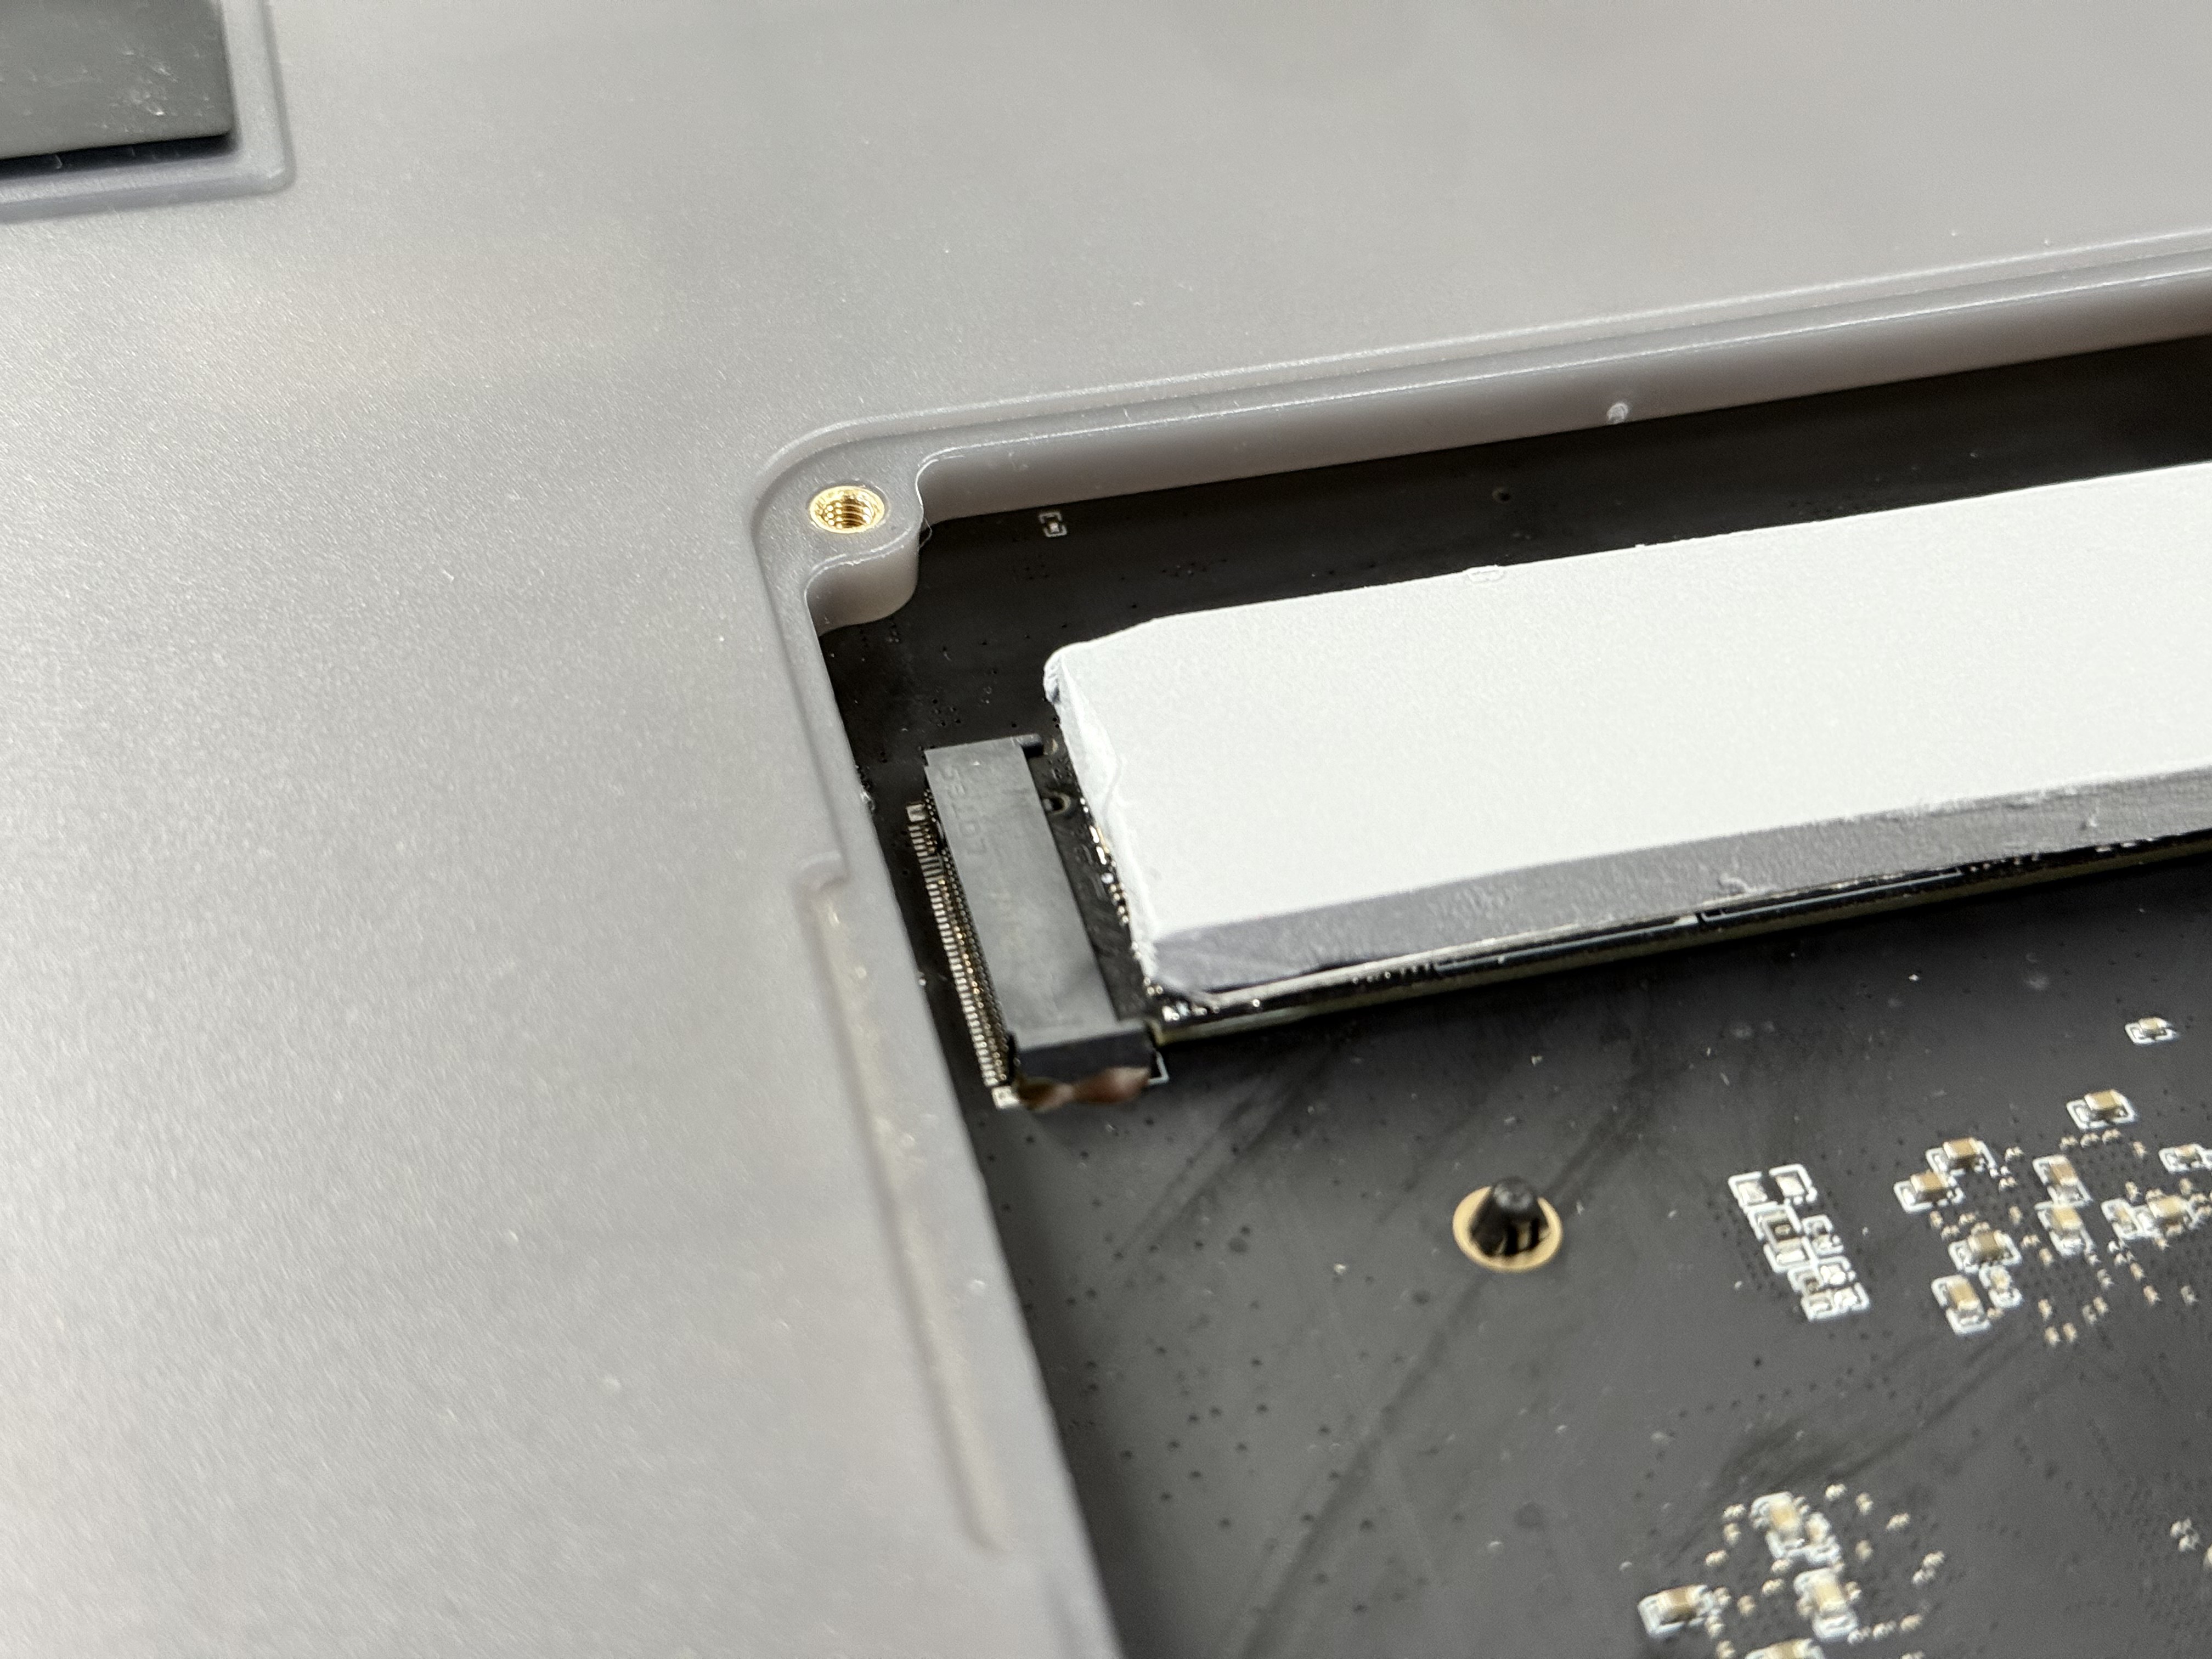
Installation Steps
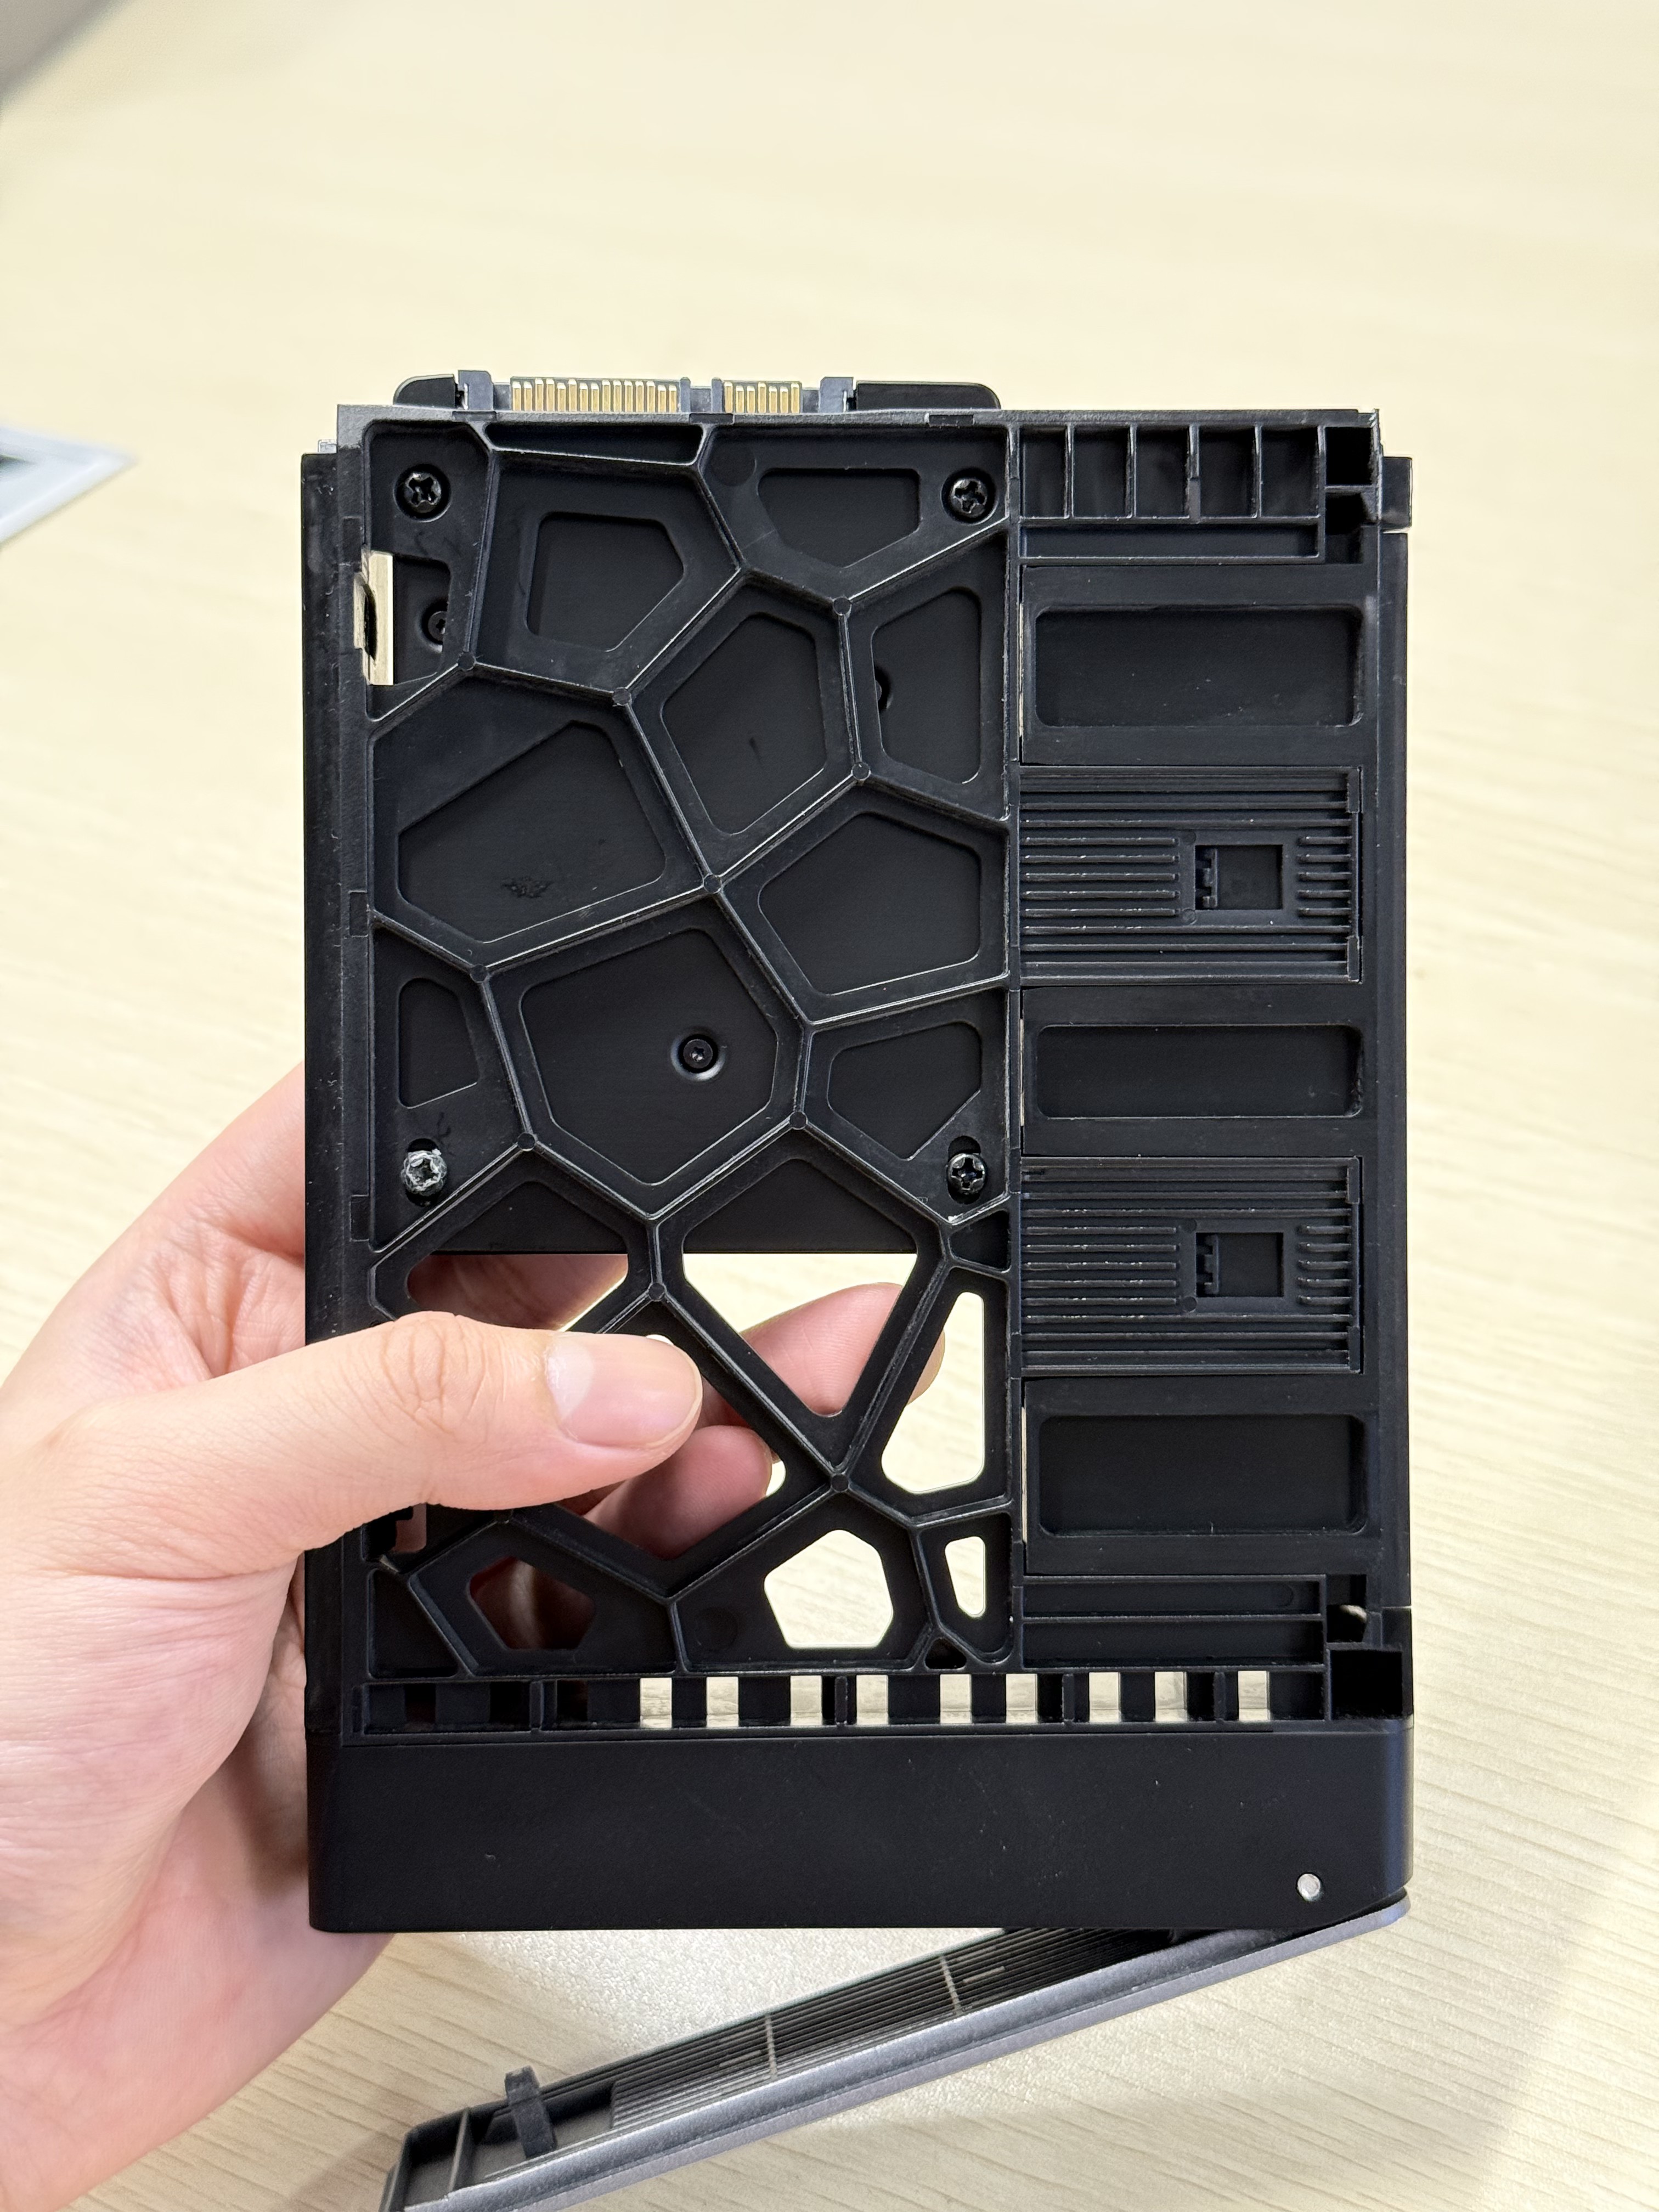
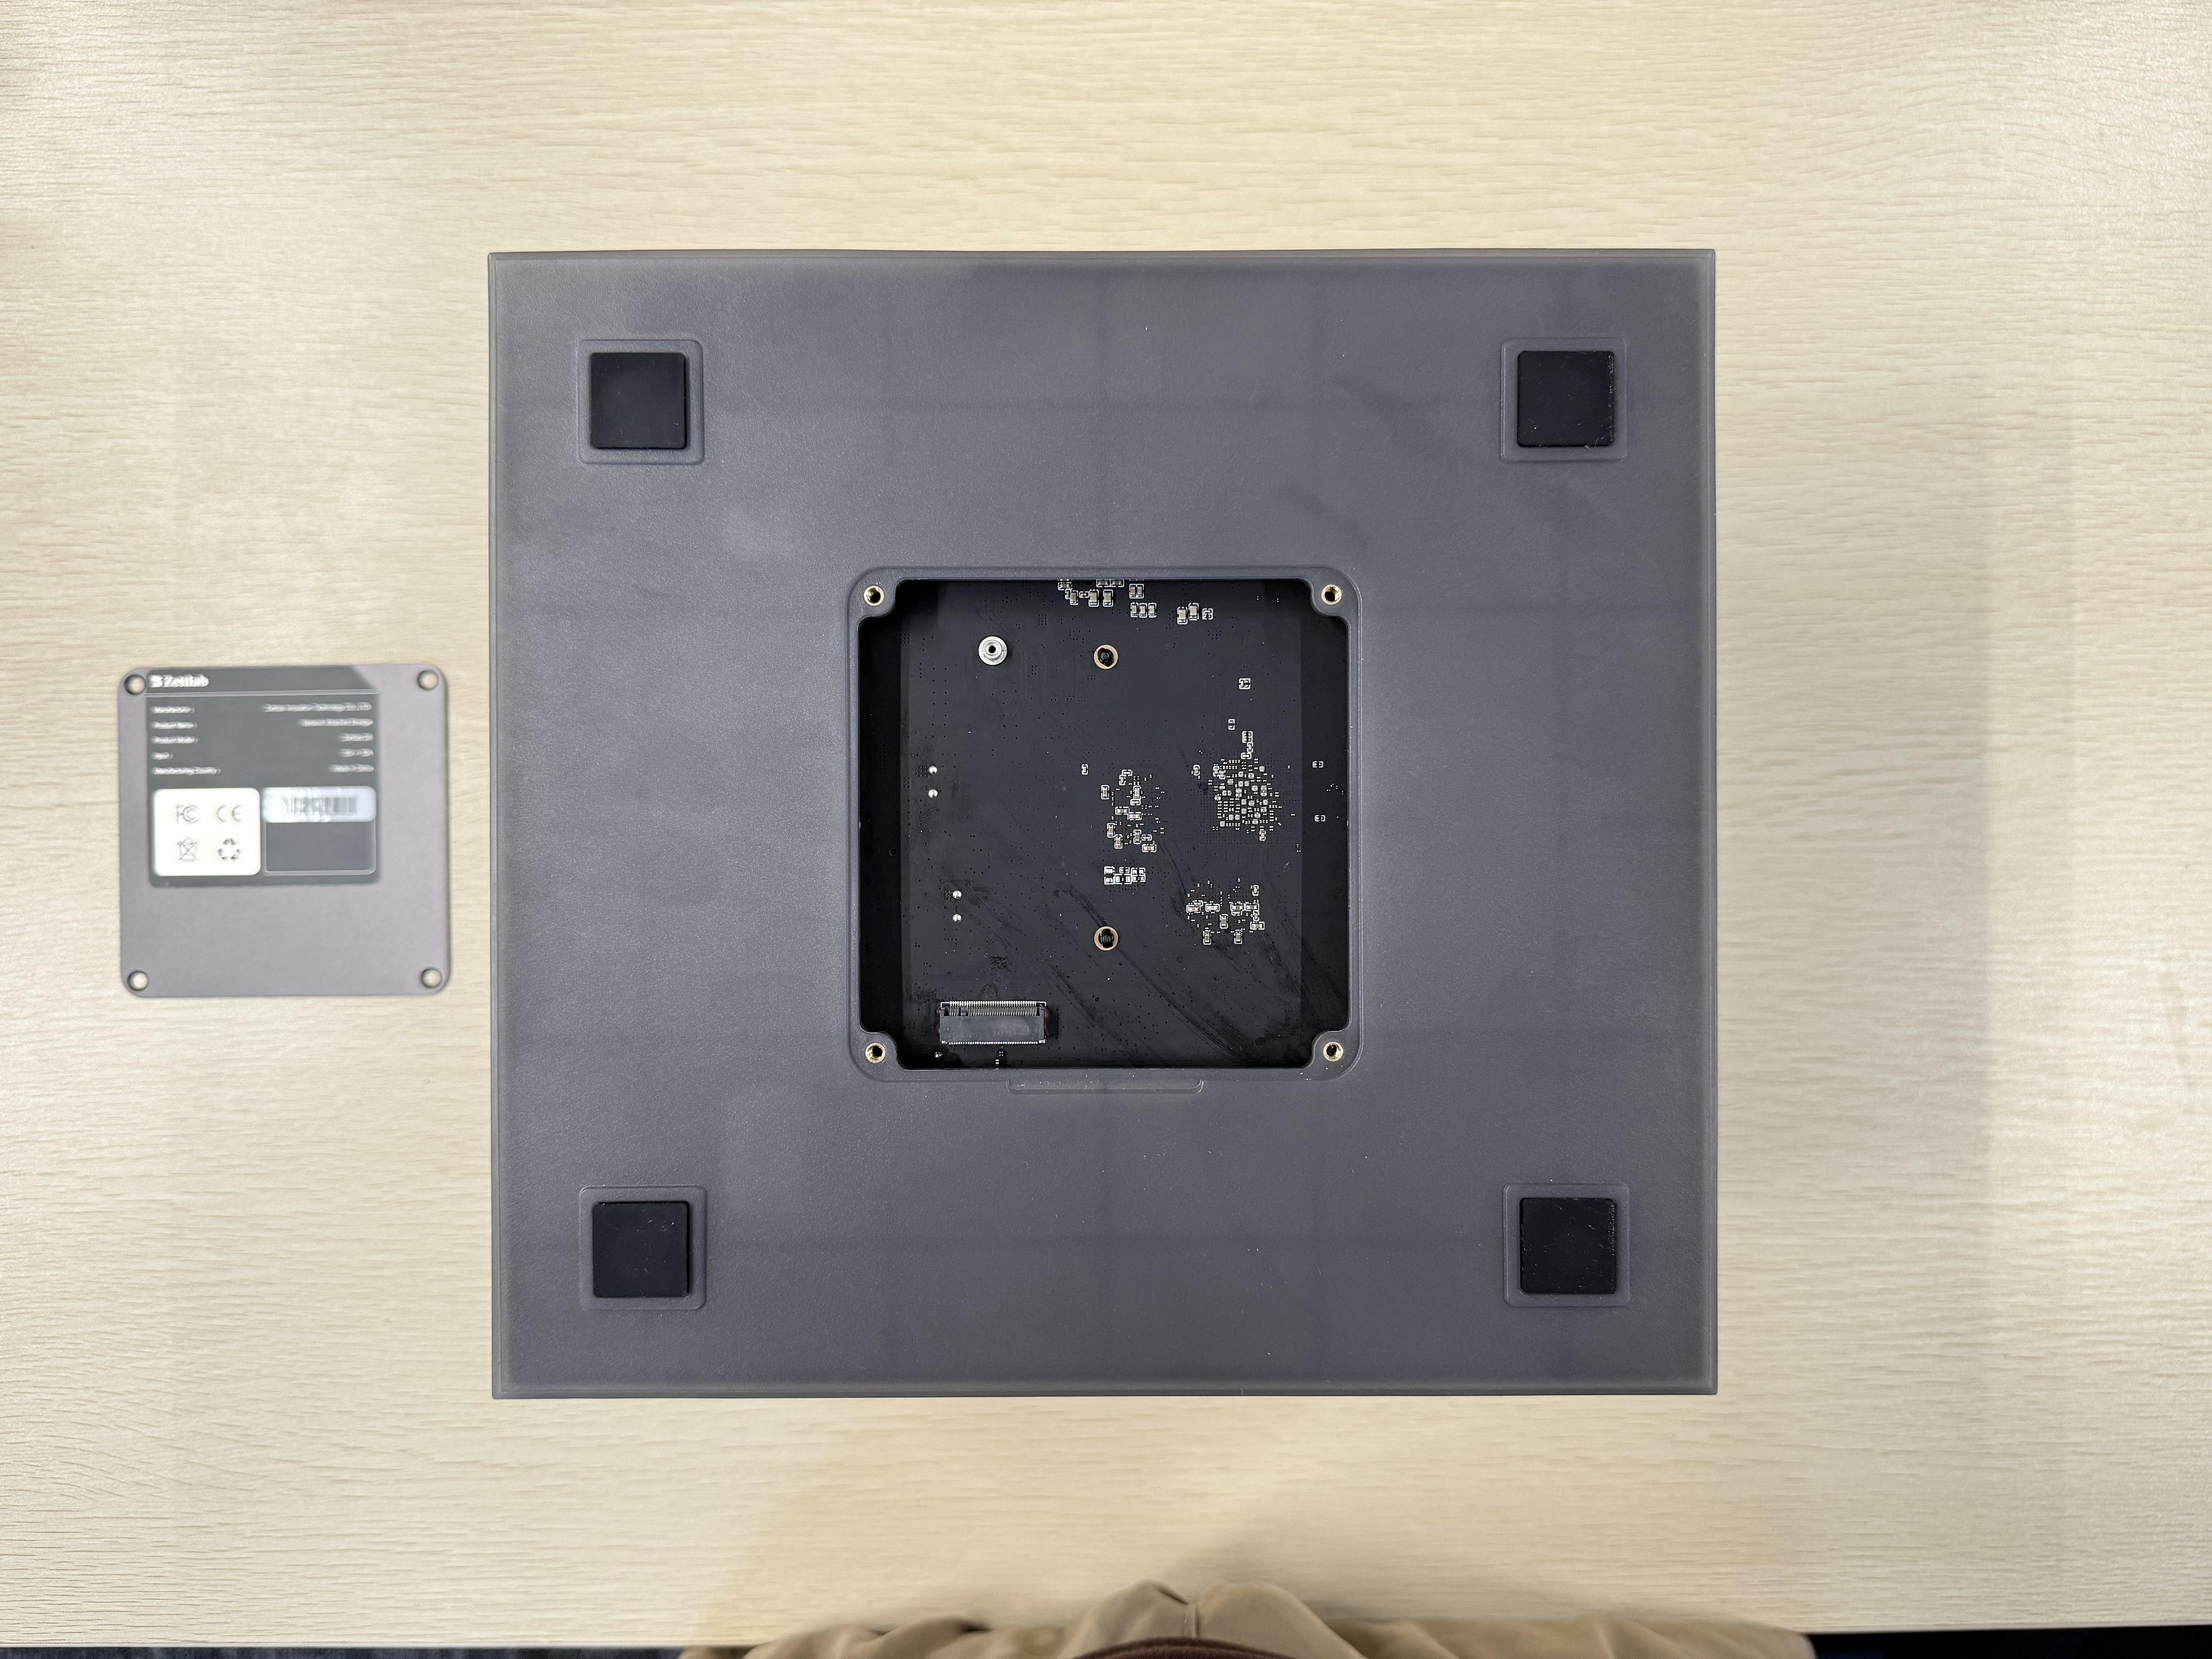
- Flip the device so the bottom is facing up.
- Remove the four screws from the bottom panel and take off the panel.
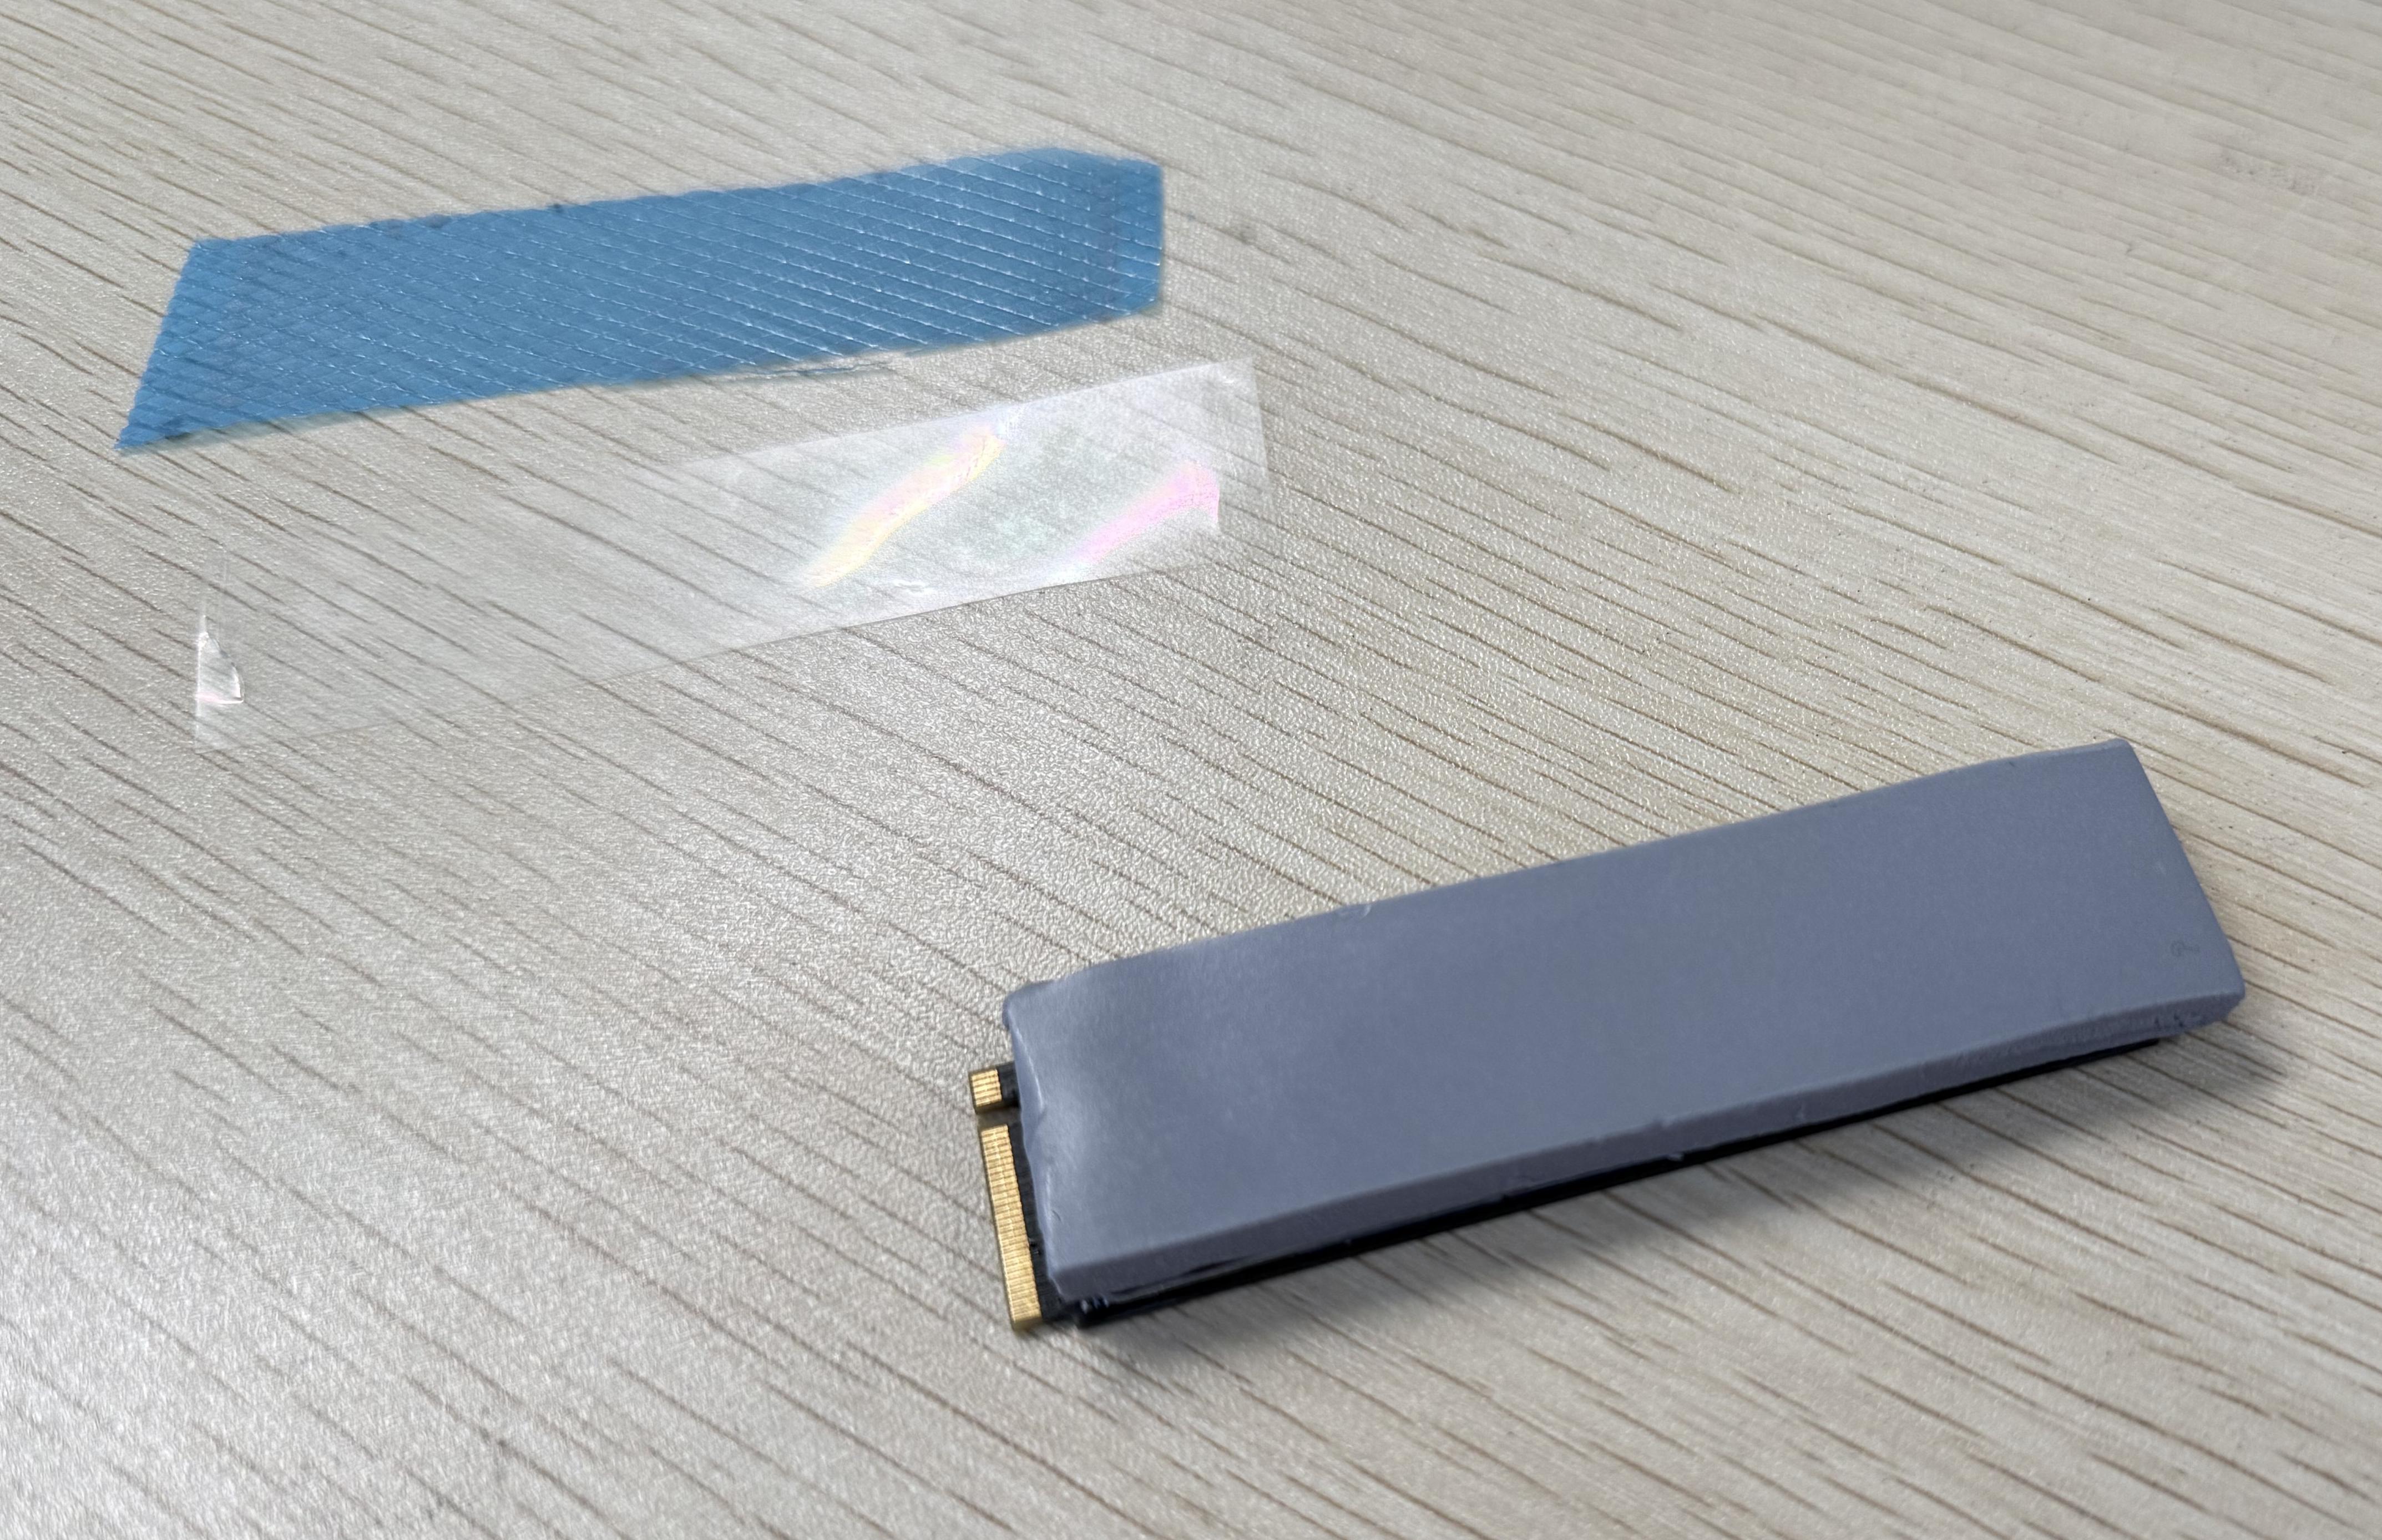
- Peel off the transparent backing from the thermal silicone pad and attach it to the labeled side of the M.2 hard drive.
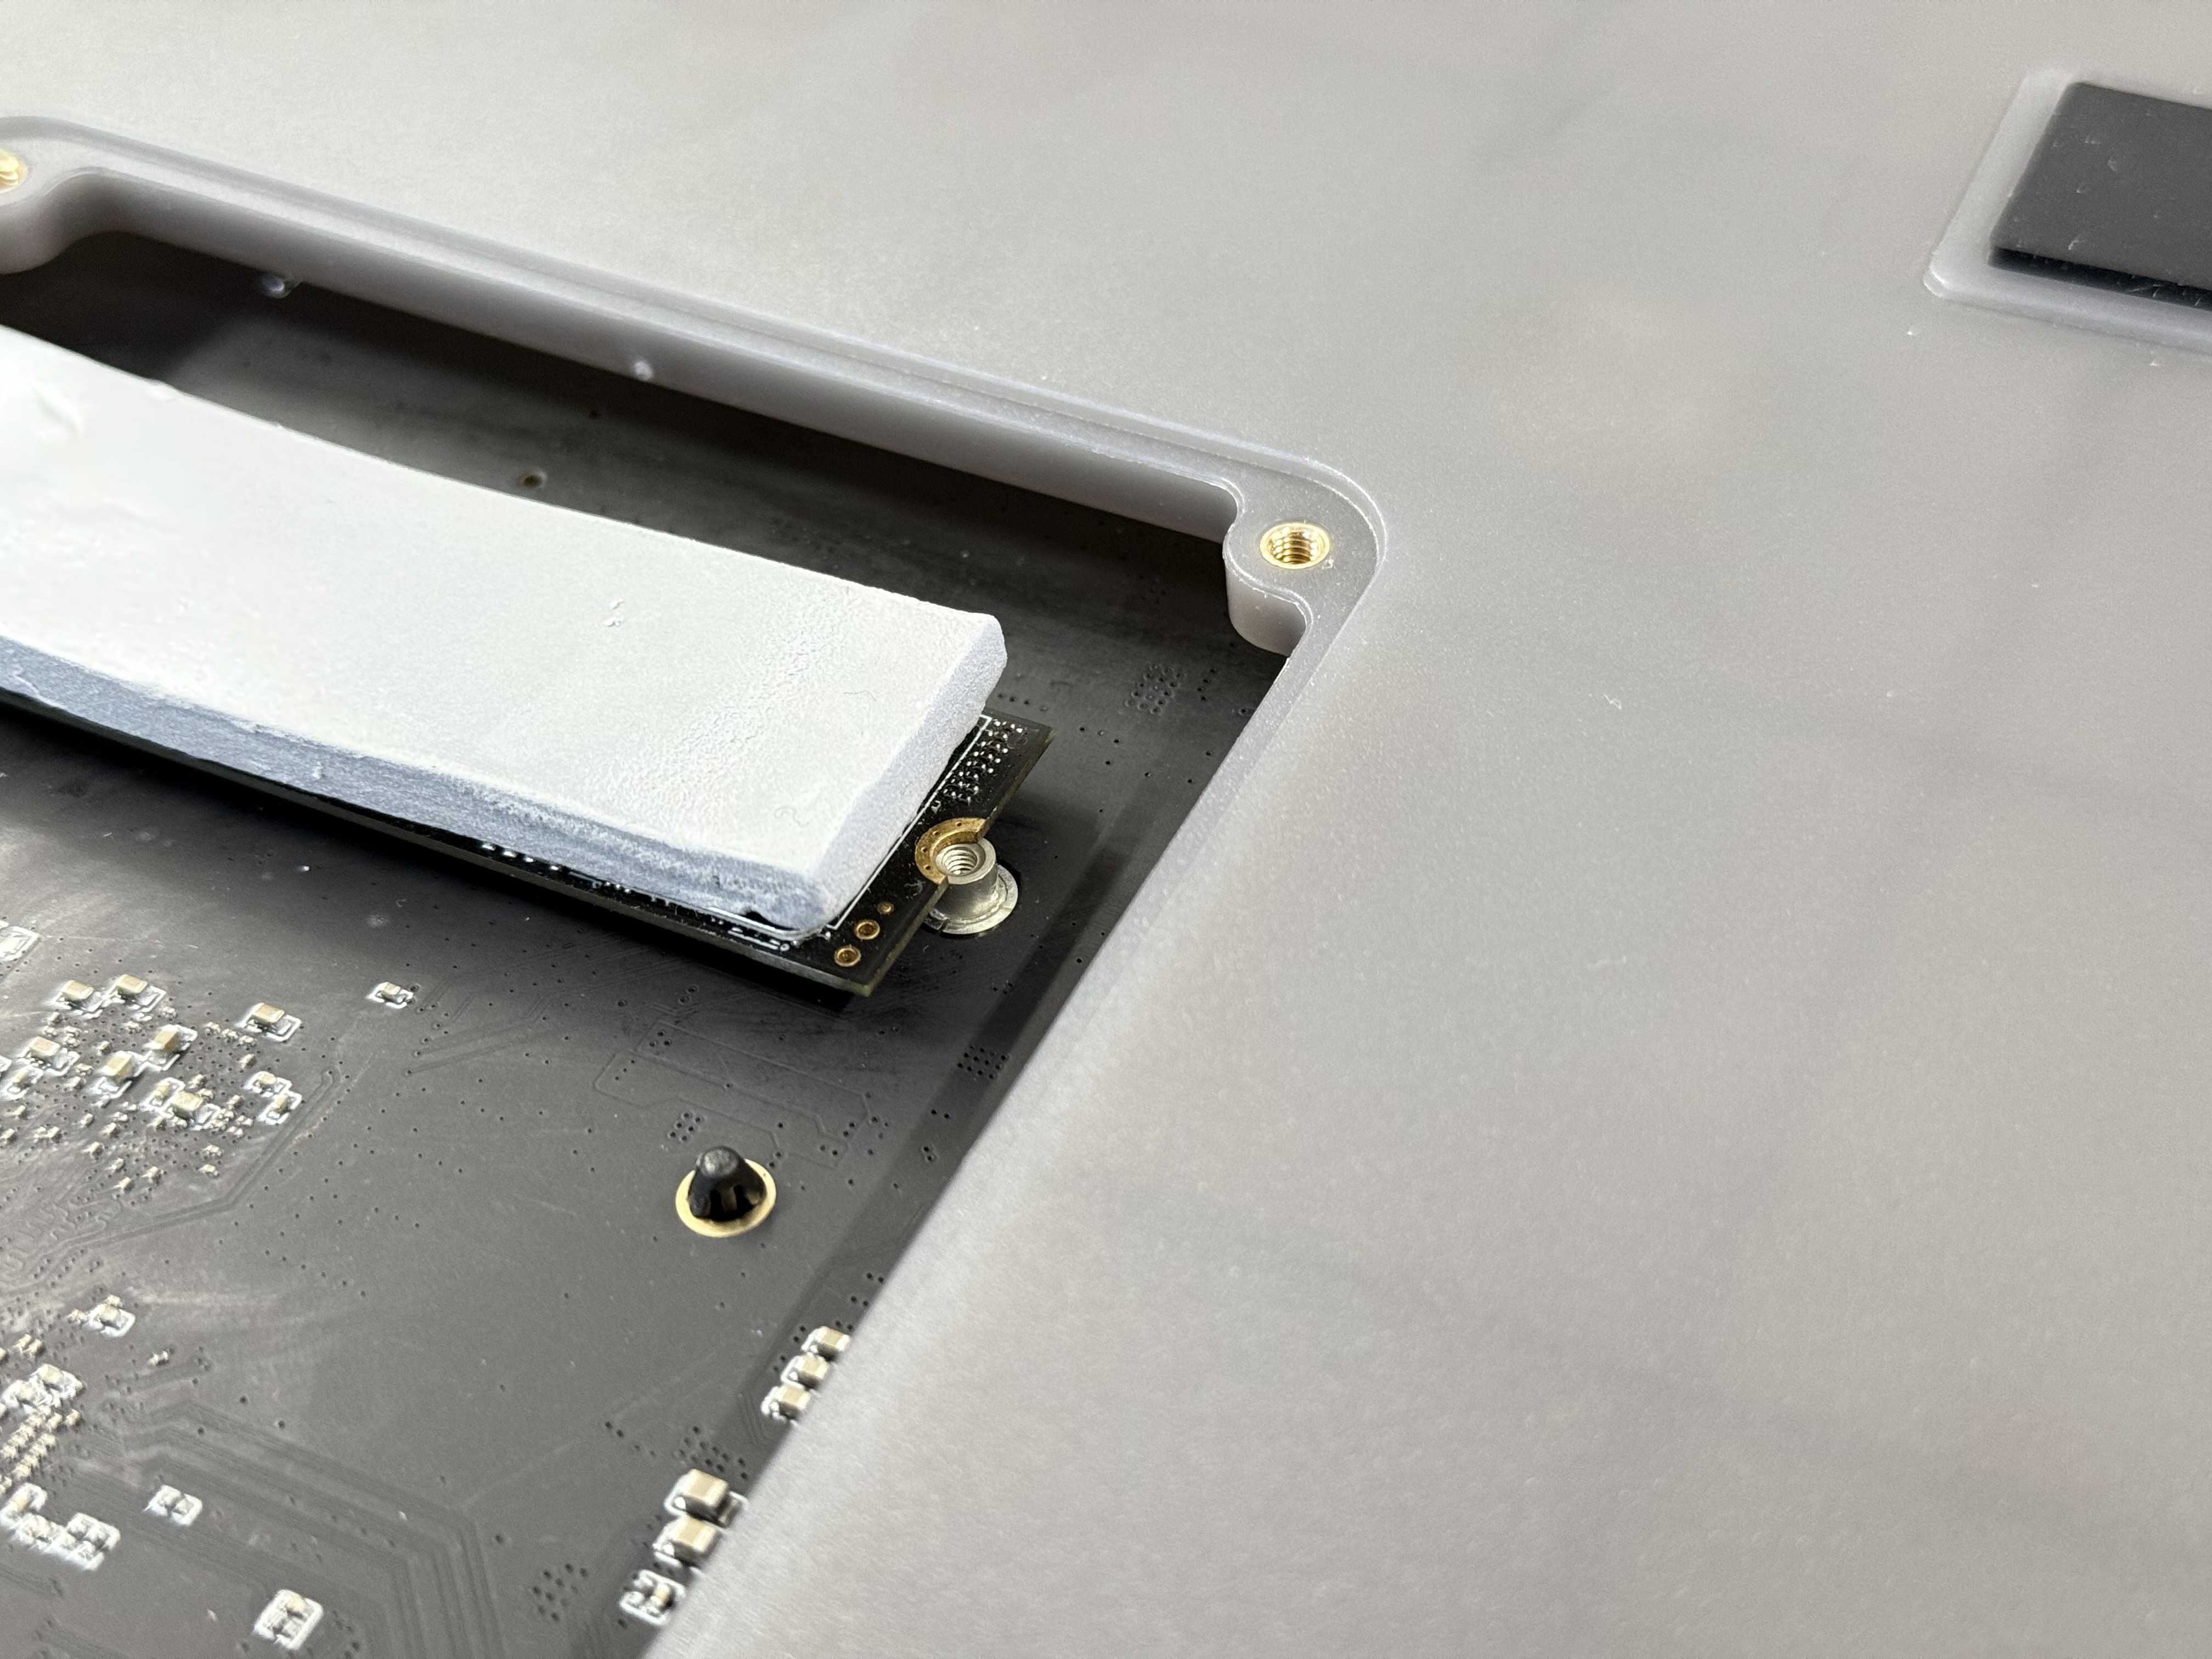
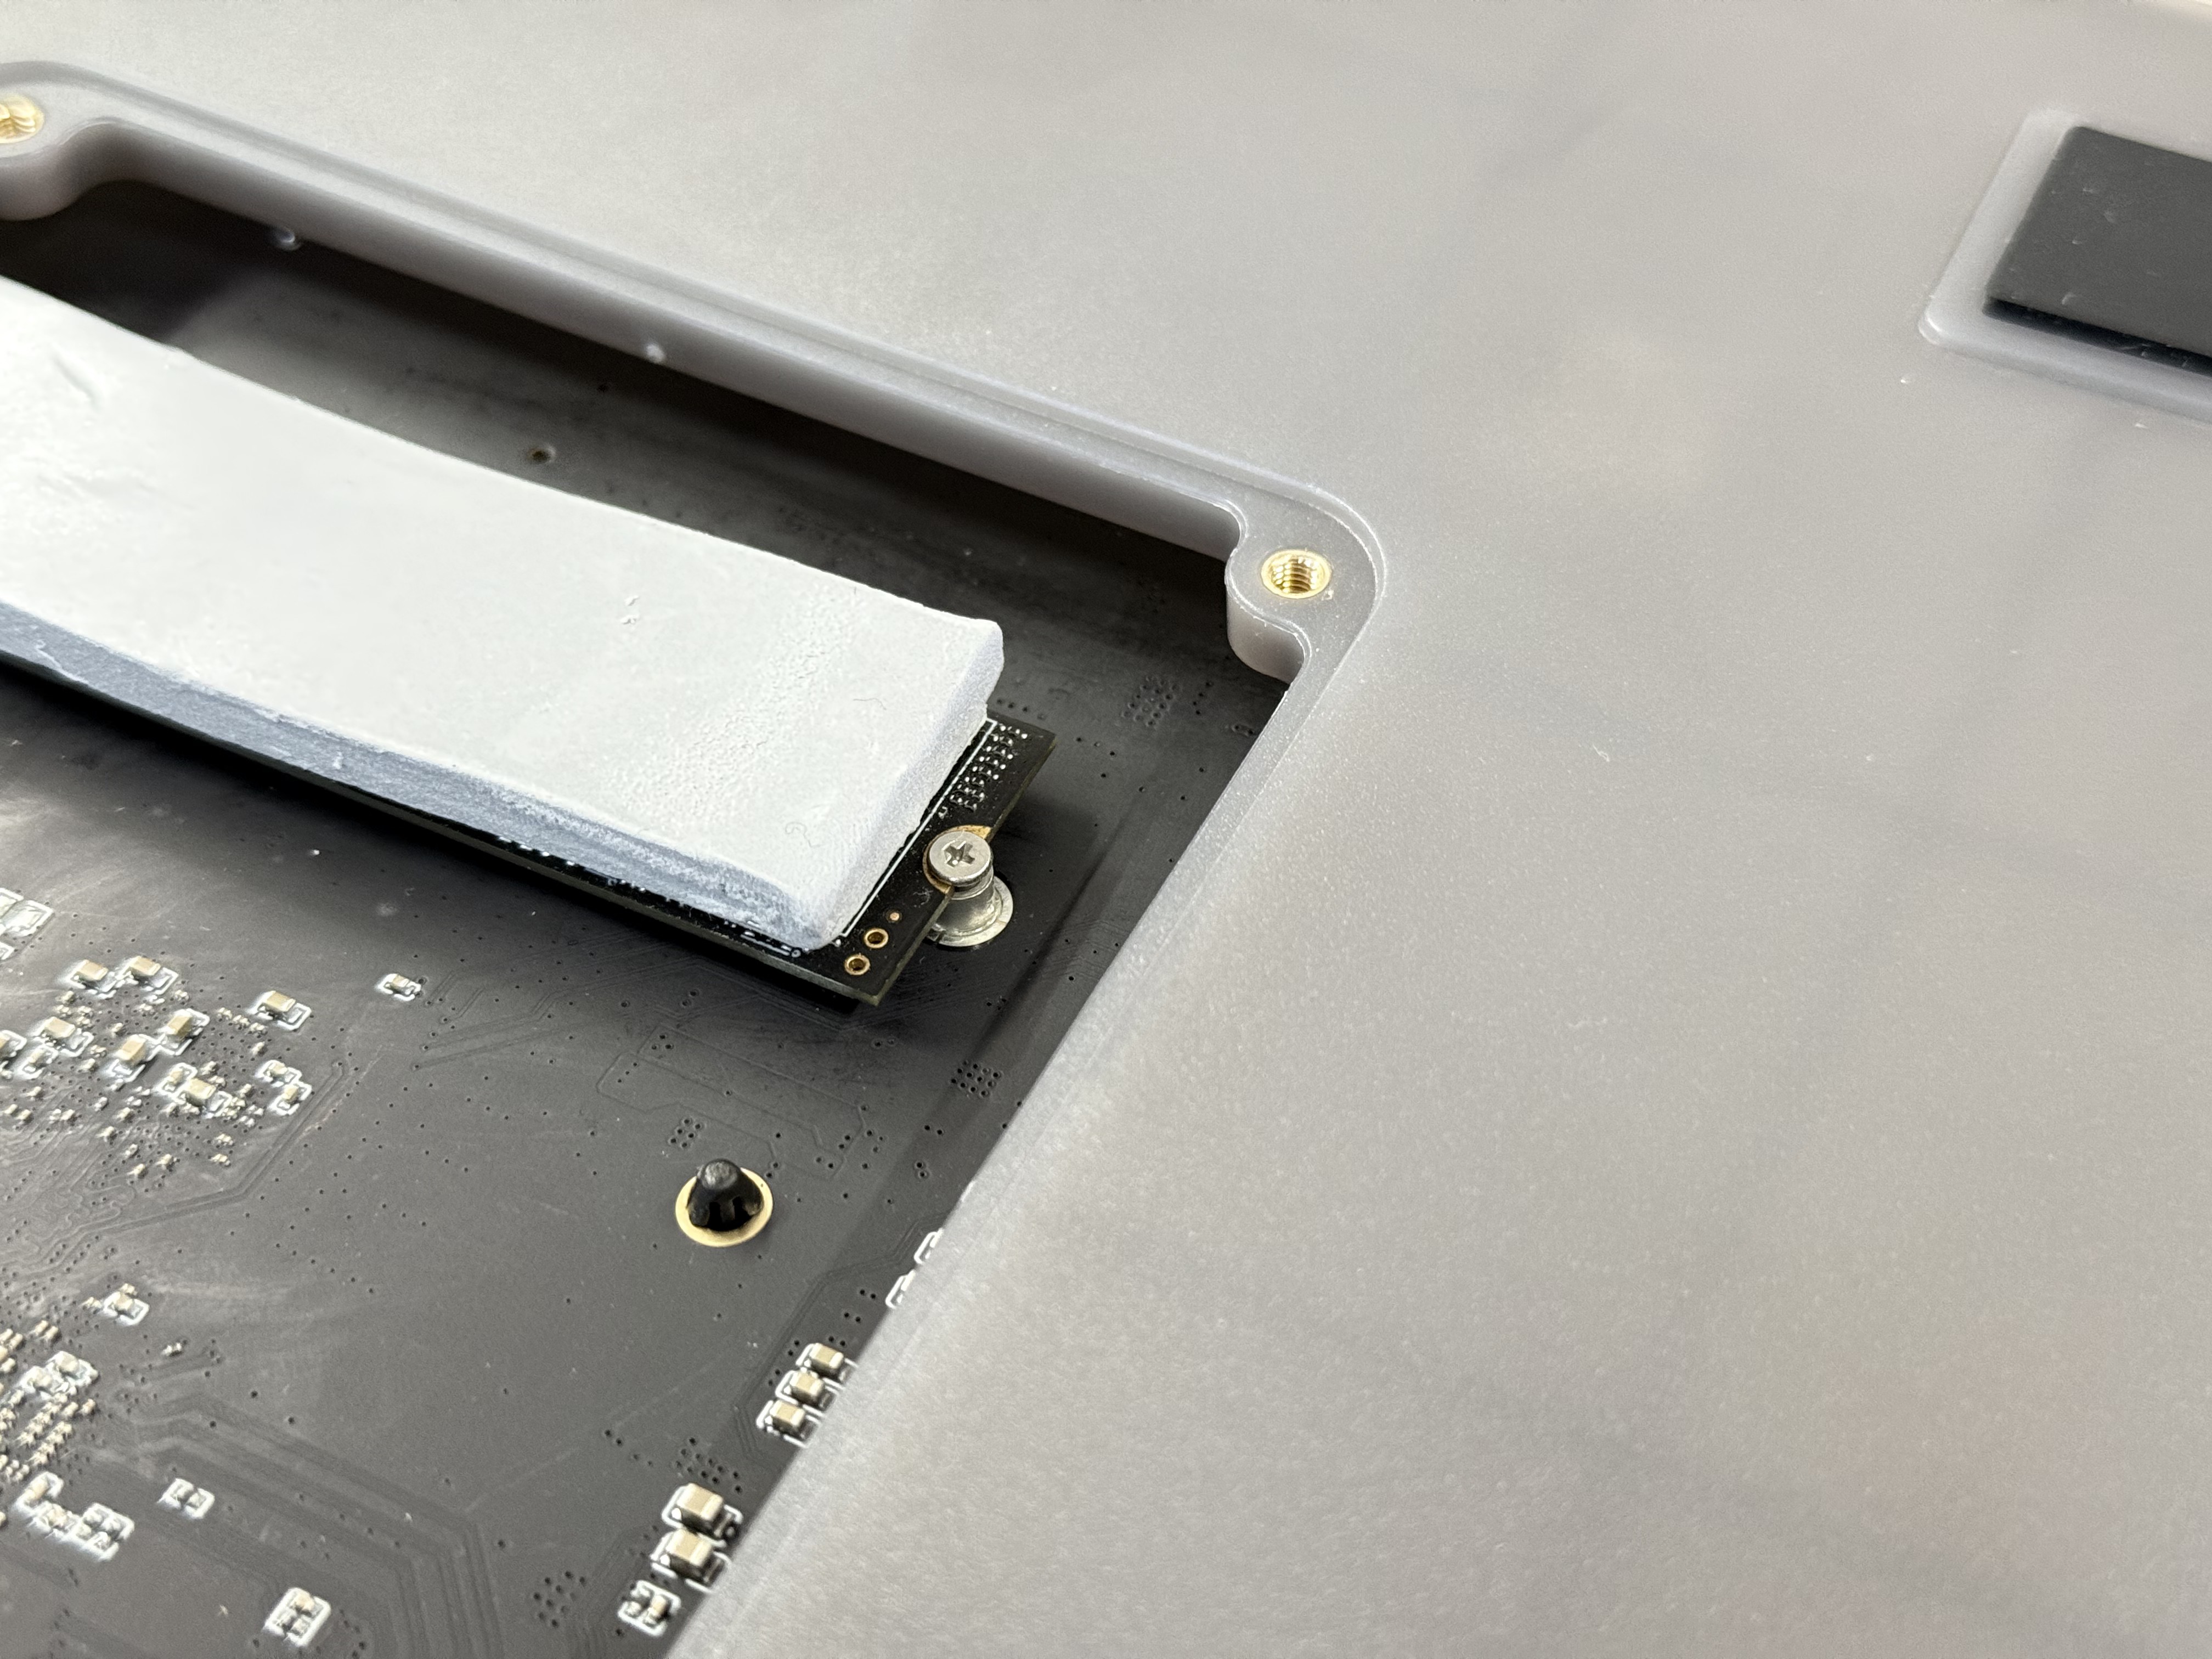
- Insert the M.2 hard drive with the silicone pad into the slot until it is fully seated.
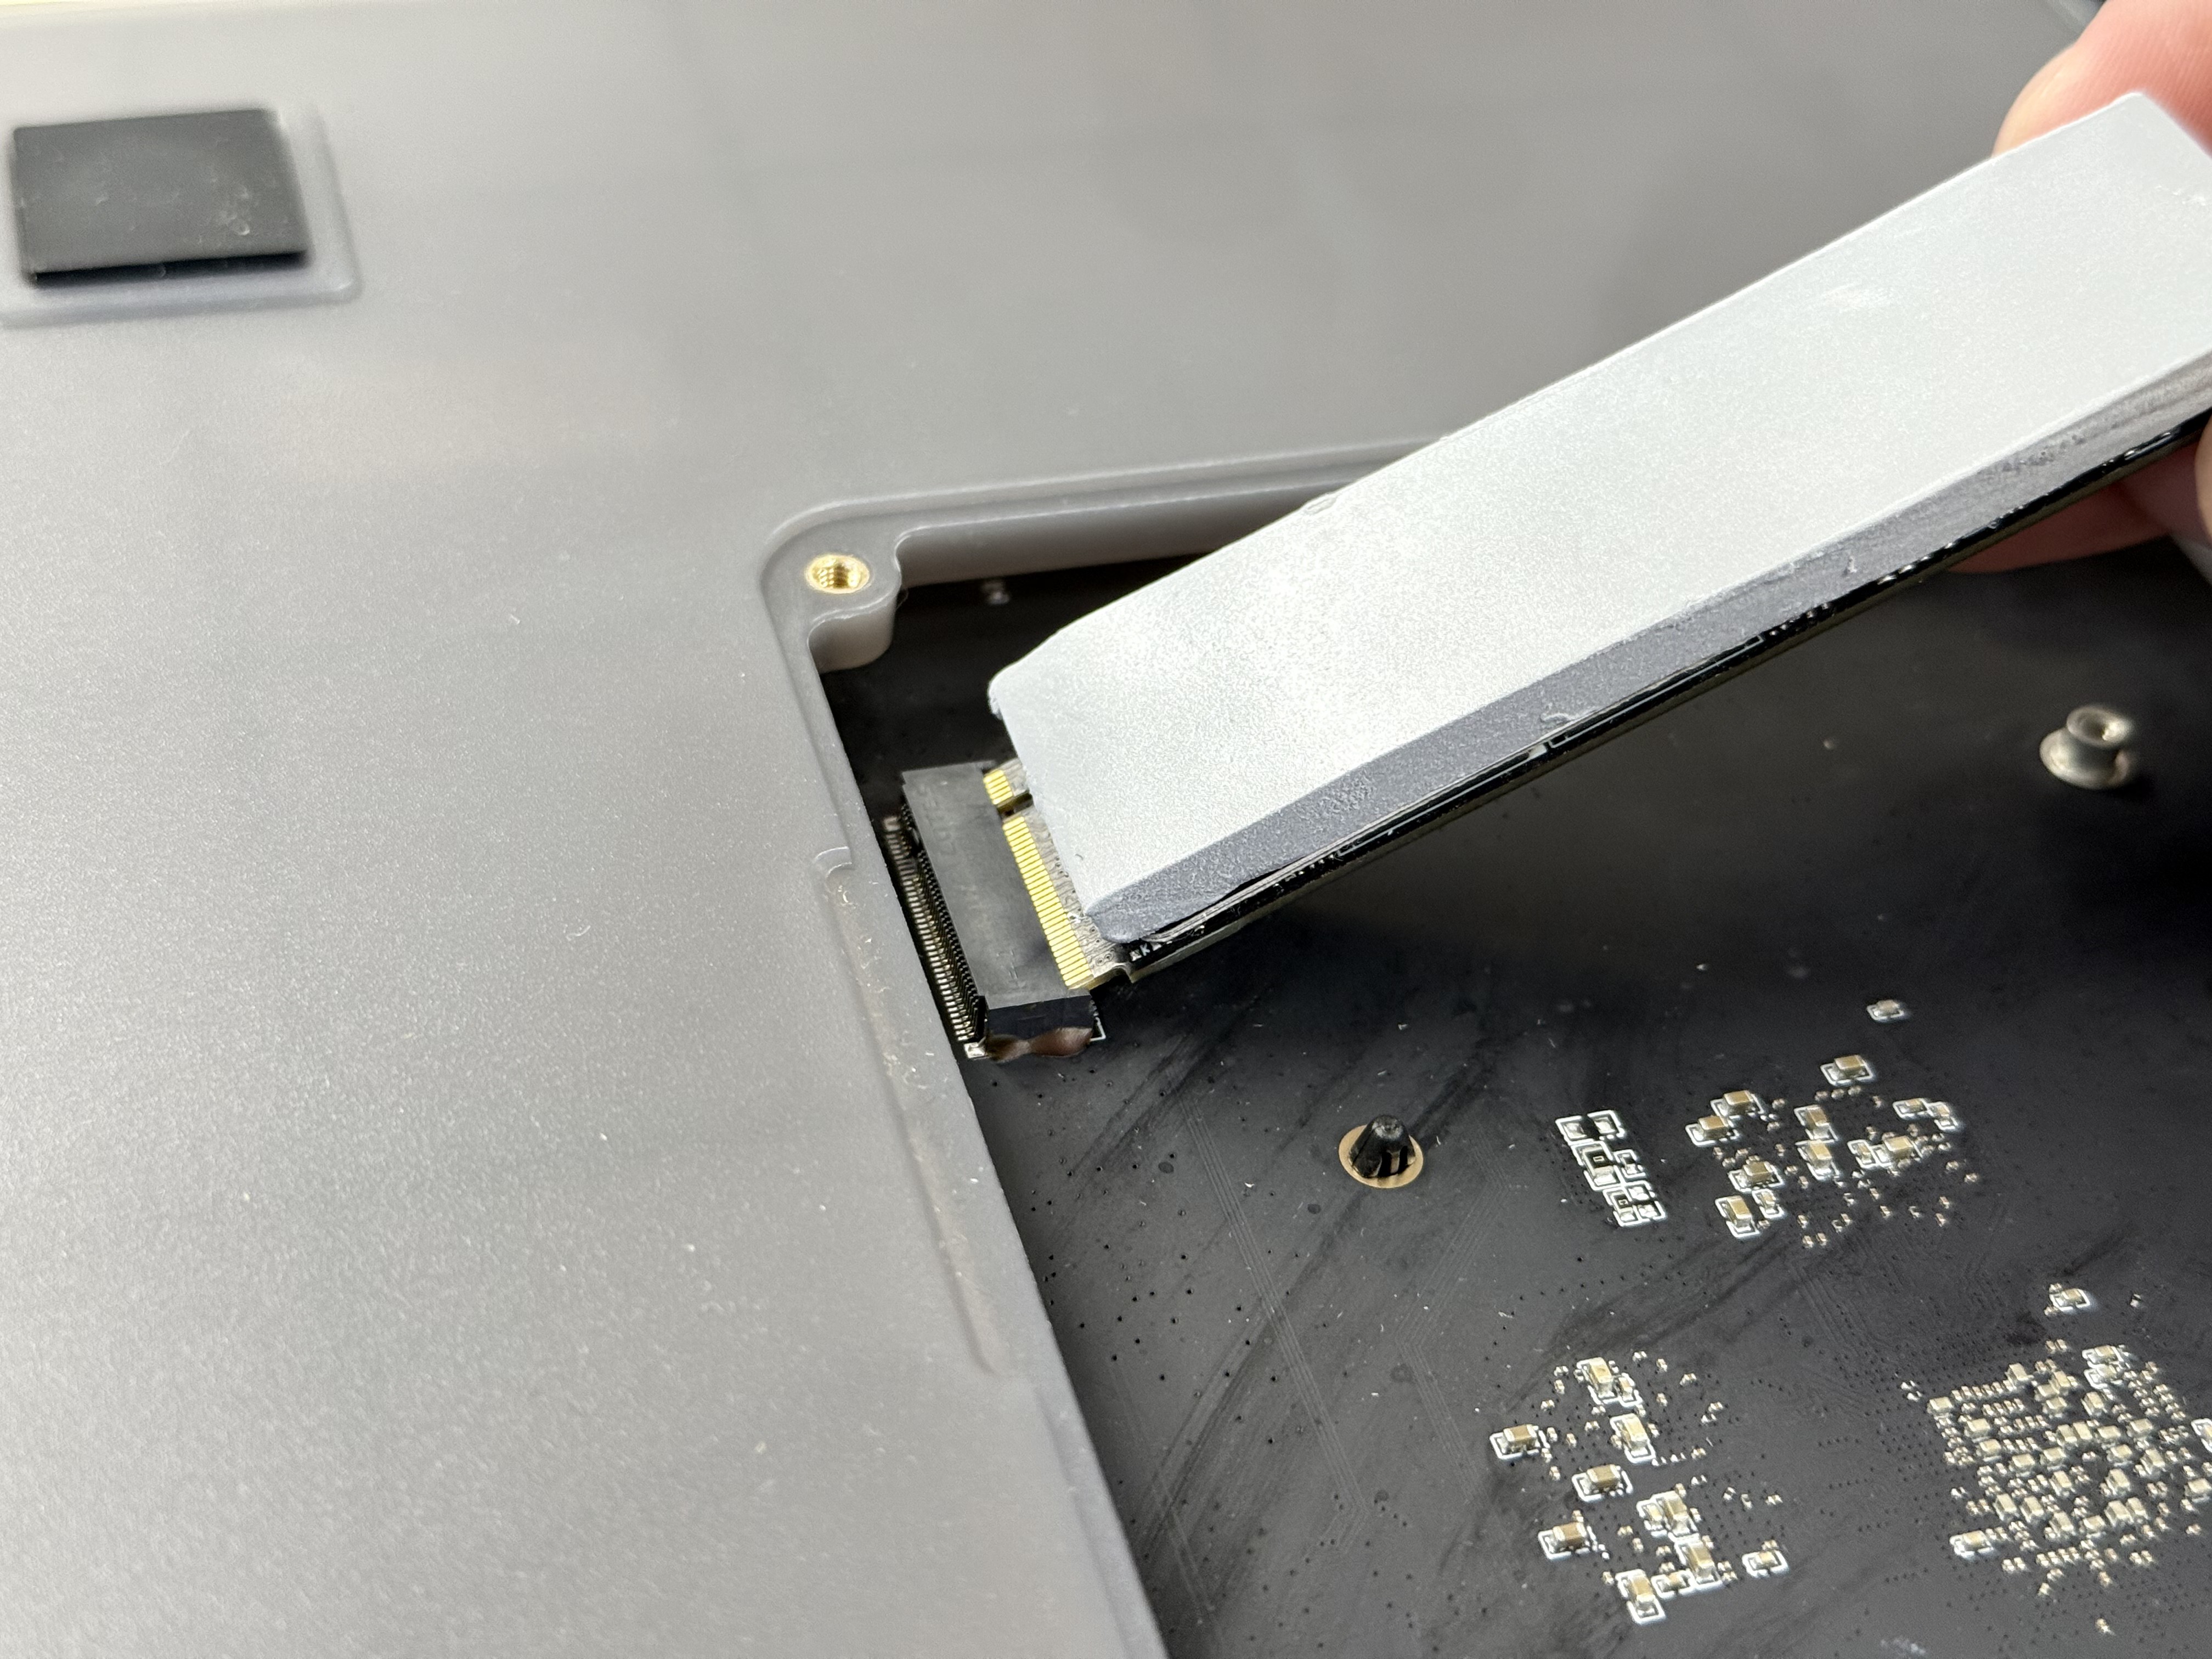
- Use the included screws to secure the hard drive.
- Reattach the bottom panel.
Connection Setup
Cable Connections
Network Cable
- Connect one end of the gigabit Ethernet cable to the 1GbE or 2.5GbE port on the back of the Zettlab AI NAS (if your router supports 2.5GbE, it is recommended to use this port).
- Connect the other end to the LAN port on your router.
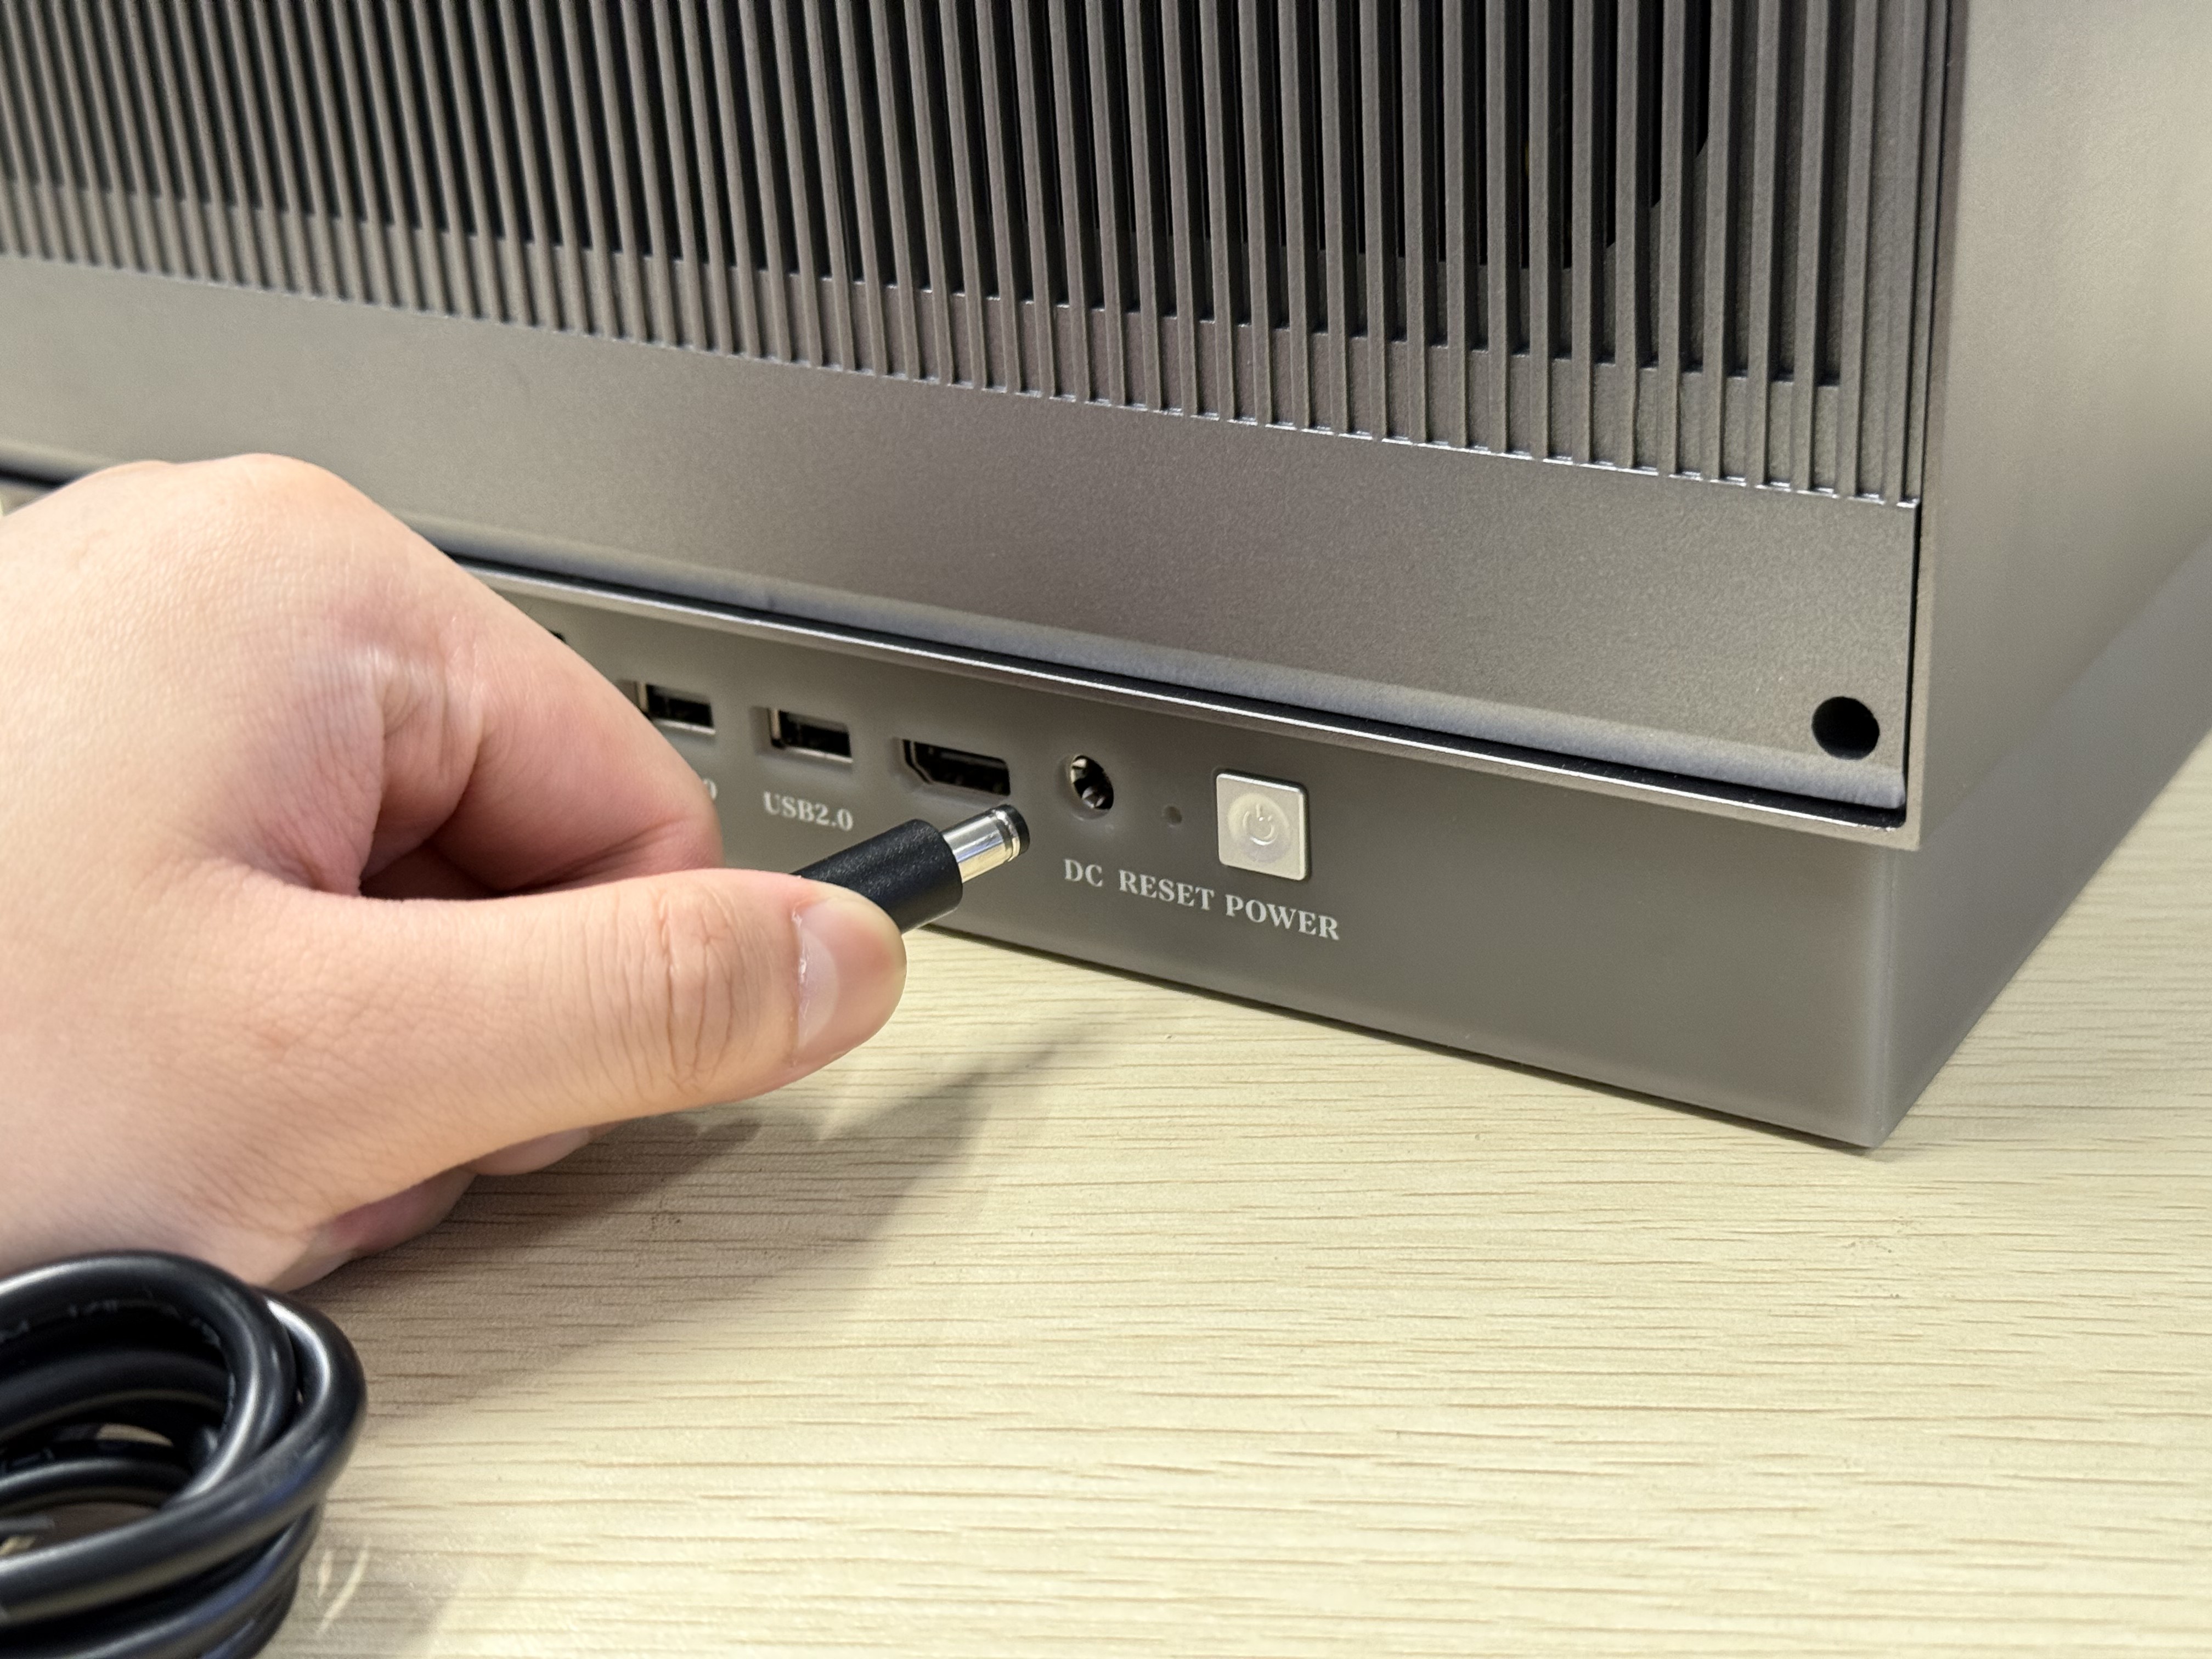
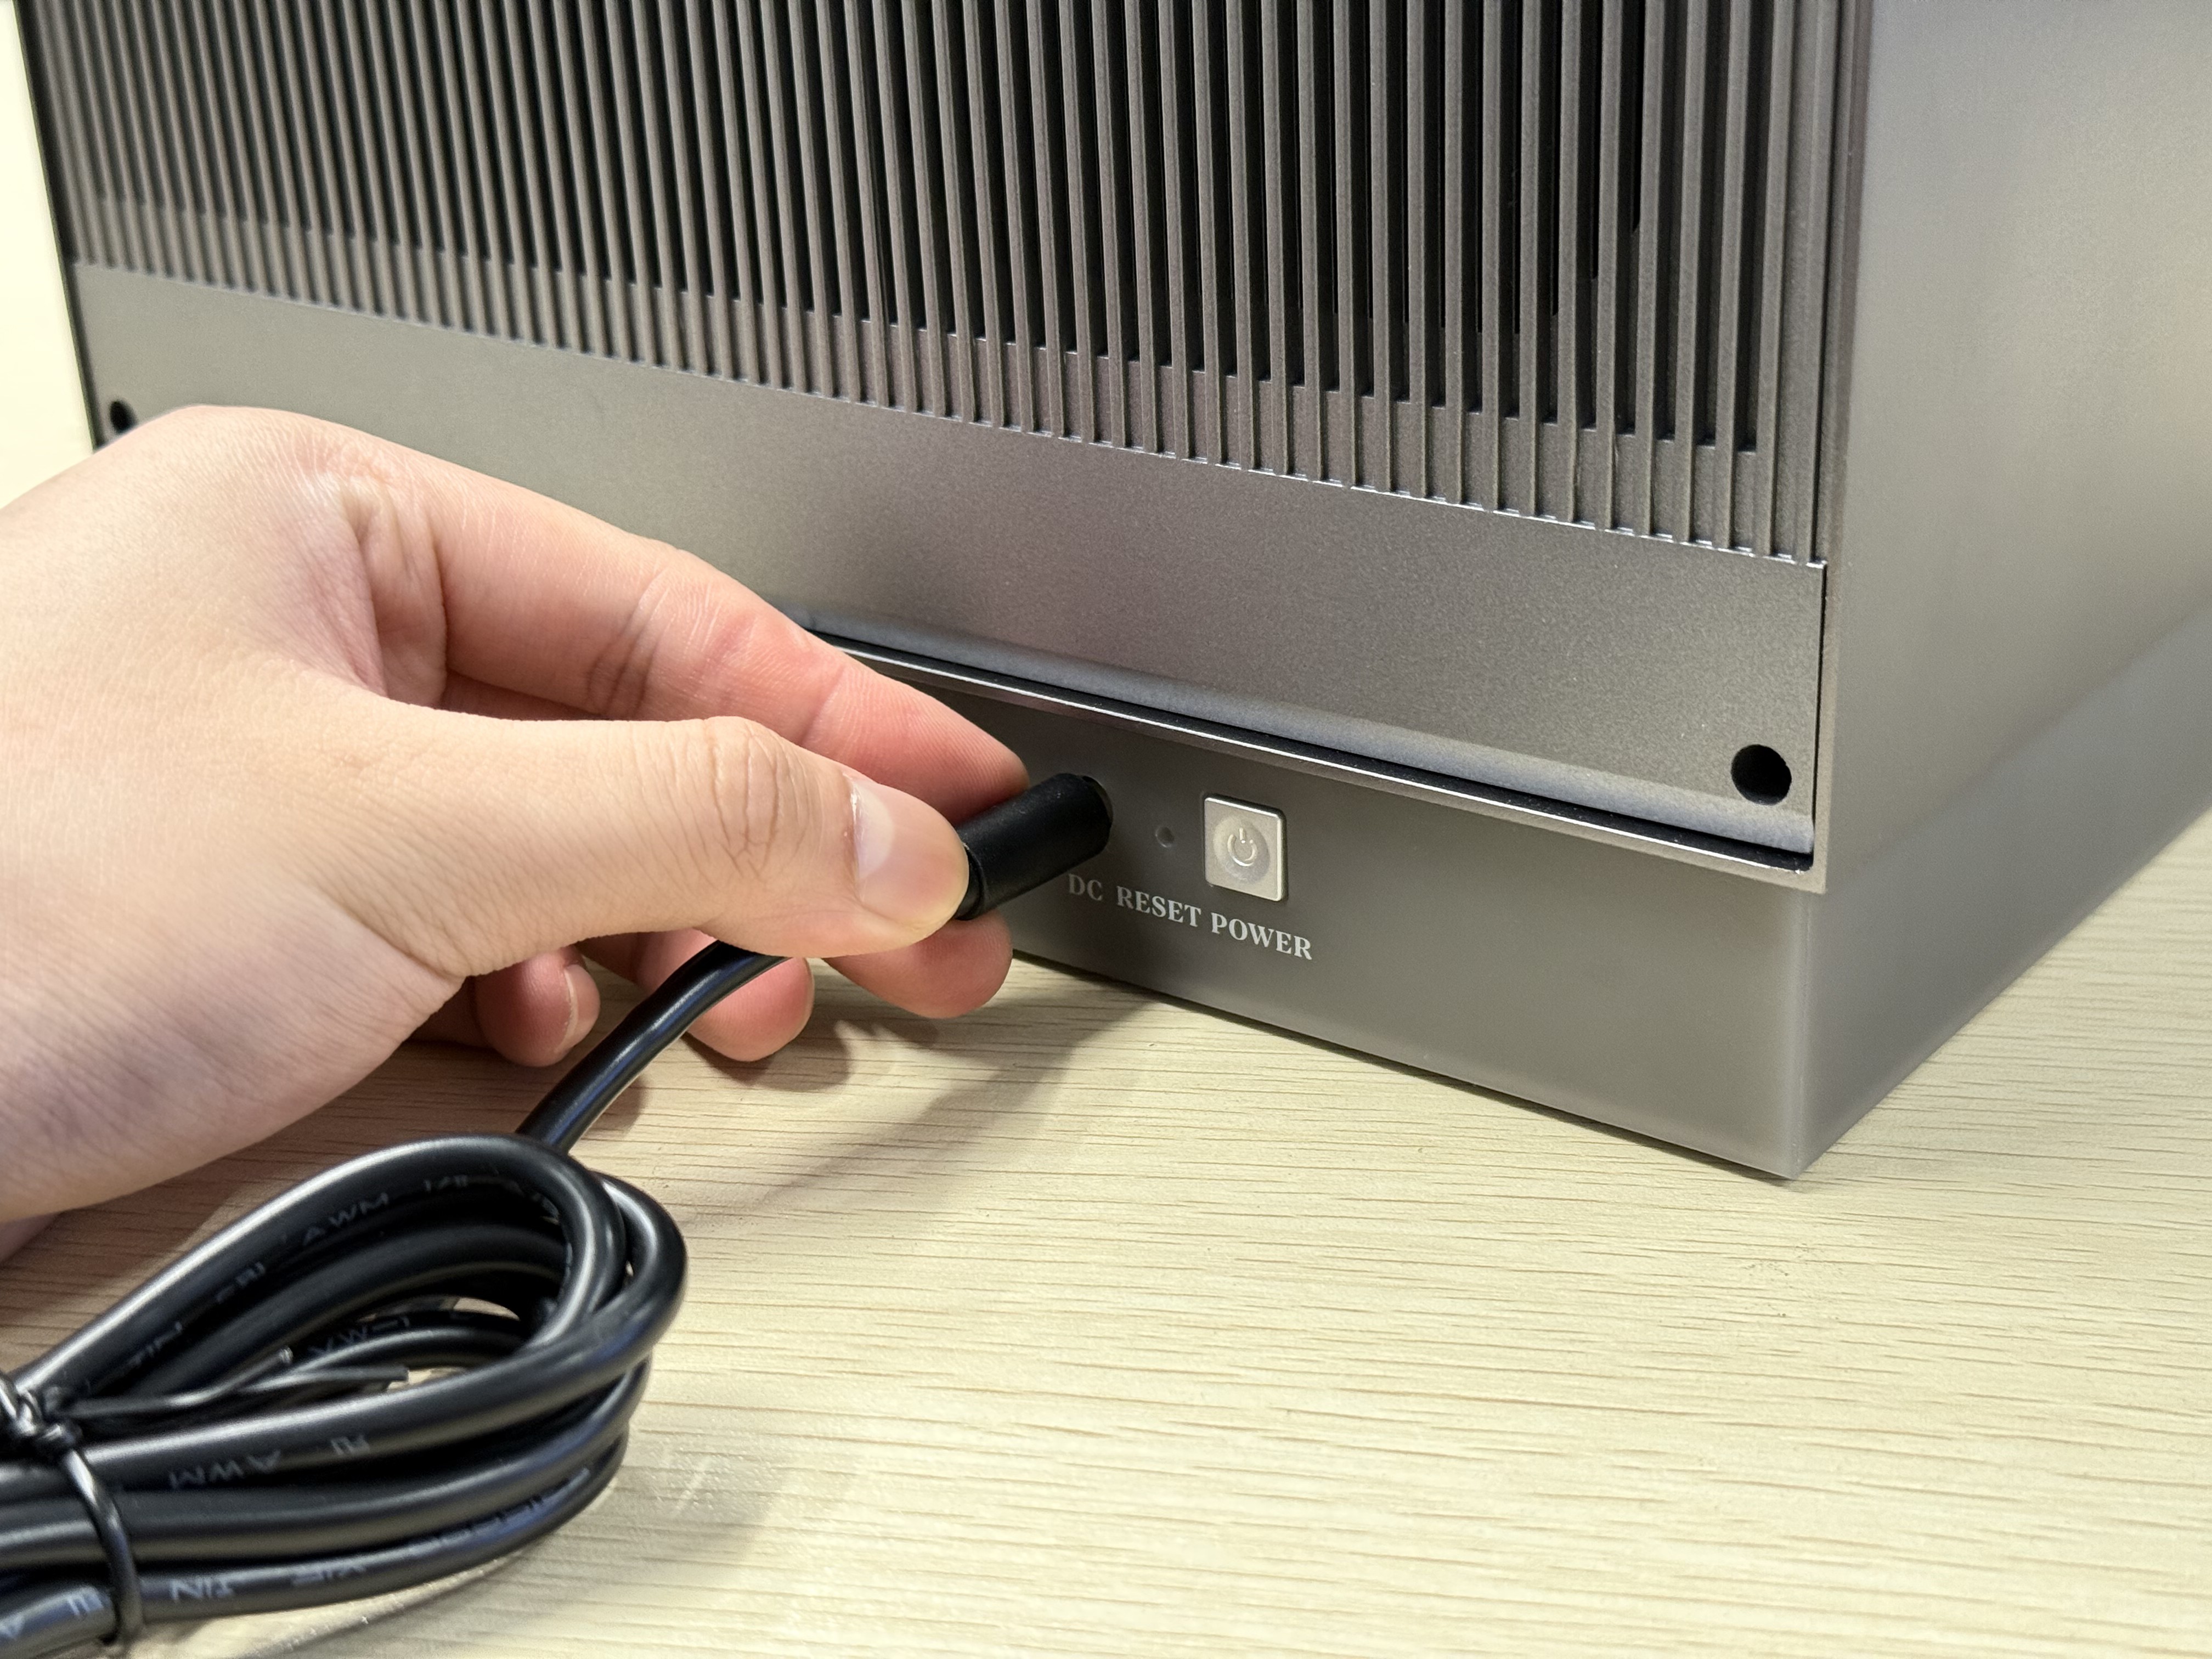
Power
- Connect the included power cord to the power adapter.
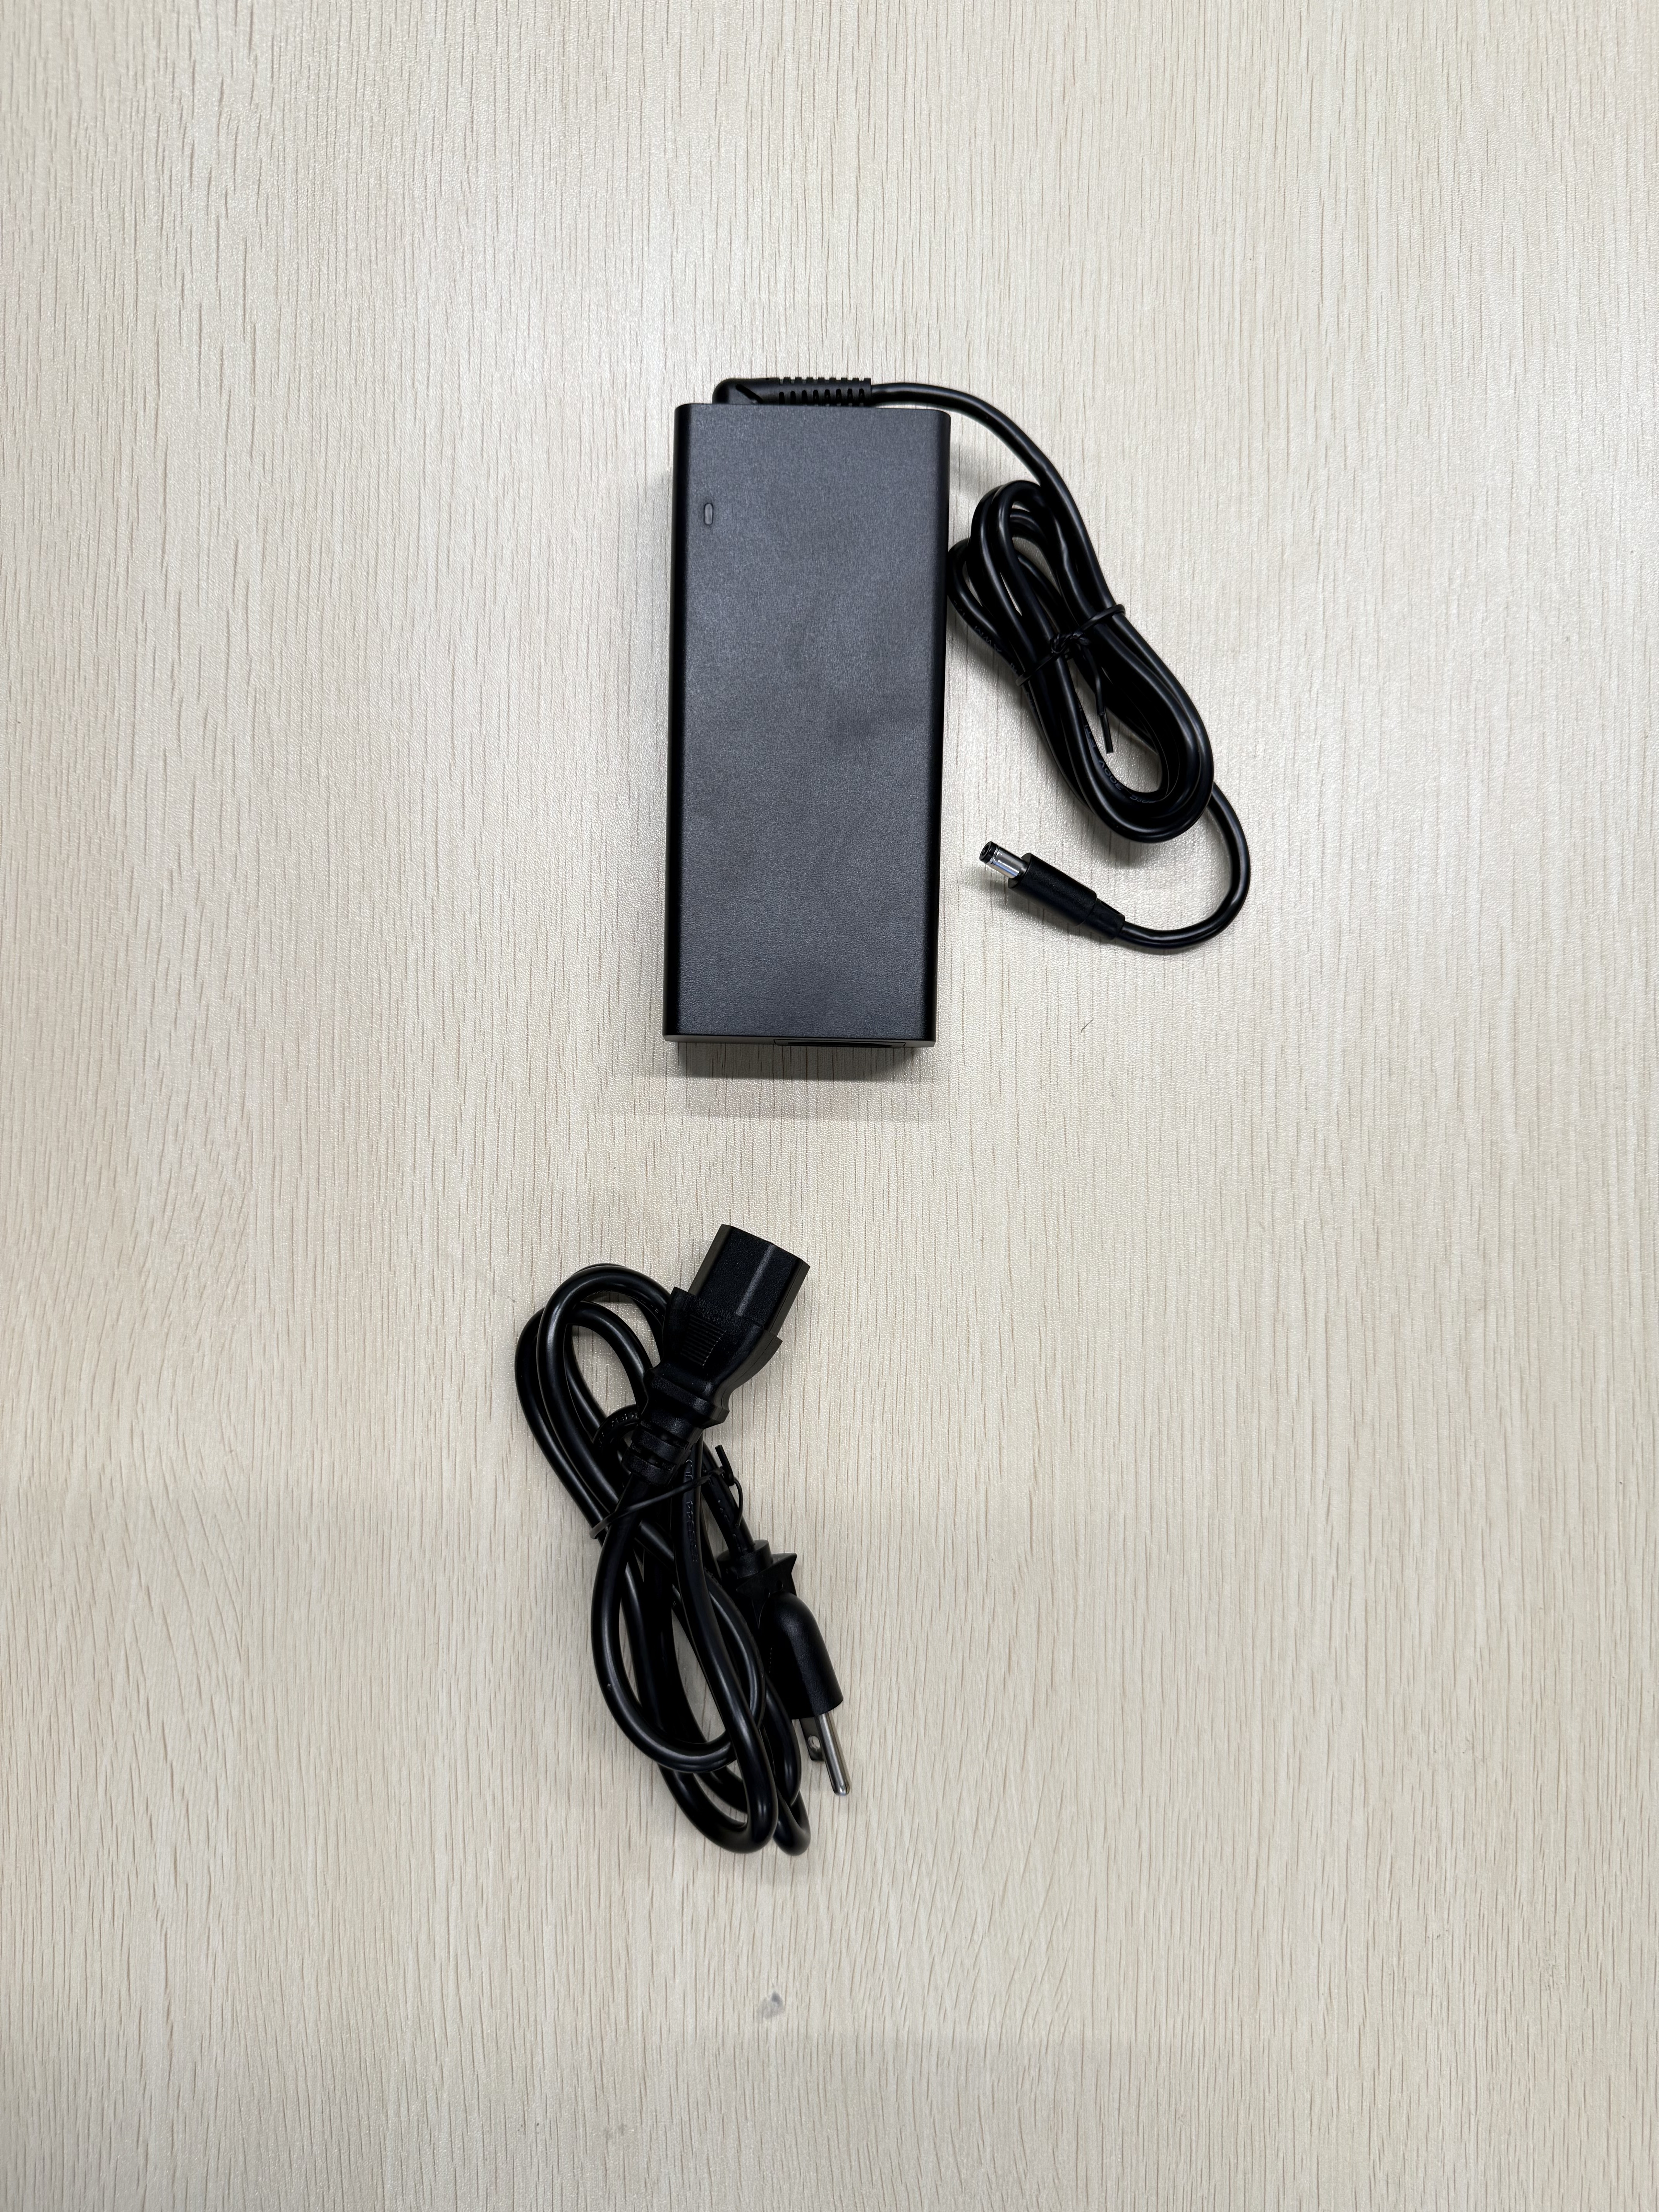
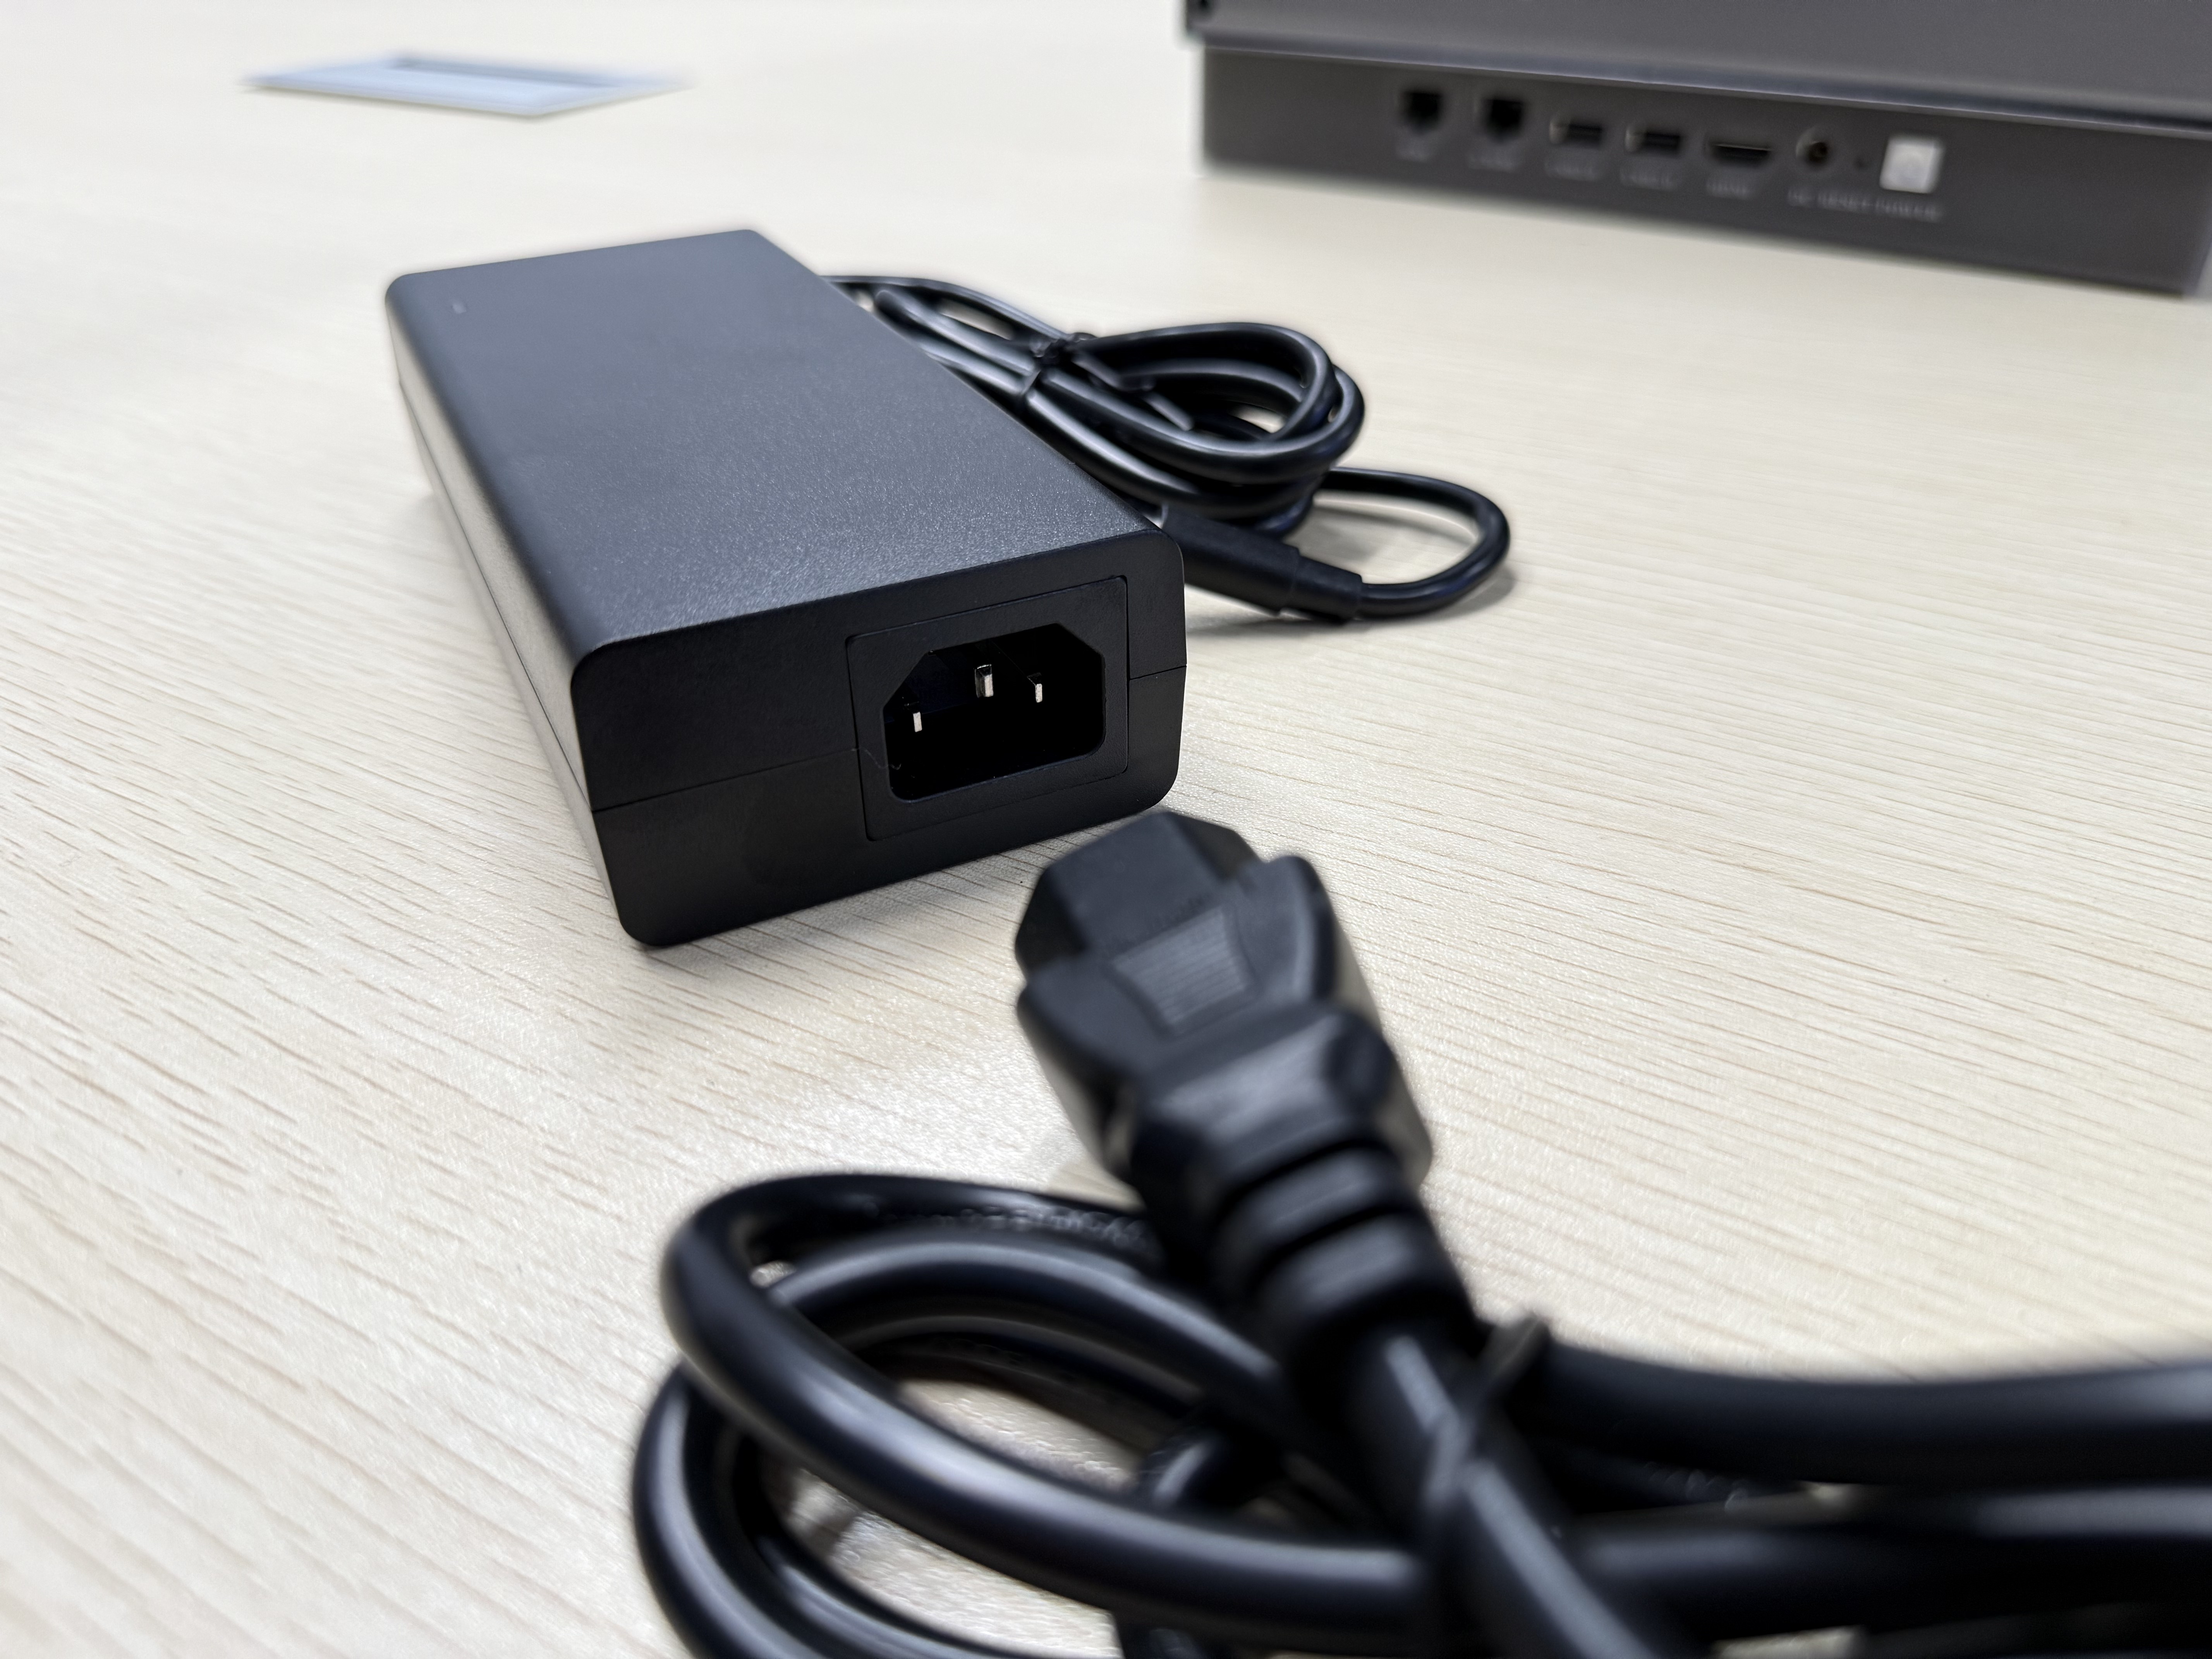

- Plug the power cord into a power outlet.
- Connect the power adapter to the DC power port on the back of the Zettlab AI NAS.
- Wait for the system to boot up.
System Connection
Using Web Interface
- Find the IP address displayed on the front LCD screen (e.g., 192.168.XX.XXX).
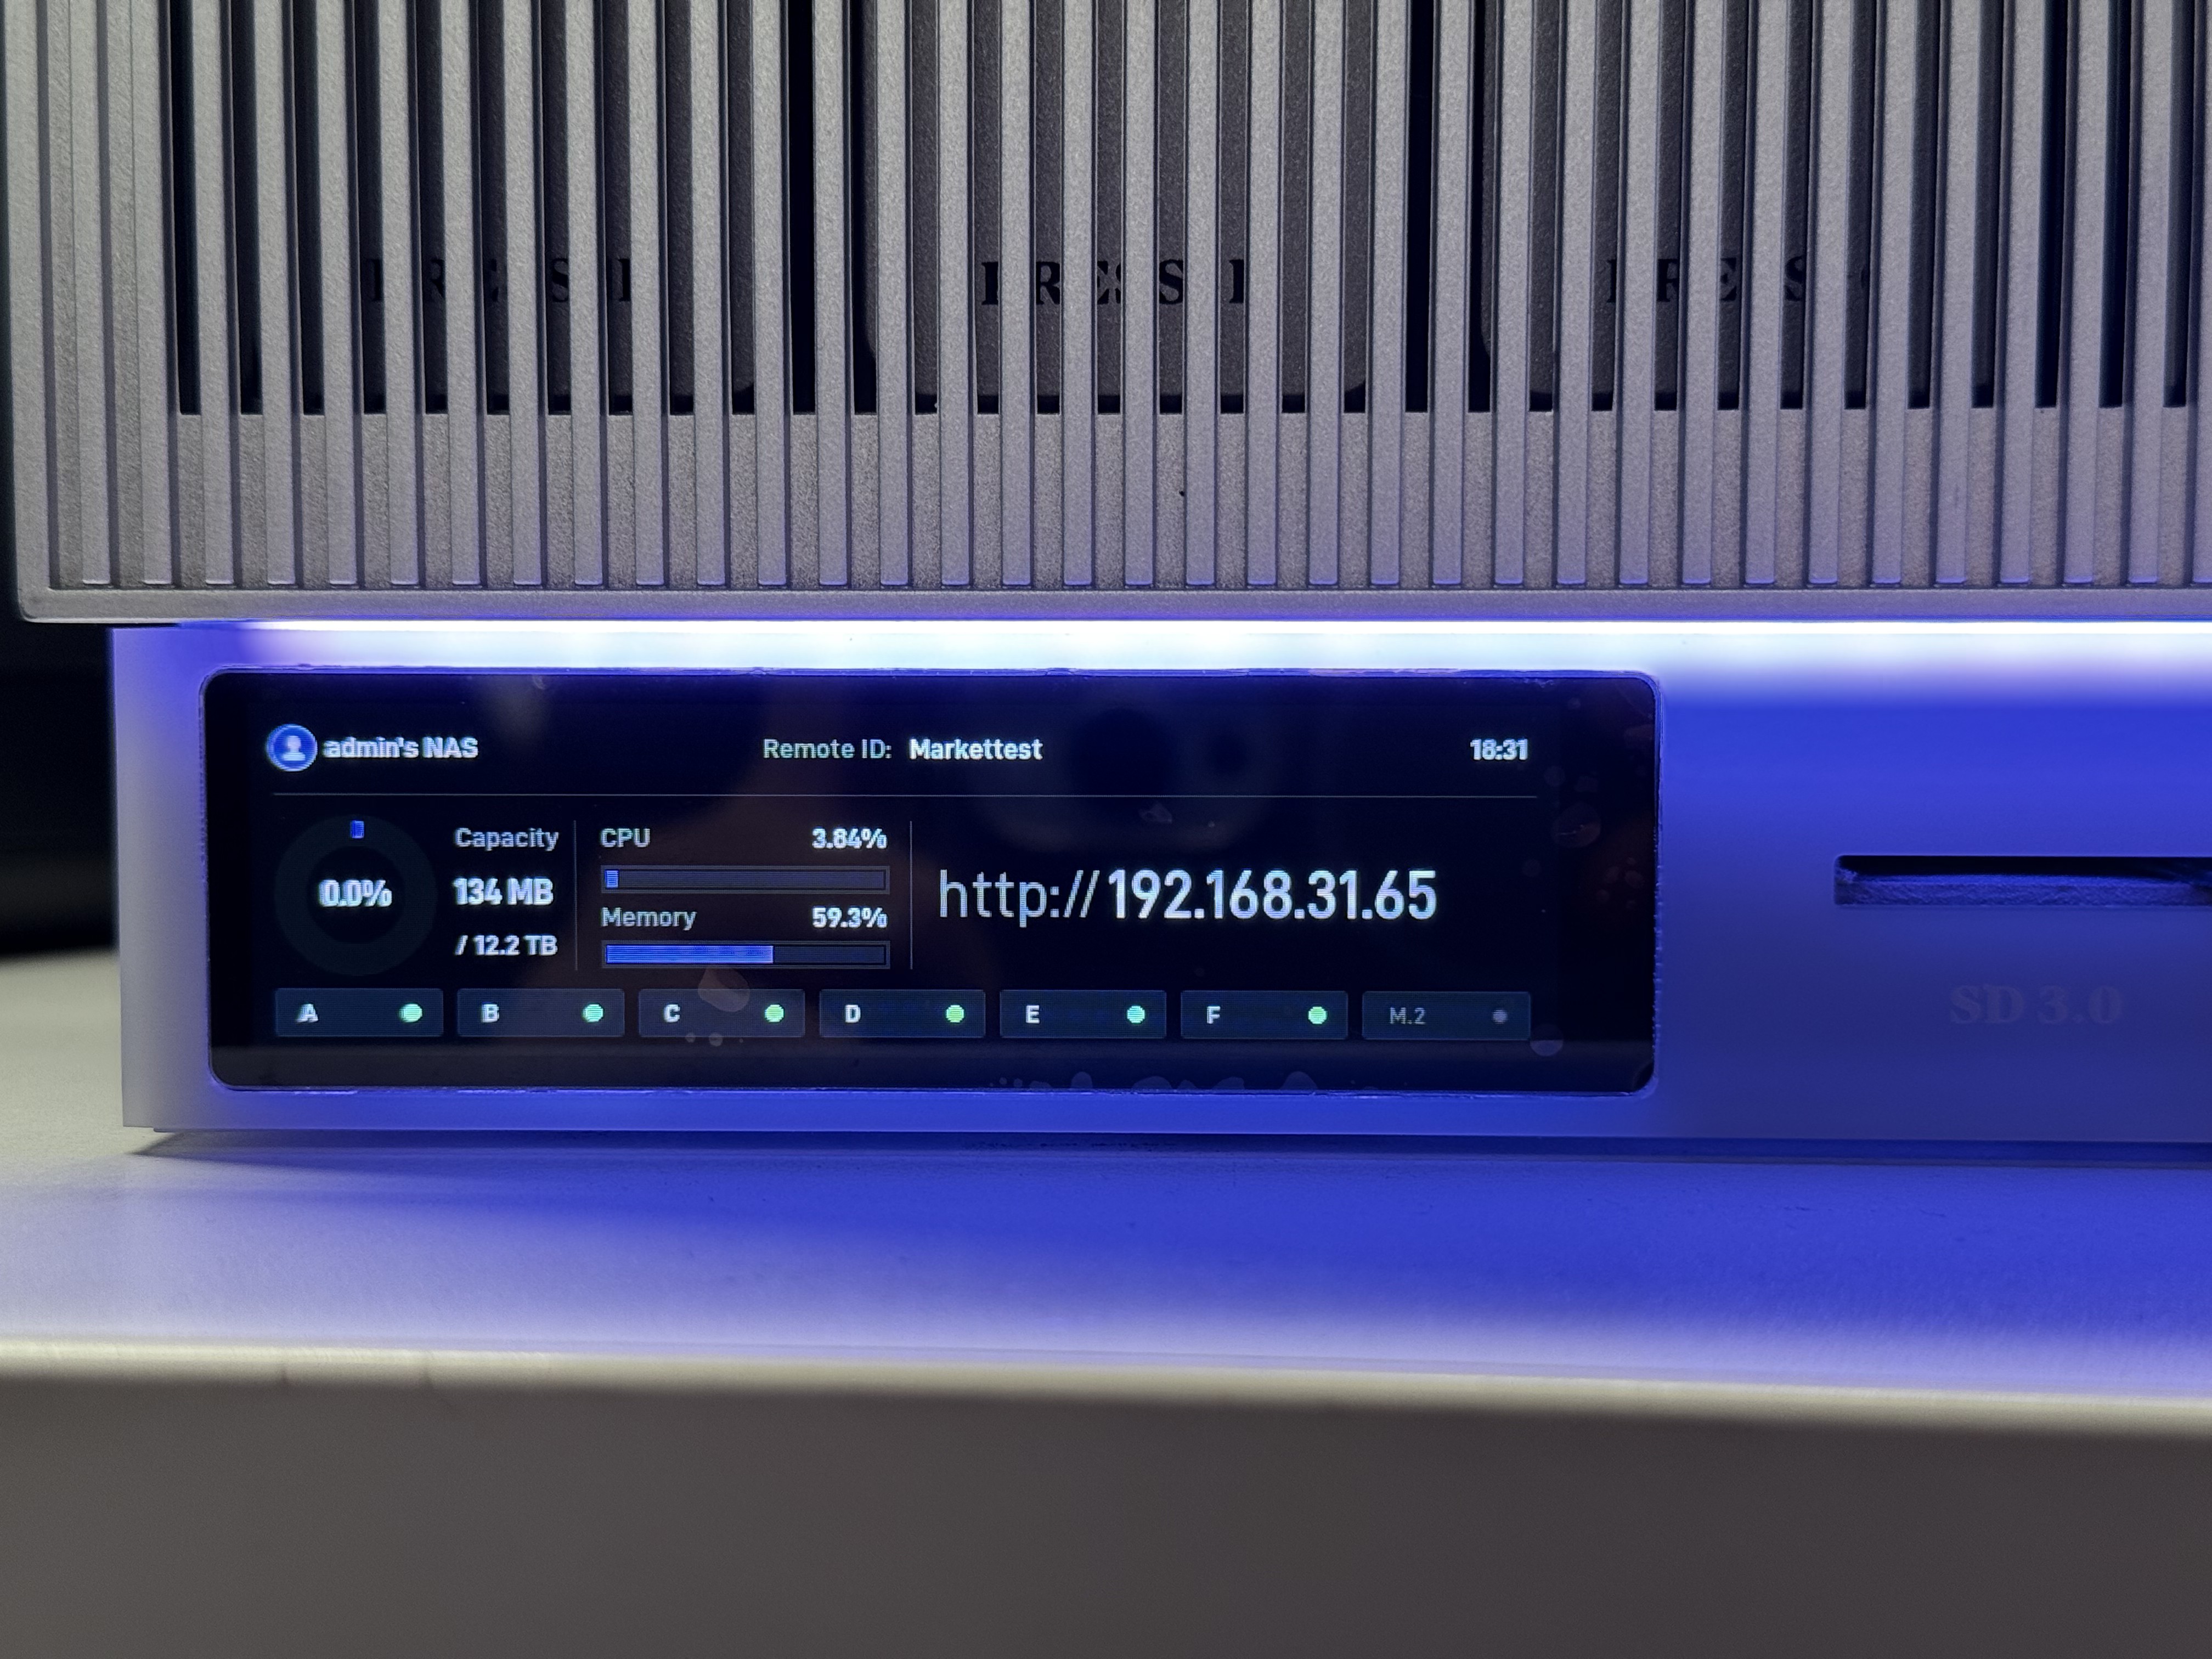
- Open a web browser on any device and enter the IP address shown on the LCD screen.

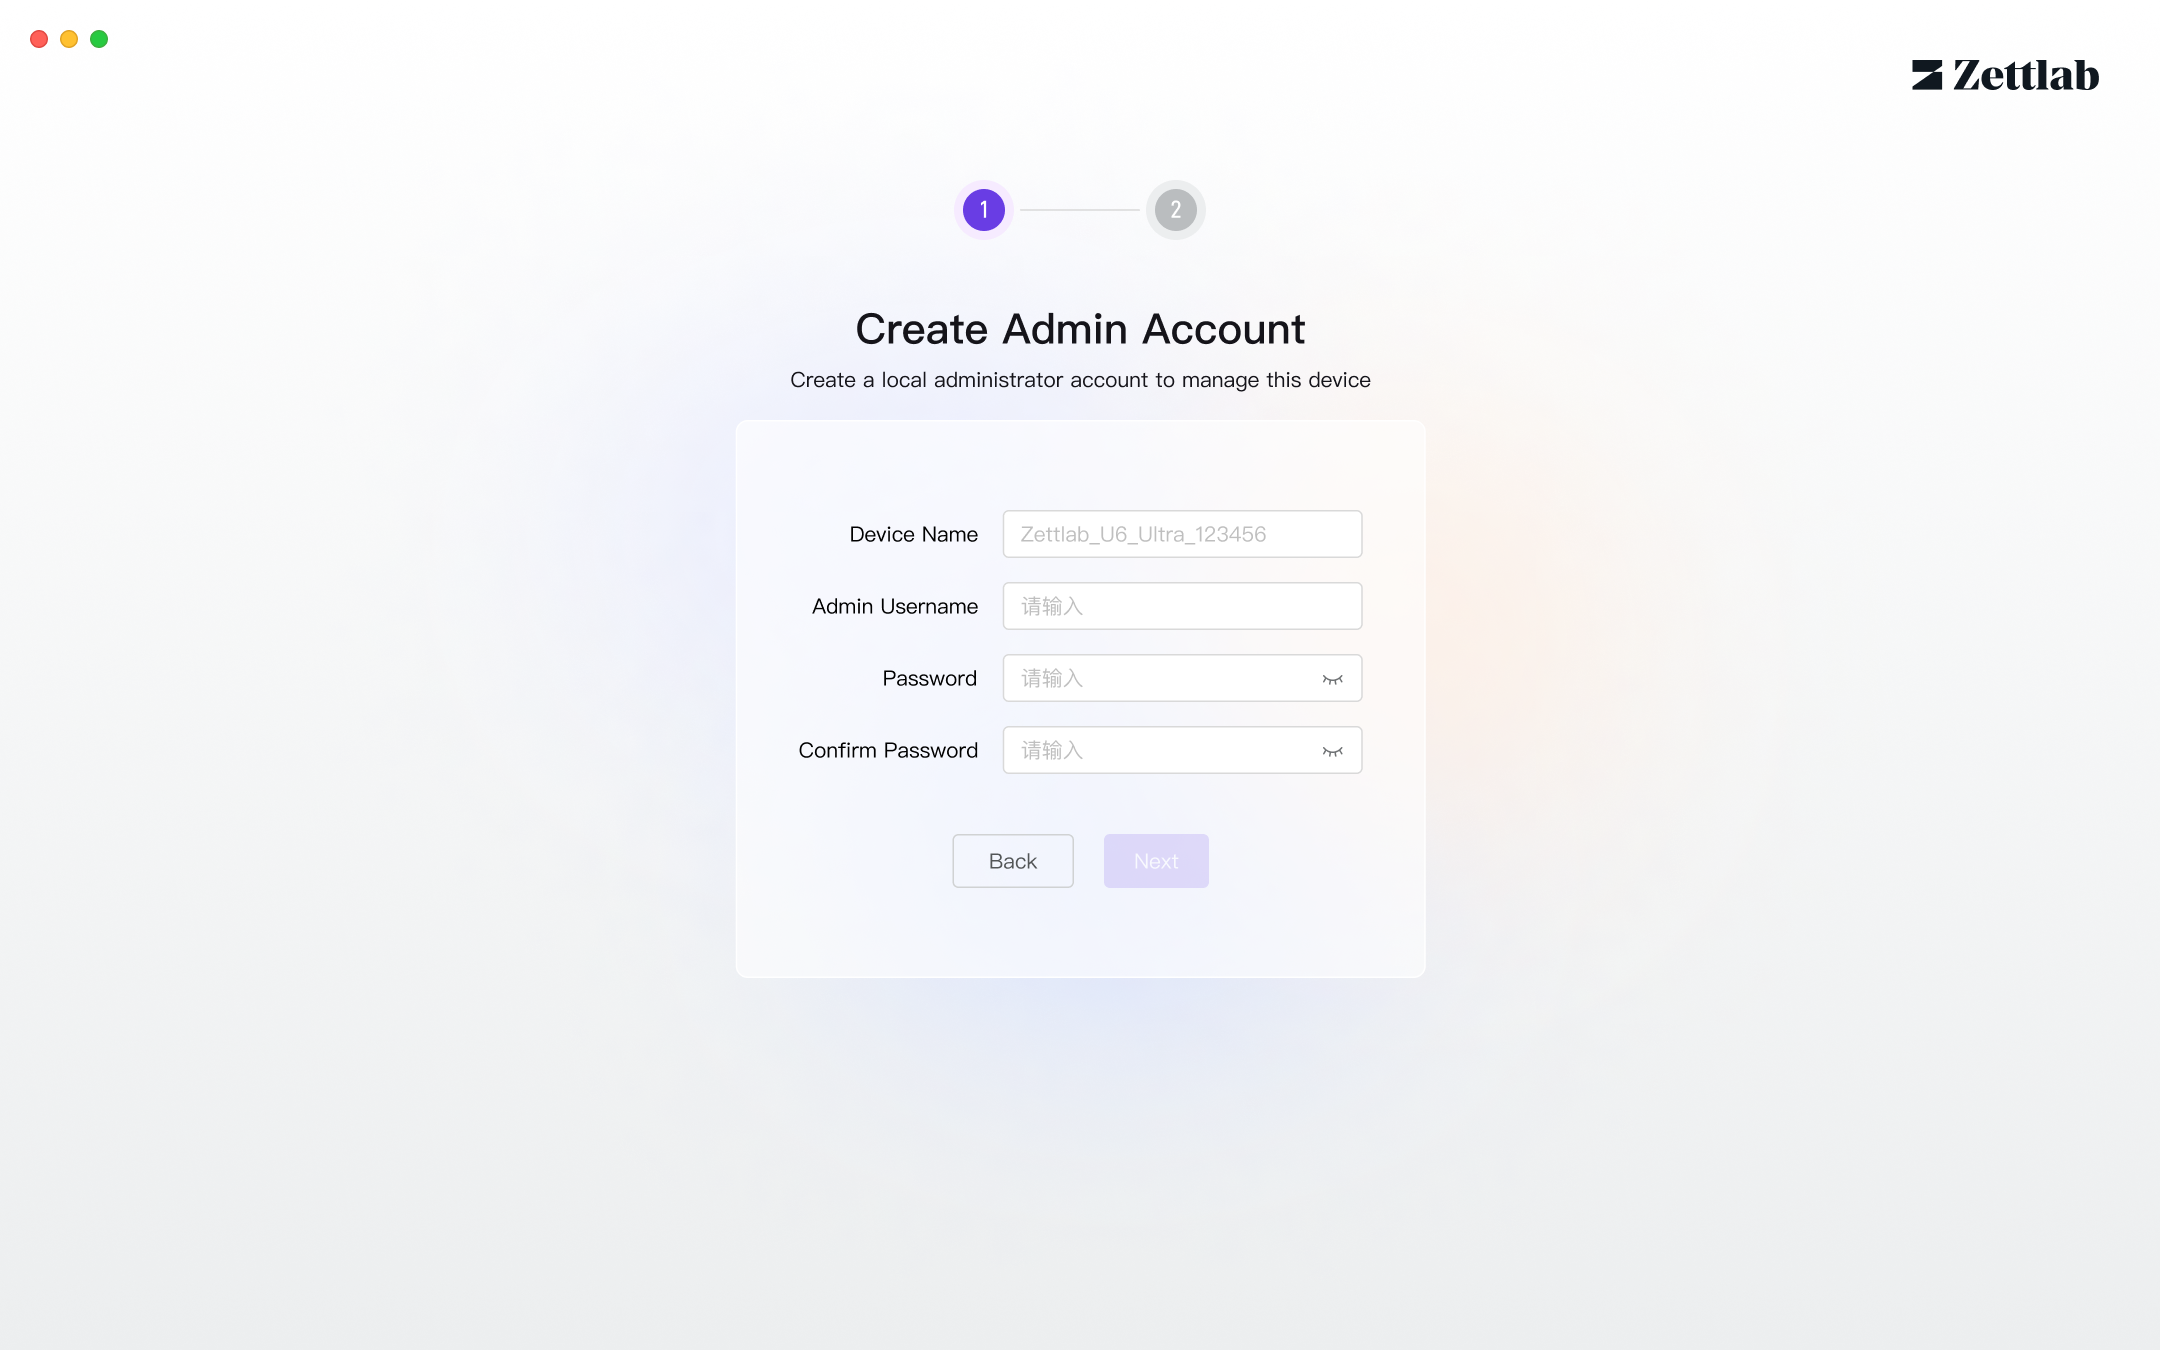
- Follow the prompts to create an administrator account.
- Choose whether to enable remote access.
Remote Access: Allows remote login to the NAS from outside the local network for quick access, management, and sharing of files stored on the NAS.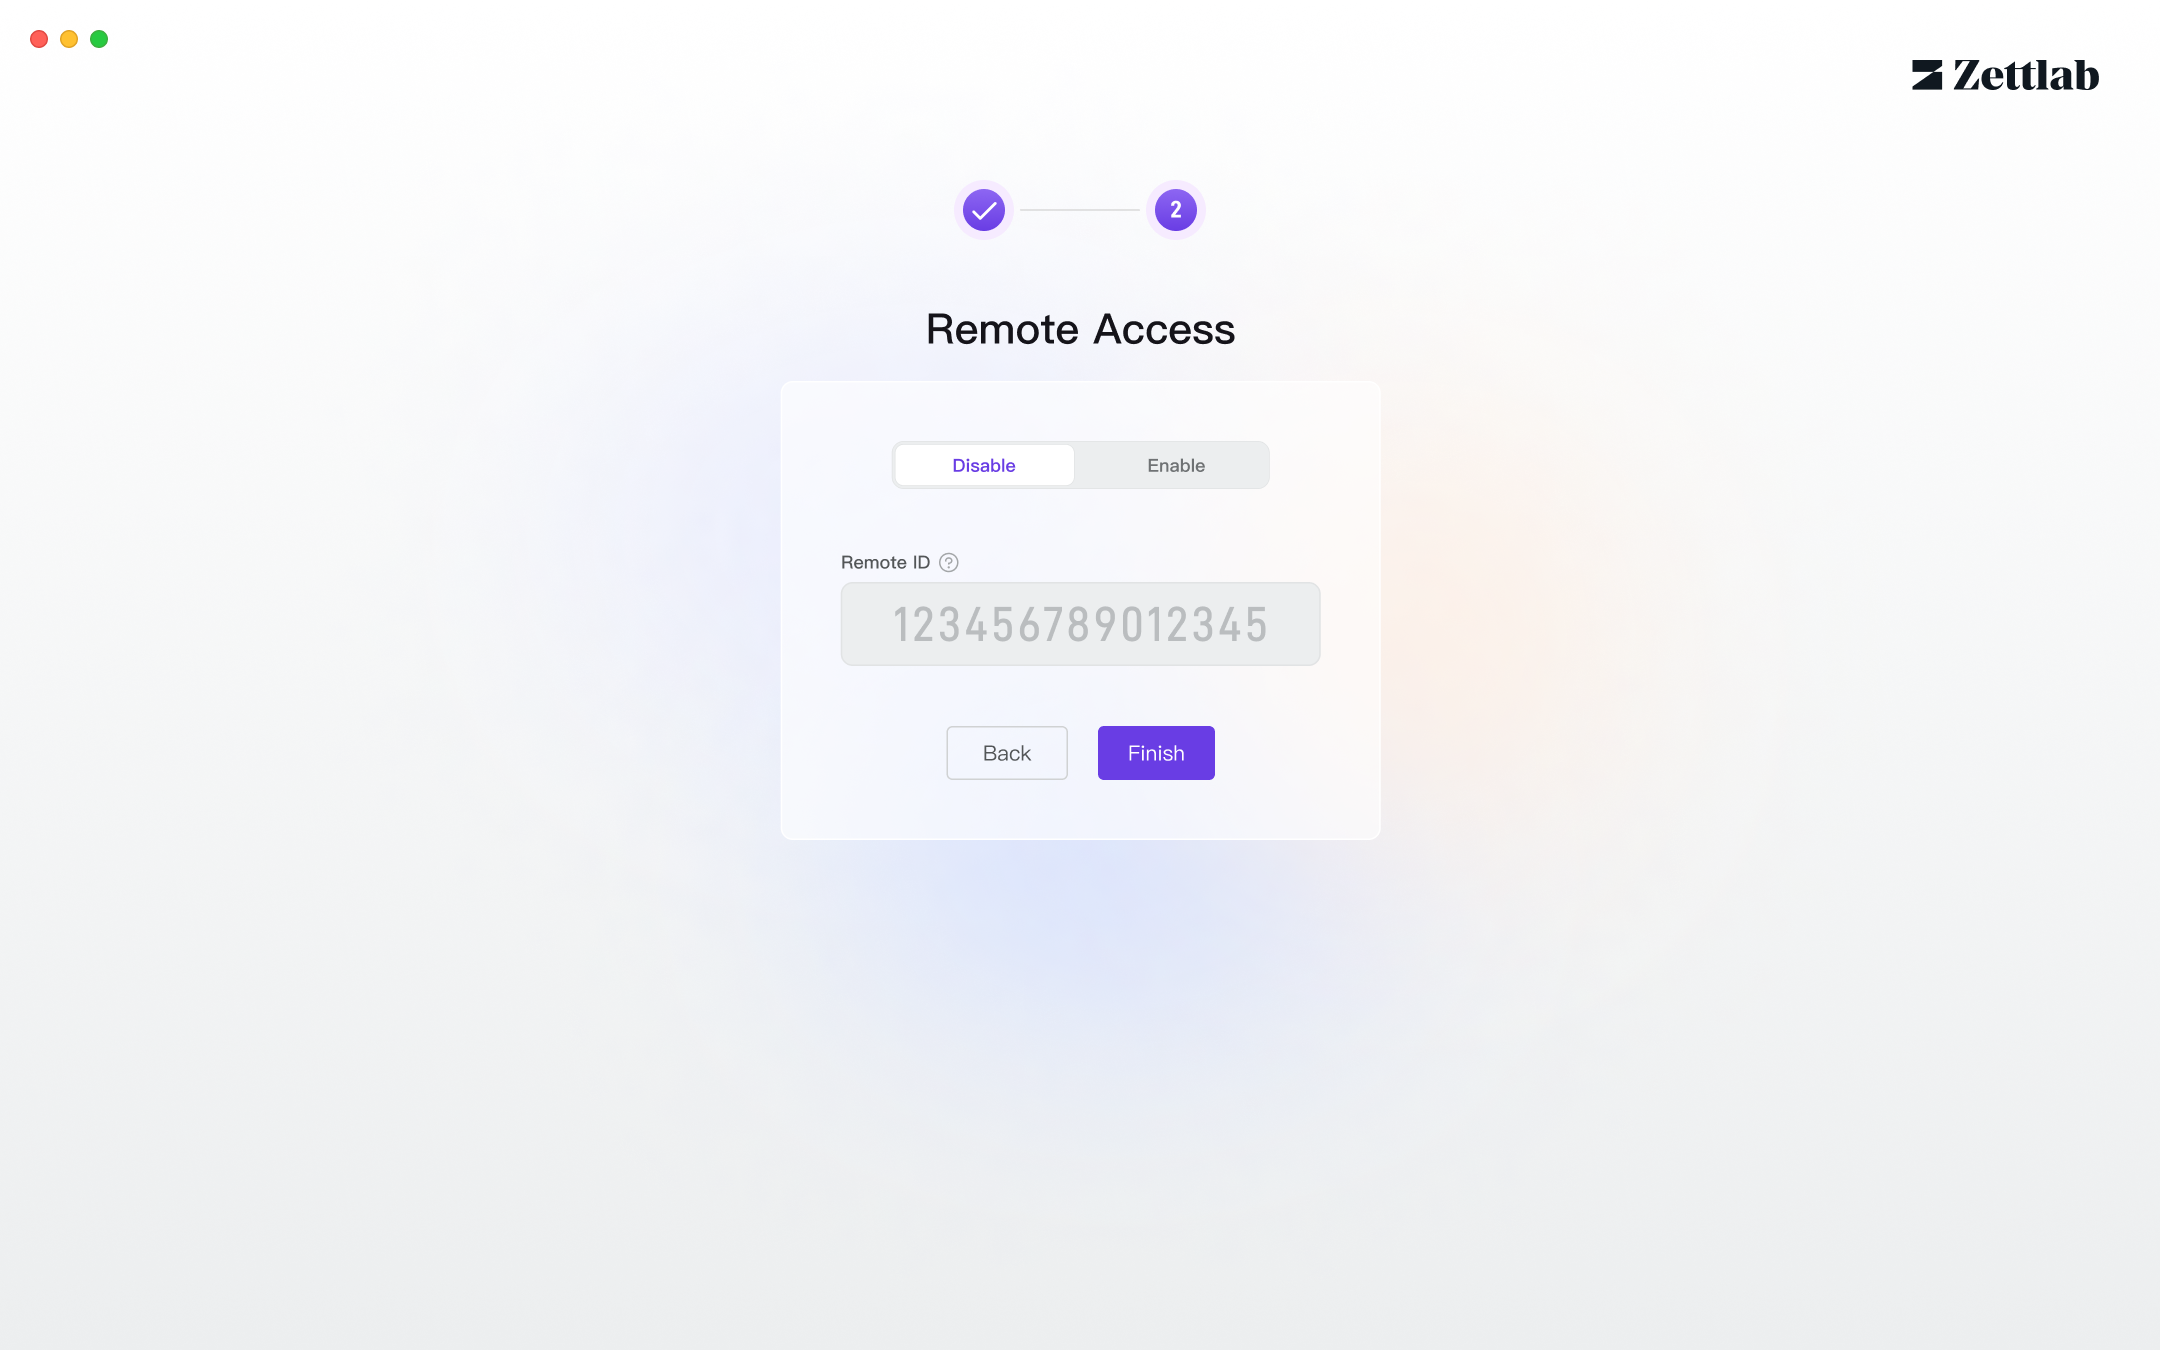
- Enter the system and start your AI NAS experience.
Using Client Software
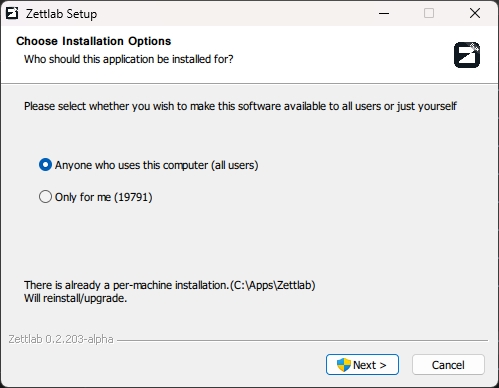
- Download the client software from the official website (available for WIN/MAC).
- Install the client software.
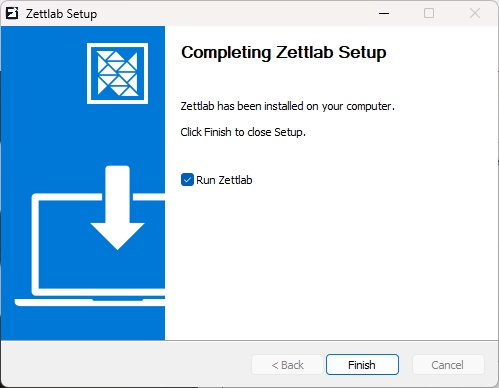
Install on MAC

Install on Windows

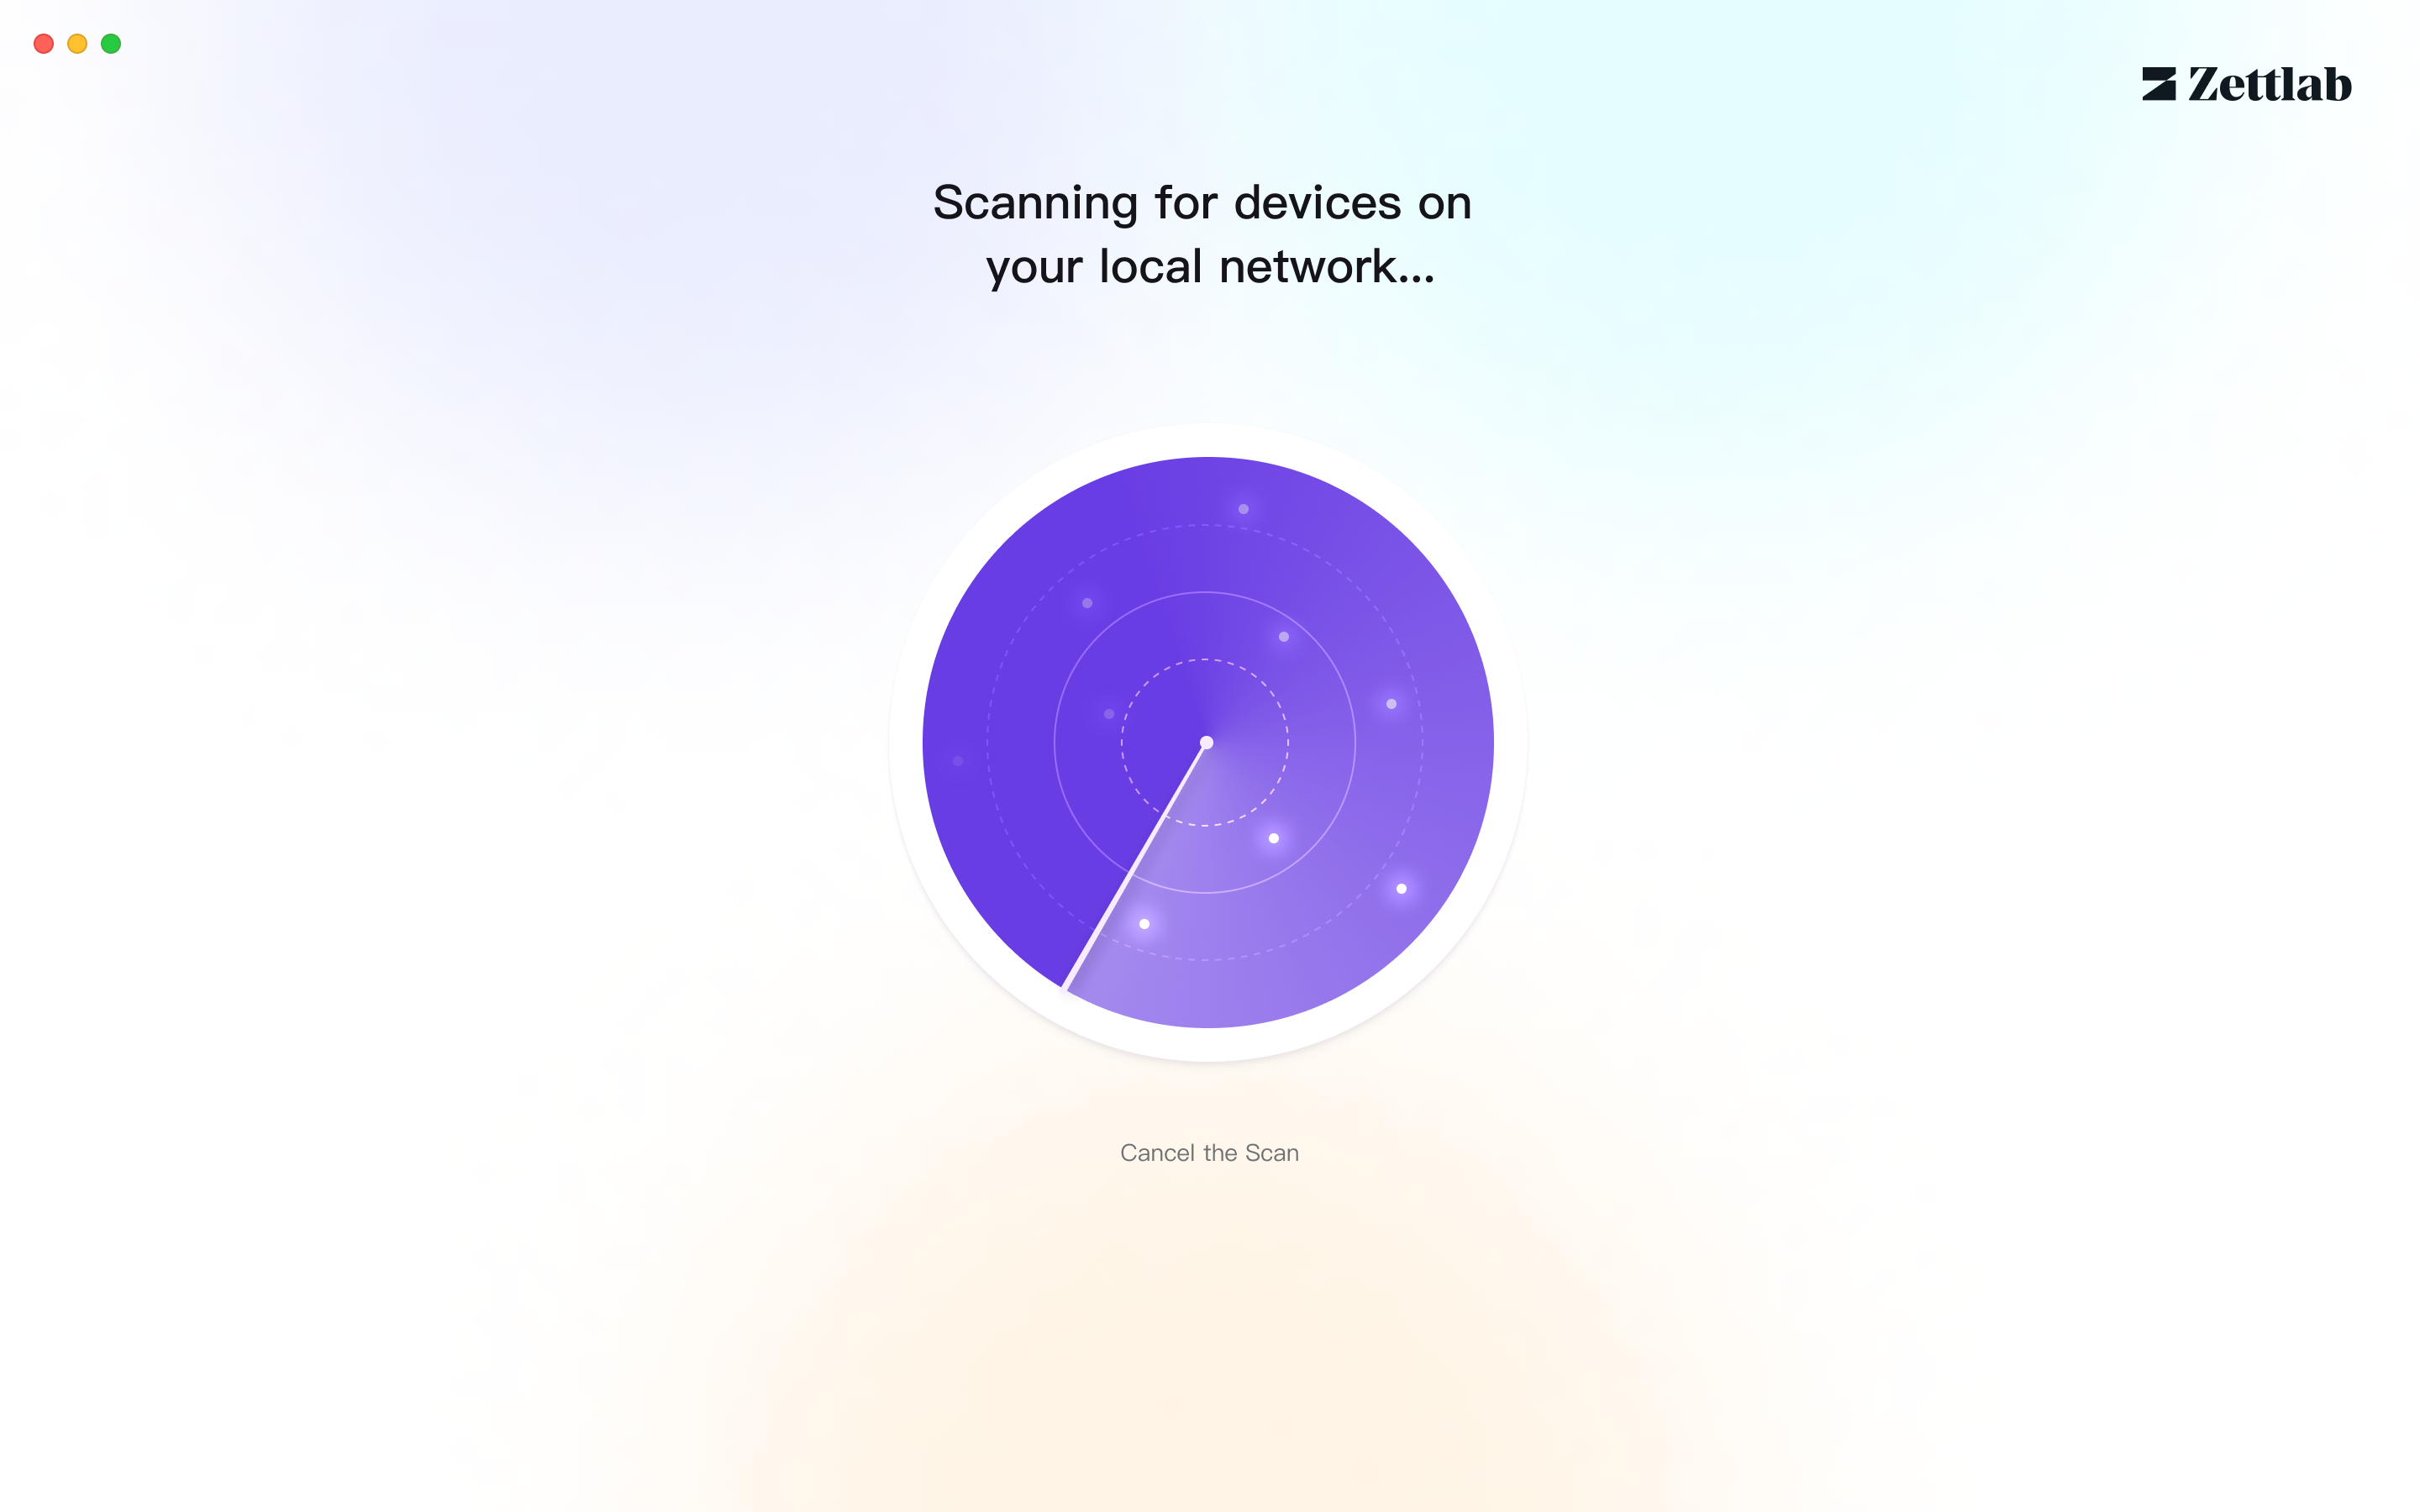
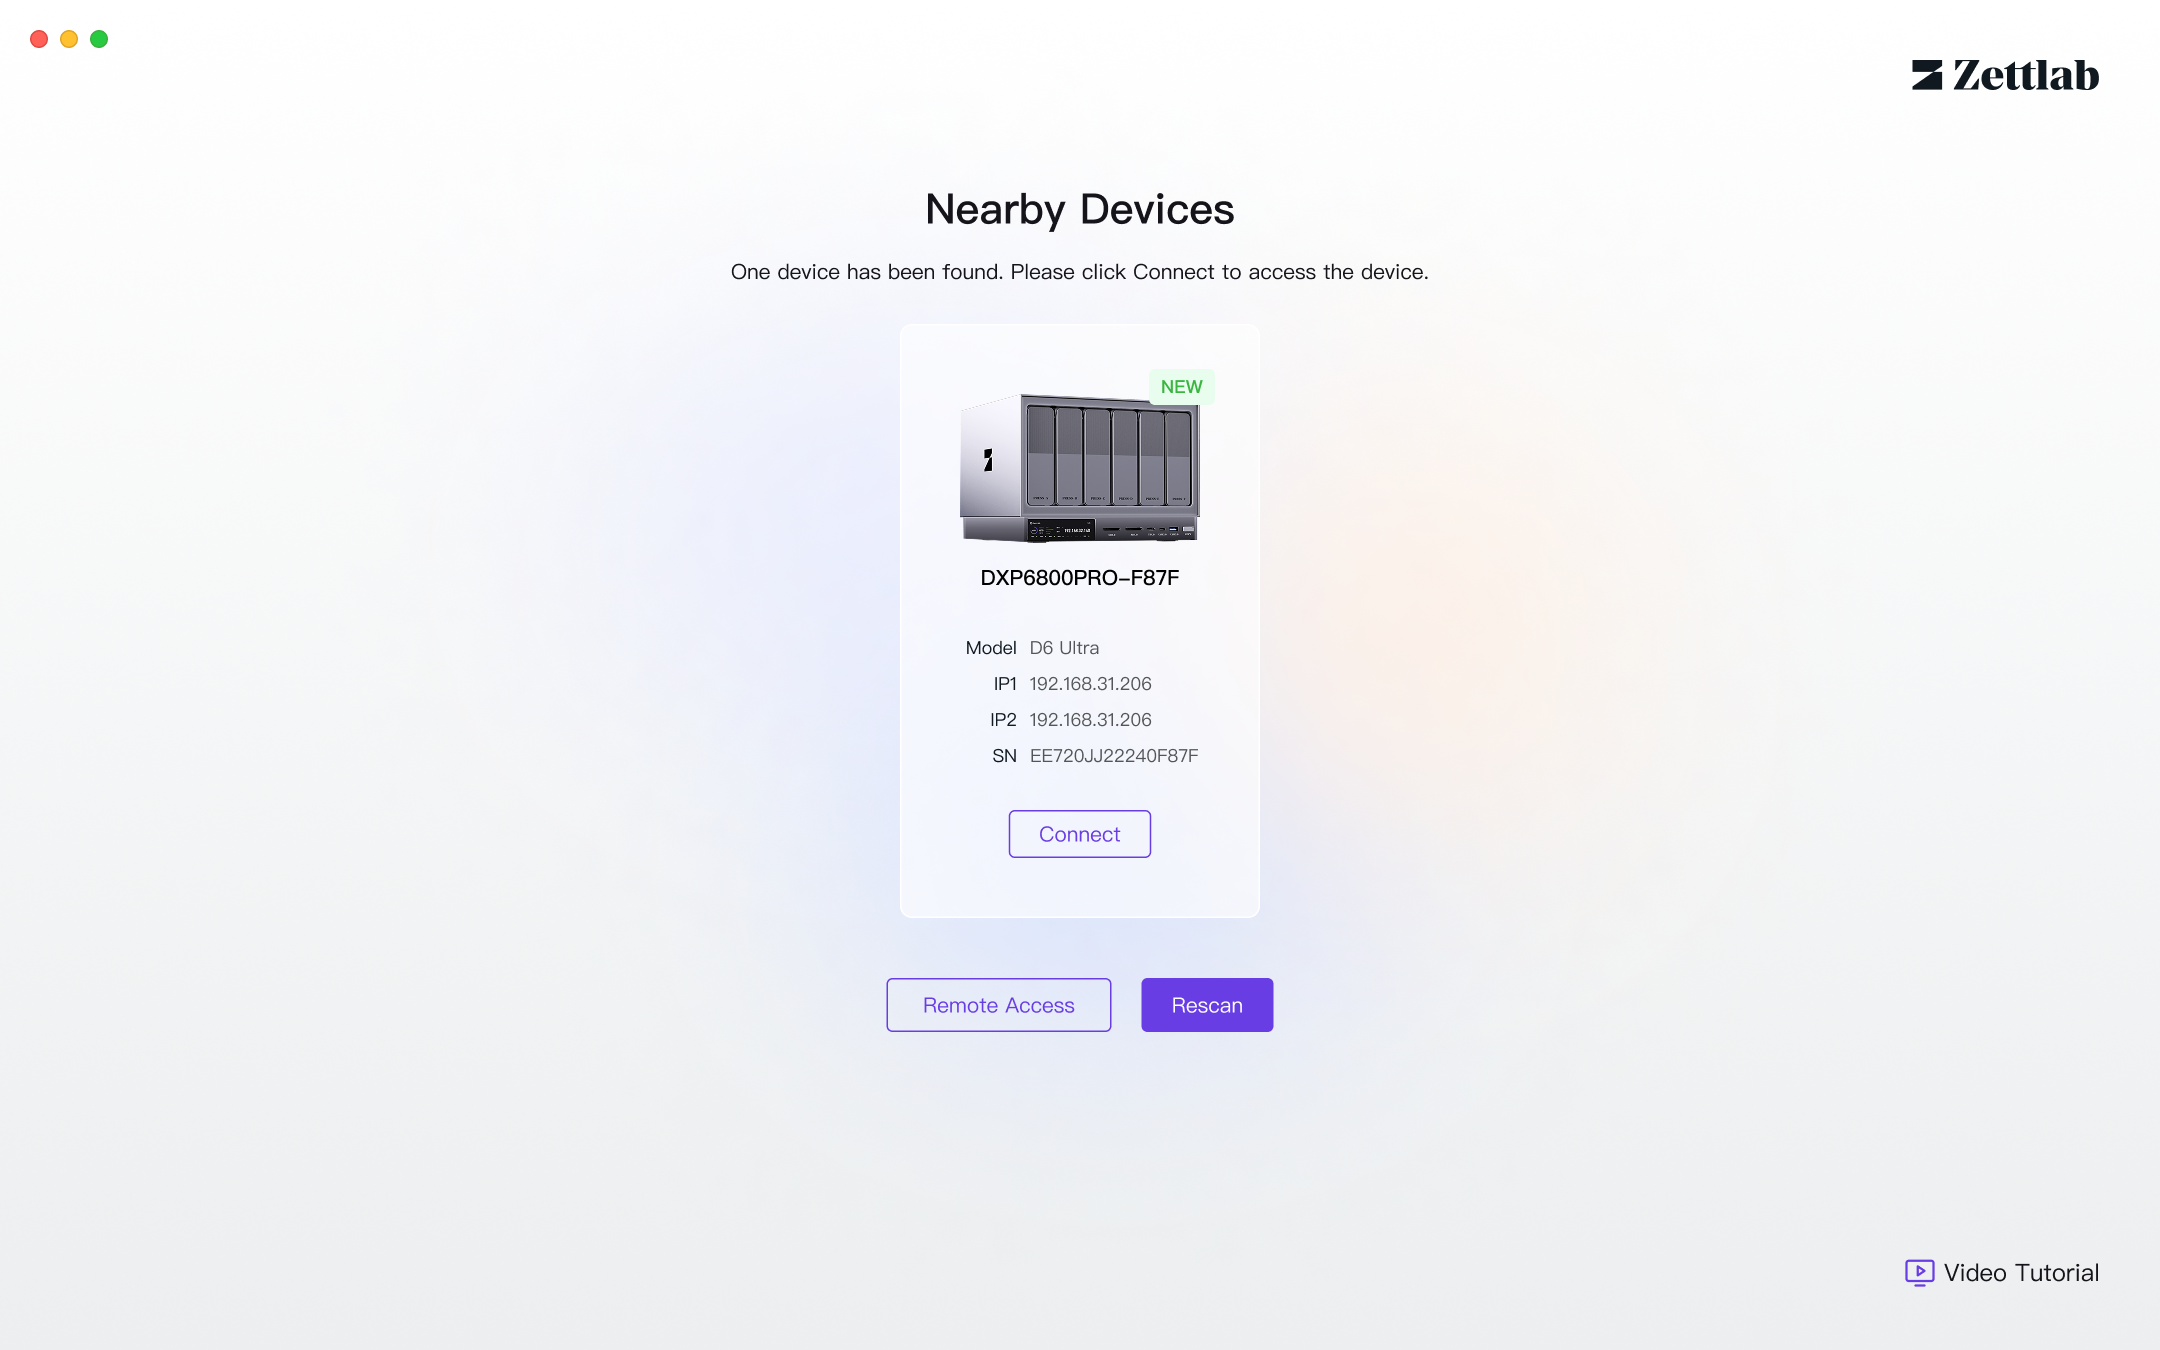
Launch the client software and scan for devices on the local network. If devices are not detected, follow the on-screen instructions to troubleshoot and retry the scan.
Click to connect to the device.
Follow the prompts to create an administrator account.
Choose whether to enable remote access.
Remote Access: Allows remote login to the NAS from outside the local network for quick access, management, and sharing of files stored on the NAS.Enter the system and start your AI NAS experience.
Restart the Device
- Standard Restart Click on the avatar in the upper right corner of the system interface, find Restart, and click it to restart the device.

- Forced Restart Locate a circular hole marked with "RESET" next to the power button, and use a SIM card ejector pin or another sharp object to firmly press inward to force the device to restart.