AI Clip Introduction
AI Clip visually displays the transcription results of audio and video with timestamps and provides rich functionality to enhance your efficiency in handling materials. With AI Clip, you can:
- Quickly browse the spoken content in audio and video
- Adjust the playback speed of audio and video
- Search for keywords in audio and video (exact and fuzzy matching)
- Click on keywords to jump to the corresponding key frames
- Edit, delete, or split keywords and segments
- Clip audio and video by selecting transcription results
- Export subtitles in ASS or SRT formats
- Export merged or separate selected segments
Whether it's rough cutting video dubbing or viewing academic lectures and technical presentations, AI Clip significantly simplifies your workflow.
Interface Overview
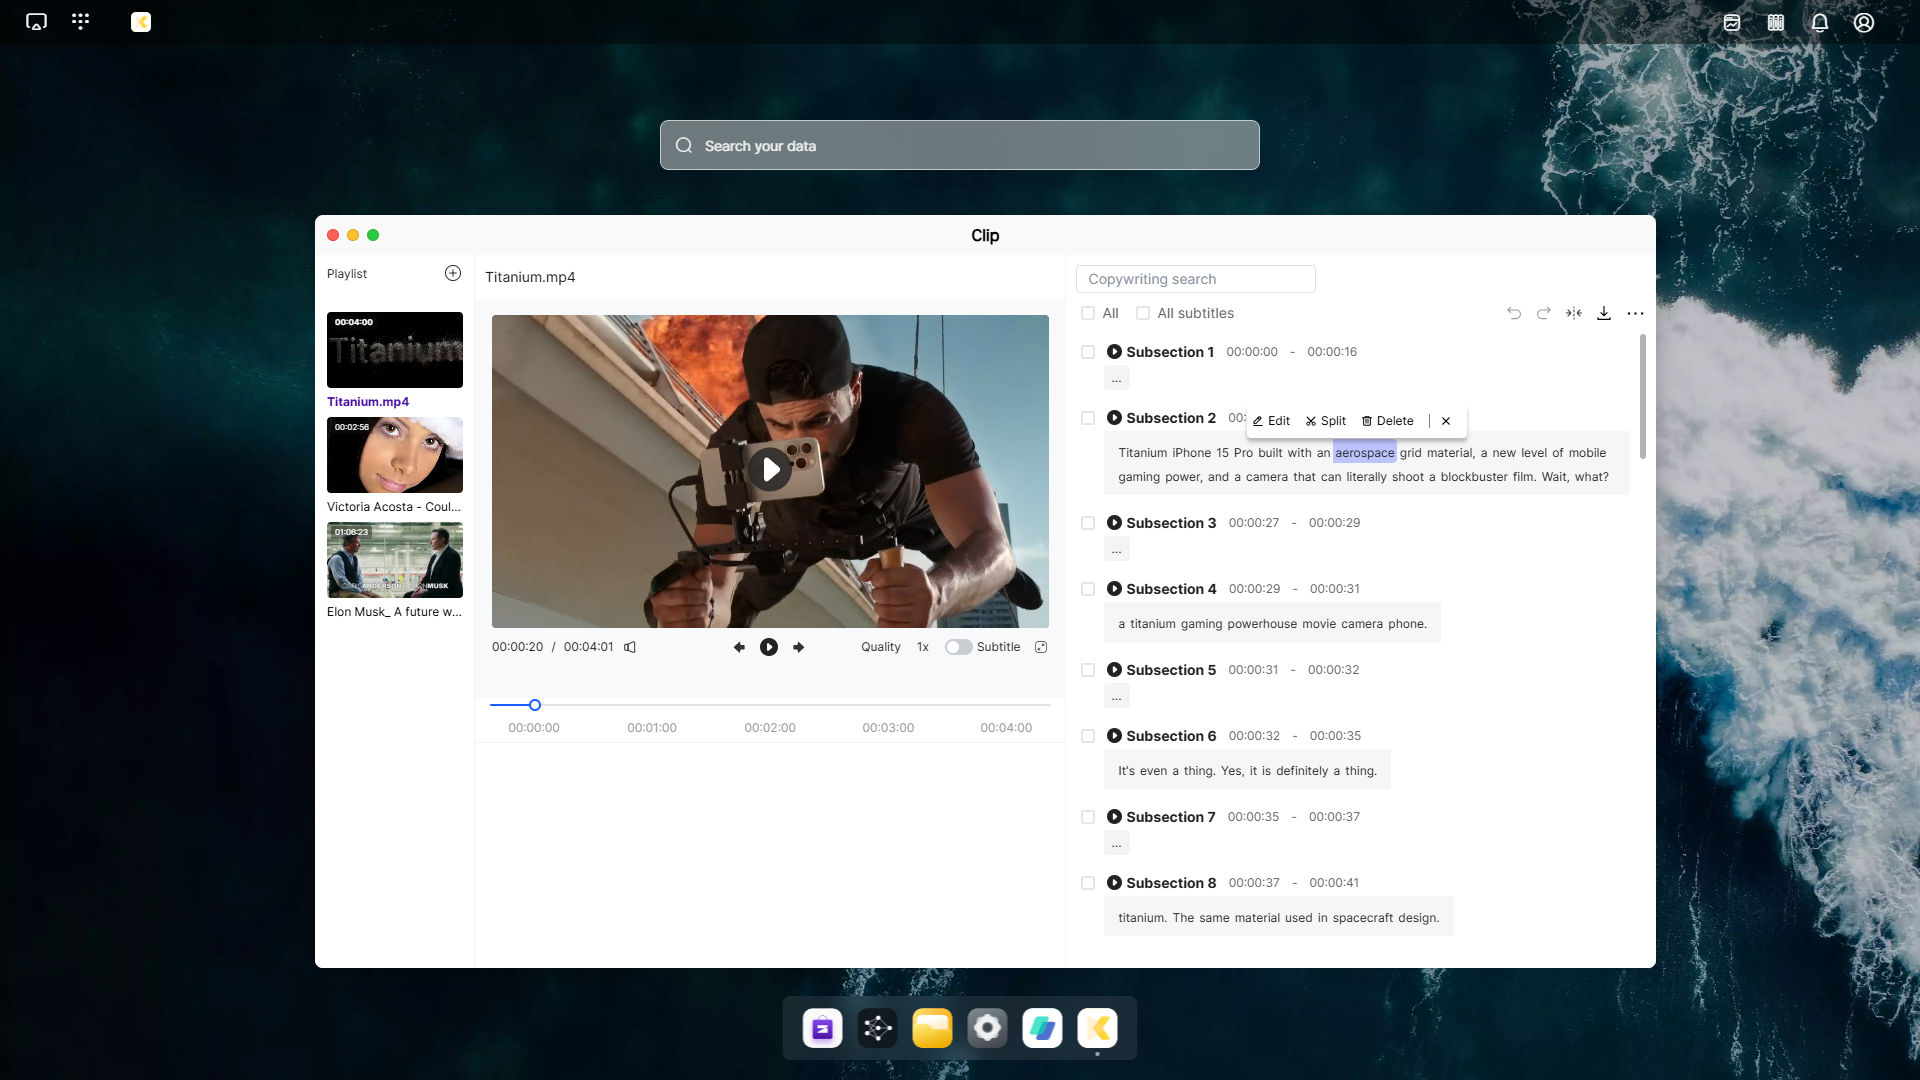
The AI Clip interface can be divided into three parts from left to right.
- Playback List Area: Videos added to AI Clip will appear here. You can add multiple videos for quick switching during editing.
- Video Playback Area: Similar to most video players, you can:
- Adjust volume
- Switch to the previous or next video
- Select video quality (currently unavailable)
- Adjust video speed
- Show video subtitles
- Enter full-screen mode
- Select video progress
- Operation Area: Here, you'll find the keyword search bar, subtitle selection boxes, and various operation icons. These will be explained in more detail later.

Getting Started
Adding Videos to the Playback List
Before your first use of AI Clip, upload the videos you want to edit to the NAS. Then, add videos to the AI Clip playback list using one of the following methods:
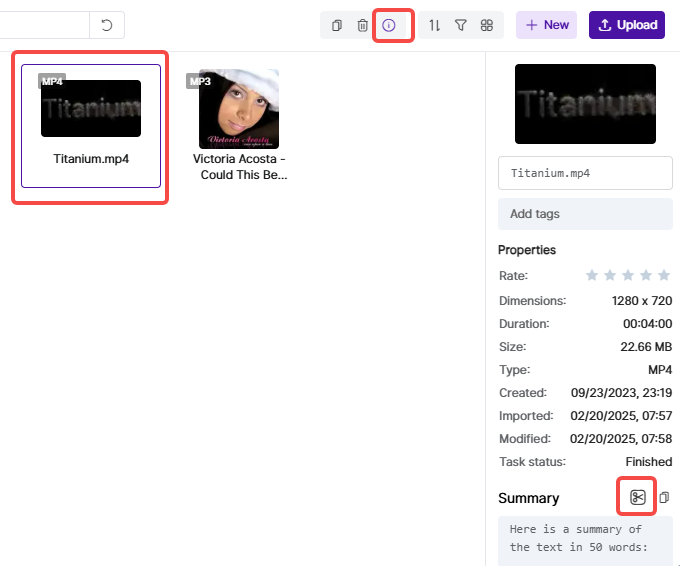
- Select the video you want to edit, click the exclamation mark (!) in the top right corner, and then click the scissor-shaped icon next to the Summary.
- Open AI Clip directly, select the folder containing your video, and add the video to the playback list.

Note: Uploaded data needs to be processed by AI before it can be successfully added to AI Clip. You can check the processing status by selecting the file in Files, clicking the exclamation mark (!) in the top right corner, and viewing the Task Status. If it says "Processing," the data is still being handled; "Finished" means the data is ready.

Searching for Keywords
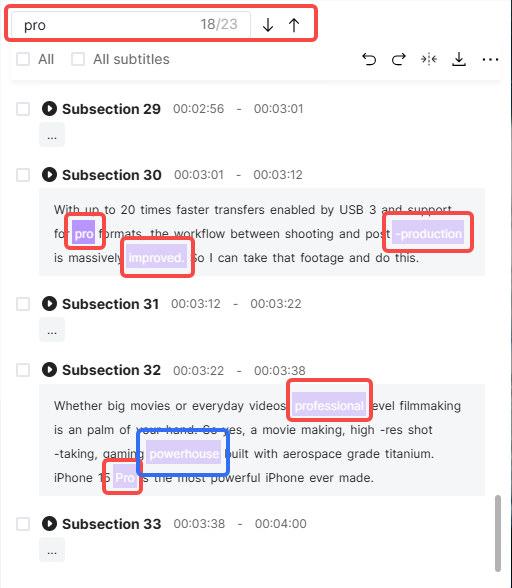
In the search bar at the top of the Operation Area, you can quickly find keywords in audio and video. Note that search results can be exact matches (e.g., the word "pro" in red) or fuzzy matches (e.g., the letters "p," "r," and "o" in blue, not necessarily in order).
Selecting Transcribed Subtitles
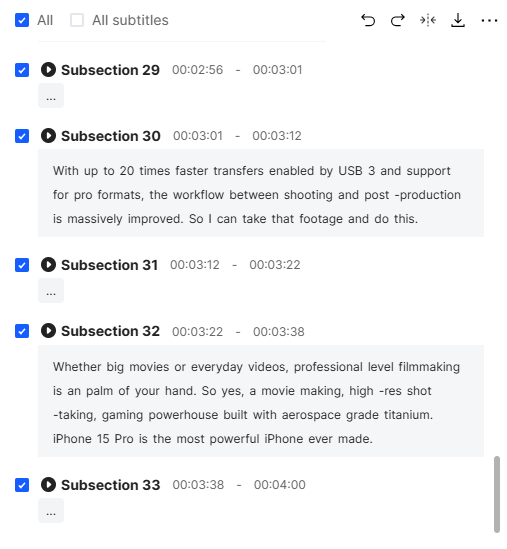
- Selecting All includes all segments, including filler words and pauses.
- Selecting All Subtitles includes only segments with spoken content, excluding filler words and pauses.
- You can also manually select segments based on your needs.

Editing, Splitting, or Deleting Keywords
When a keyword is selected, you can perform three actions: Edit, Split, or Delete.
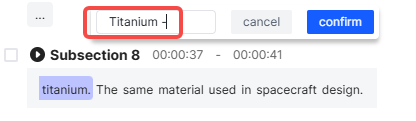
- Edit: Modify the keyword, useful for correcting recognition errors or formatting.
- Split: Separate the keyword from its context.
- Delete: Remove the keyword and its corresponding audio/video segment.

Edit: 
Split: 
Delete: 
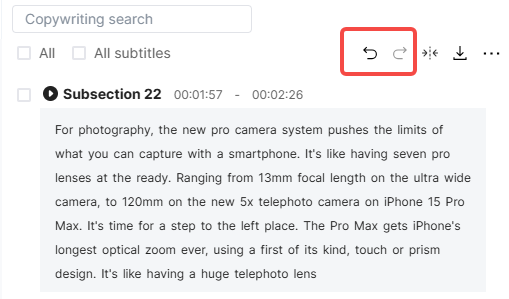
Undo and Redo
AI Clip supports the most common operations in video editing:
- Undo: Revert the most recent edit.
- Redo: Reapply the most recently undone action.
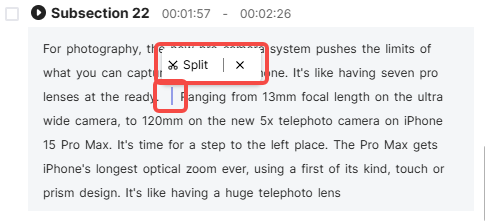
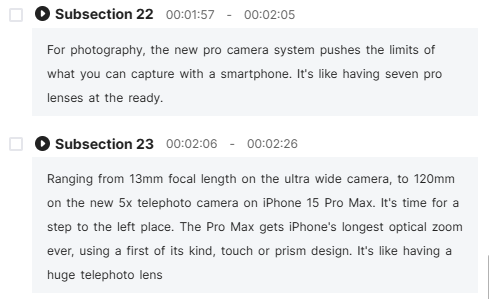
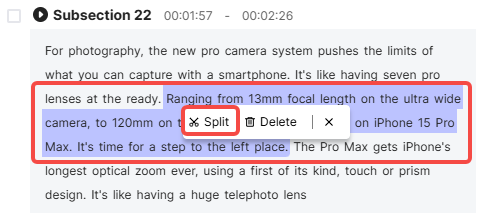
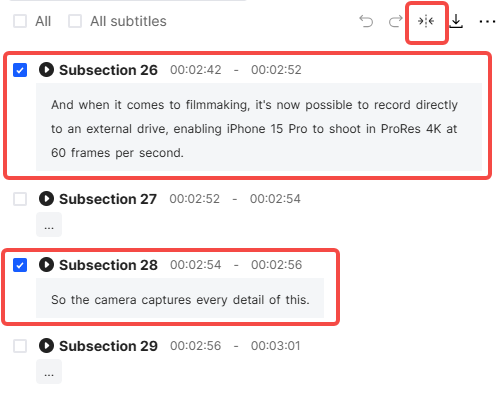
Splitting Segments
There are two ways to split a long segment into multiple parts:
Click on an empty space to insert a split marker, then click Split to divide the segment at that point.
Long-press to select the part you want to split, then click Split to separate it from the rest.
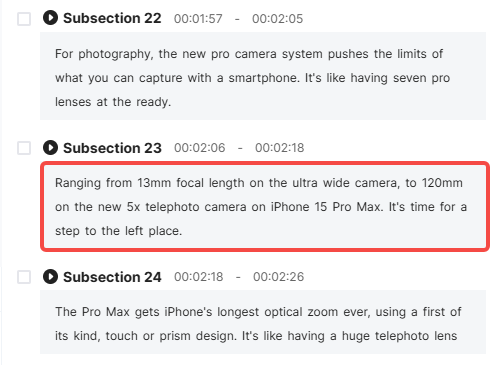
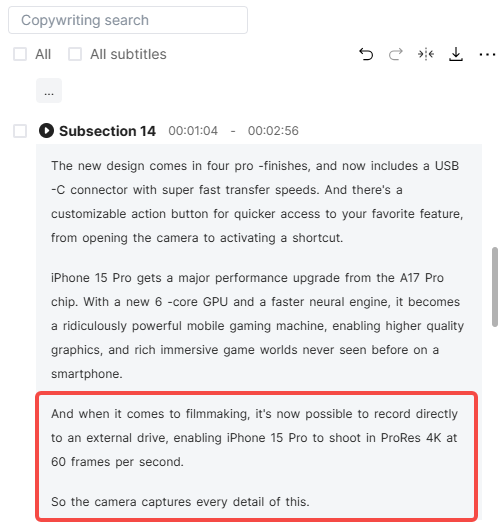
Merging Paragraphs
Select the paragraphs you want to merge, then click the Merge icon in the top right to combine them into a single paragraph.
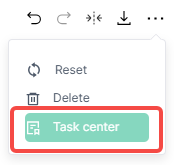
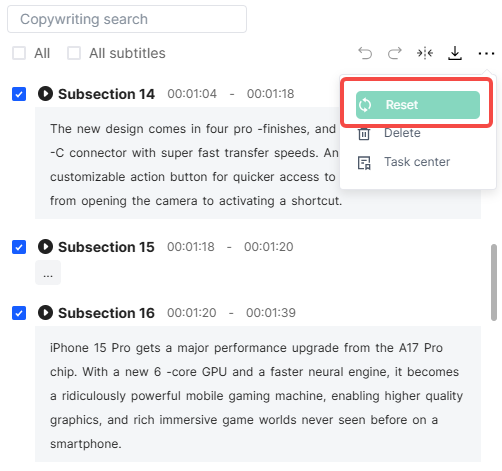
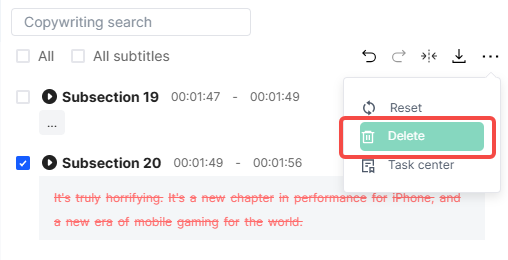
Resetting or Deleting Segments
If you've edited multiple subtitle segments and want to revert changes, you don't need to undo each edit individually. Select the segments, click More > Reset, and they will revert to their original state.
To delete an entire segment, select it, click More > Delete, and it will be removed along with its corresponding audio/video segment.
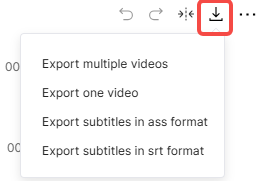
Exporting
After editing and selecting your desired content, you're ready to export. Click the export button to see four options:
- Export multiple videos: Each selected segment is exported as a separate video.
- Export one video: Combine multiple segments into a single video.
- Export subtitles in ASS format: Export selected subtitles in ASS format.
- Export subtitles in SRT format: Export selected subtitles in SRT format.
Select your preferred option and choose the export location.
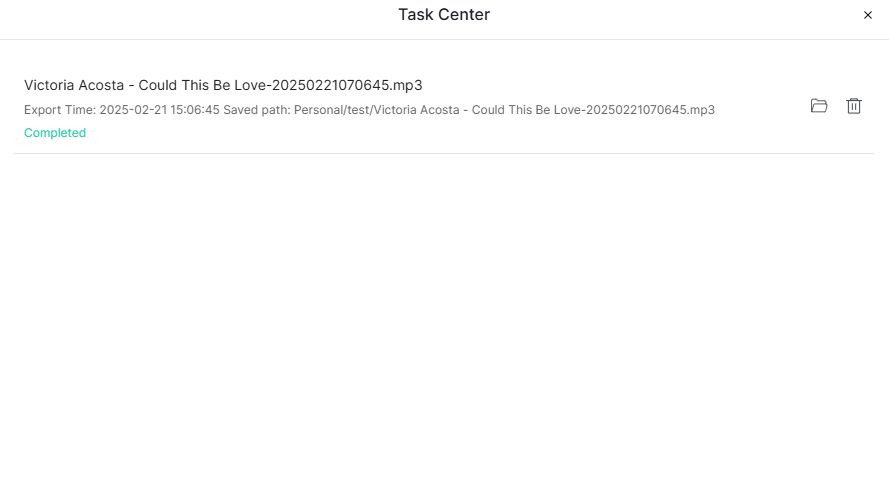
Viewing Export Progress and History
In More > Task Center, you can monitor export progress and view historical records.